This page will show you how to capture your screen and annotate using the Capture function of the software.
*The functions on this page can only be used with ZEUS CAPTURE.
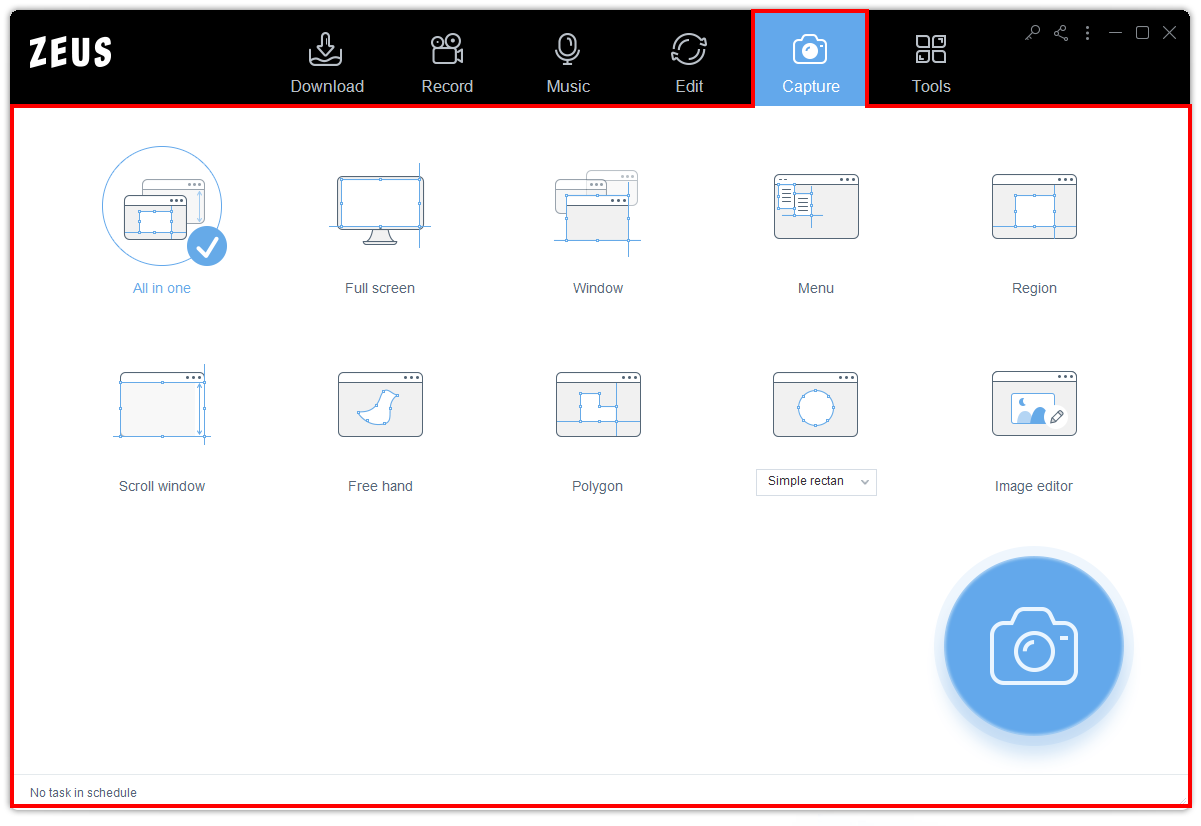
Capture Function Screen
From the software interface, click the “Capture” menu to open the function screen. This function allows you to capture your screen using the 10 customized designated areas such as Fullscreen, Window, Region, etc. It is also built with Image Editor where you can annotate the captured images.
Screen Capture Features and Tools
1. Select a customized designated area
To begin capturing your screen, Select first a customized designated area and click the camera button.

Customized Designated Areas
The screen capture function is packed with multiple customized designated areas such as:
1.1 All-in-one
Shooting method that combines automatic window recognition and manual rectangle setting
1.2 Fullscreen
For full-screen shooting
1.3 Window
Automatically recognizes window
1.4 Menu
For window menu shooting
1.5 Region
Set specific rectangular range Shooting
1.6 Scroll window
Shooting by automatically scrolling a window with vertical long content
1.7 Freehand
Shooting a free shape by clicking the apex
1.8 Polygon
Cut out like a newspaper article
1.9 Others Shape
Rounded corners, rectangles, triangles, diamonds, etc.
1.10 Image Editor
Editing your captured file
Range Selection
After selecting a customized designated area, a magnifying glass will pop up where you can select a range to capture. Below are the features it covers.
A. Shooting Range
If the shooting method is all-in-one, hovering the mouse over the window will automatically target the window. The range of automatic recognition changes depending on the position of the cursor. With one click within the range, you can shoot the automatically recognized range, and by dragging, you can change the shooting range manually.
B. Range Specification Cursor
2. Capturing and Editing
Once the range to capture is specified, the built-in Image Editor will automatically open with the captured image. You can then edit the captured images by adding texts, shapes, lines, highlights, etc.
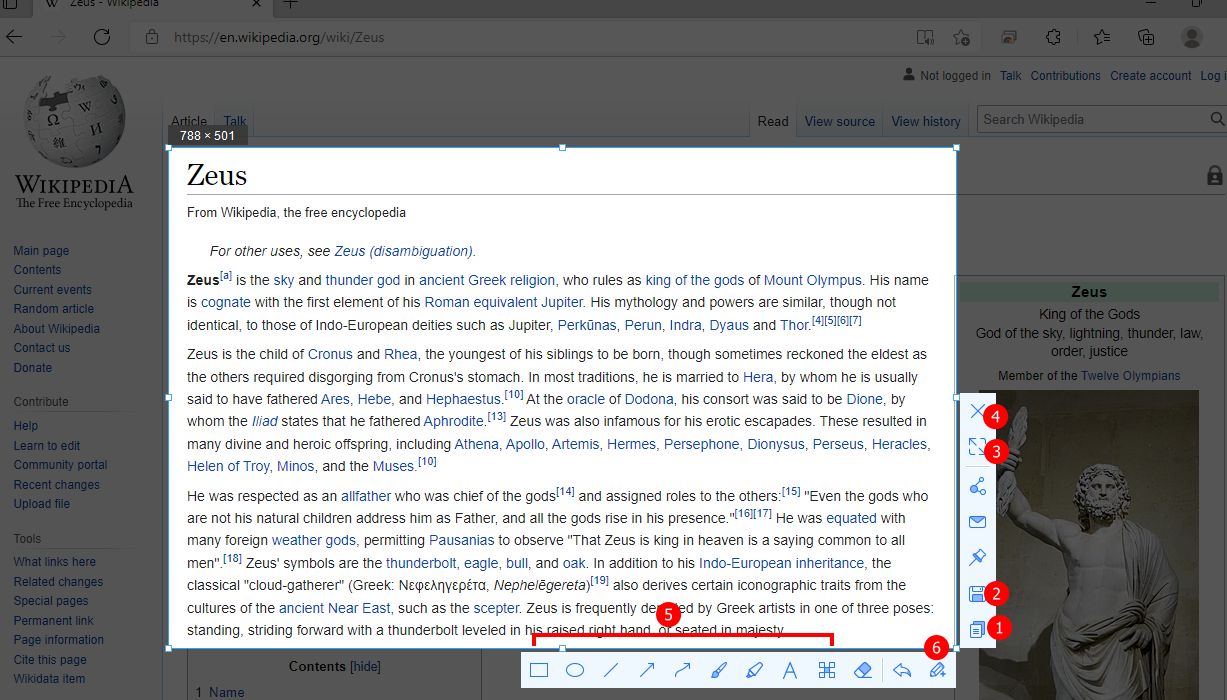
The functions under the “Image Editor” are as follows:
2.1 Copy
Copy the shooting range to the clipboard.
2.2 Save
Save the file with a name.
2.3 Maximize
Change the shooting range across the entire screen.
2.4 Cancel
Cancels the shooting range. The same action will be taken when pressing “ESC” on the keyboard.
2.5 Editing Function
Draw squares, lines, arrows, etc. directly on the current screen.
2.6 Open Edit Screen
Open the edit screen separately.
The cross line indicates the cursor’s position.
C. Loupe
The cursor point is enlarged.
D. Manually set the shooting range
From the starting point, drag it diagonally to the endpoint.
Leave A Comment