This page will show you how to convert and reduce file size of video using ZEUS EDIT. Using this method, you can compress and convert video files to a specified file size without worrying about its detailed settings such as bit rate. It’s the easiest way to save storage space on your local files with lossless quality.
Note: If the file size is made extremely small, the image quality will deteriorate significantly.
The ZEUS series has a trial version that you can try for free, just click the button below.
Steps on How to Reduce File Size of Video
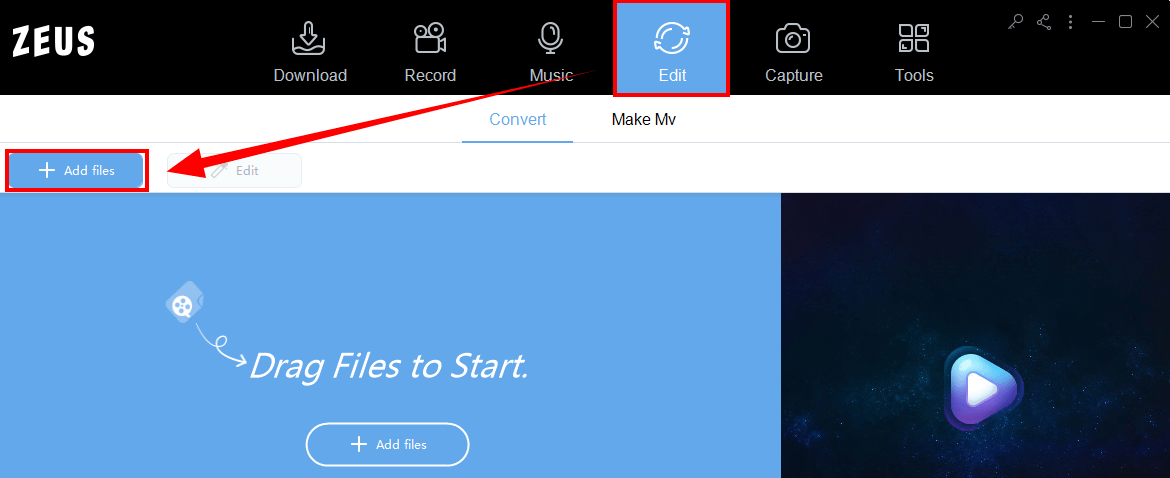
Step 1: Add video file
Run the ZEUS series and click “Add File ” in the “EDIT” tab to add a video file.
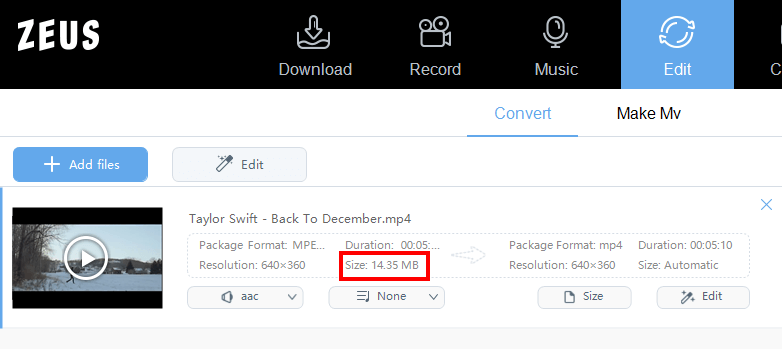
You can check the file size of the added video file in the highlighted part below.
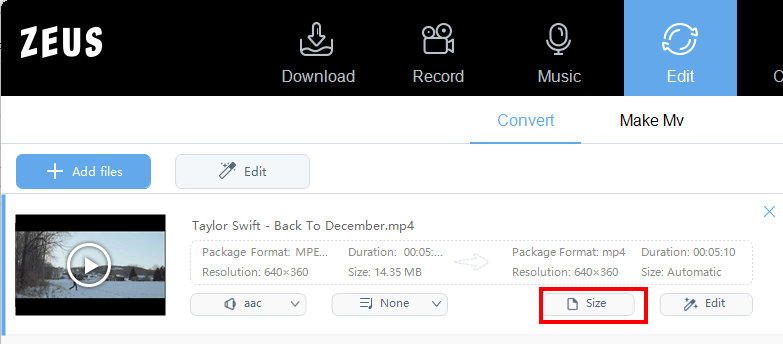
Step 2: Set the file size after conversion
Set the file size after conversion. Click “Size”.
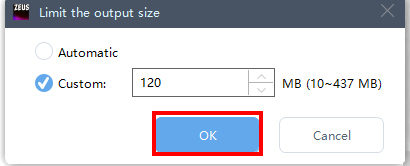
Click “custom”.
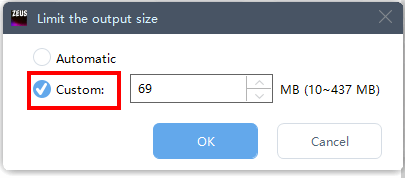
Enter the converted file size. The unit is MB (megabyte).

Click “OK”
Step 3: Convert by specifying file size
Check the output folder on the highlighted part below.

You can change the output folder with the highlighted button below.

Click “Convert” to start the conversion.

After the conversion is complete, check the saved video file. Please check if the size is close to the specified file size and if the image quality is appropriate. That’s all for converting and specifying the file size after conversion using ZEUS EDIT.
Leave A Comment