With ZEUS MUSIC, you can record all audio (system audio), microphones, and external inputs that can be played on a PC. You can also record streaming, internet radio, LINE and Skype calls. It can be used for many purposes.
Here’s a quick guide on how to record microphone sound only.
You can try ZEUS by clicking the button below.
Step 1: Set up the recording device
If ZEUS is running, it will be closed. The right lower part of the speaker icon on the Windows desktop, right-click, and then click the recording device.

Check if the device you want to record is the “default device”. If the microphone you want to record is not the “default device”, right-click the device and click “Set as Default Device”.

Check if the device you want to record is the “default device”. If the microphone you want to record is not the “default device”, right-click the device and click “Set as Default Device”.

When the device you want to record is the Default Device, click OK.

Step 2: Record the microphone sound using ZEUS MUSIC.
Launch ZEUS and open the “Music” tab.

Click the sound source icon at the bottom right of the screen and select “Microphone”.

The default recording format is MP3 but if you want to change the recording format, just click the format icon to the right of the sound source icon and select the one you want from the format list.

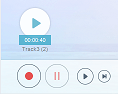
The record button is as follows. If you want to end the recording, click the record button again.

Step 3: Check your recorded file with ZEUS MUSIC
When the recording is finished, your recorded file in step 2 will be displayed at the top of the record button.

Move your cursor over the recorded audio track, the music symbol will become a playback symbol, and you can click on it to play the audio track.

You can see all your recordings by clicking the Library on the left side of the screen.
You can click the folder button at the bottom right of the screen to open the save destination of your recording.

Leave A Comment