This page introduces how to do multi screen recording using ZEUS RECORD.
Multi screen means connecting multiple displays to one PC and using them at the same time. It is not a virtual desktop function of Windows 10. With this method, you can do other work while recording on the screen that is not selected for the recording range. This is even more perfect when using the scheduled recording function of ZEUS RECORD for automatic recordings.
You can try the screen recording software – ZEUS RECORD by clicking the button below.
Before you start, check first the multi-display environment of windows.
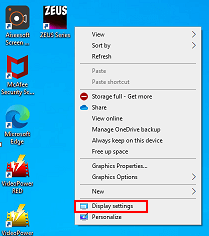
To do this, just right-click anywhere on your desktop and click Display Settings.
Make sure that the “Multiple displays” items are set to “Expand the display screen”.

For instances that the multiple displays are not connected automatically, just click the “Detect” button to connect them.
Once done, you can now start multi-screen recording using the ZEUS RECORD.
How to do Multi Screen Recording
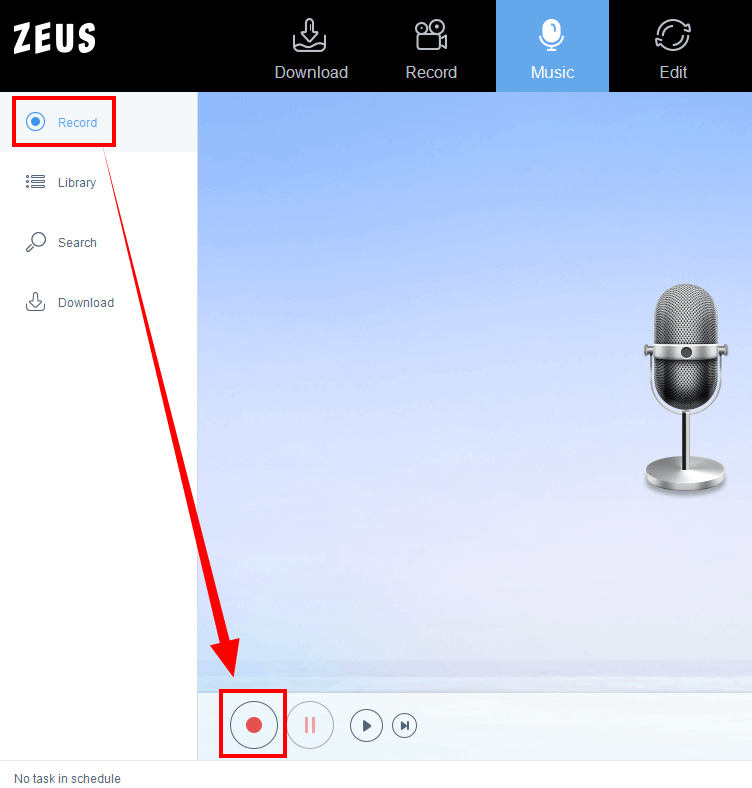
Step 1: Launch ZEUS RECORD
Launch ZEUS and click the “Record” tab.

Step 2: Set recording area – Start recording
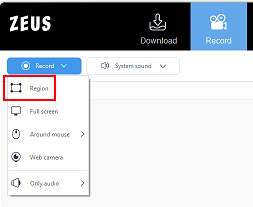
Click the “Record” button.

For area customization
In a multi-display environment, it is possible to record across multiple displays.
Click the “Region” tab to set the recording range.
The recording will start when the range is set.
Step 3: End recording
Click the “Stop” button to end the recording.
You can also stop recording using the shortcut key.
Press Ctrl + F10 on your keyboard.
That’s all for recording in a multi-display environment using ZEUS RECORD.
Leave A Comment