ZEUS EDIT has a function to add watermark to video. You can use this function to add images and text to your videos. You can place multiple watermarks but they will be displayed from the beginning to the end of the video. If you use this function well, you can also create a video for the title.
If you want to create a video with subtitles, use the subtitle function. You can refer to the quick guide below.
How to create a video with subtitles (ZEUS EDIT)
In this article, we will show you how to add watermark (images and texts) using the ZEUS EDIT
You can try the video & music conversion/editing software – ZEUS EDIT by clicking the button below.
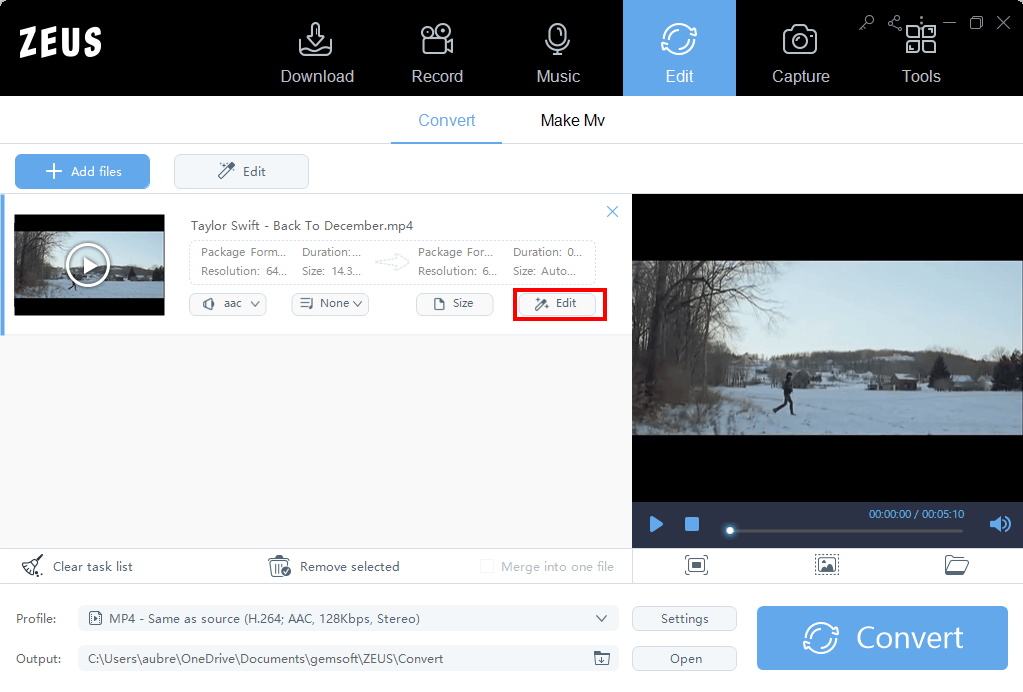
Step 1: Add video file
Run ZEUS and click the “Add File” button in the “Edit” tab to add a video file.

Step 2: Add Watermark
Click the “Edit” button on the added video file in step 1
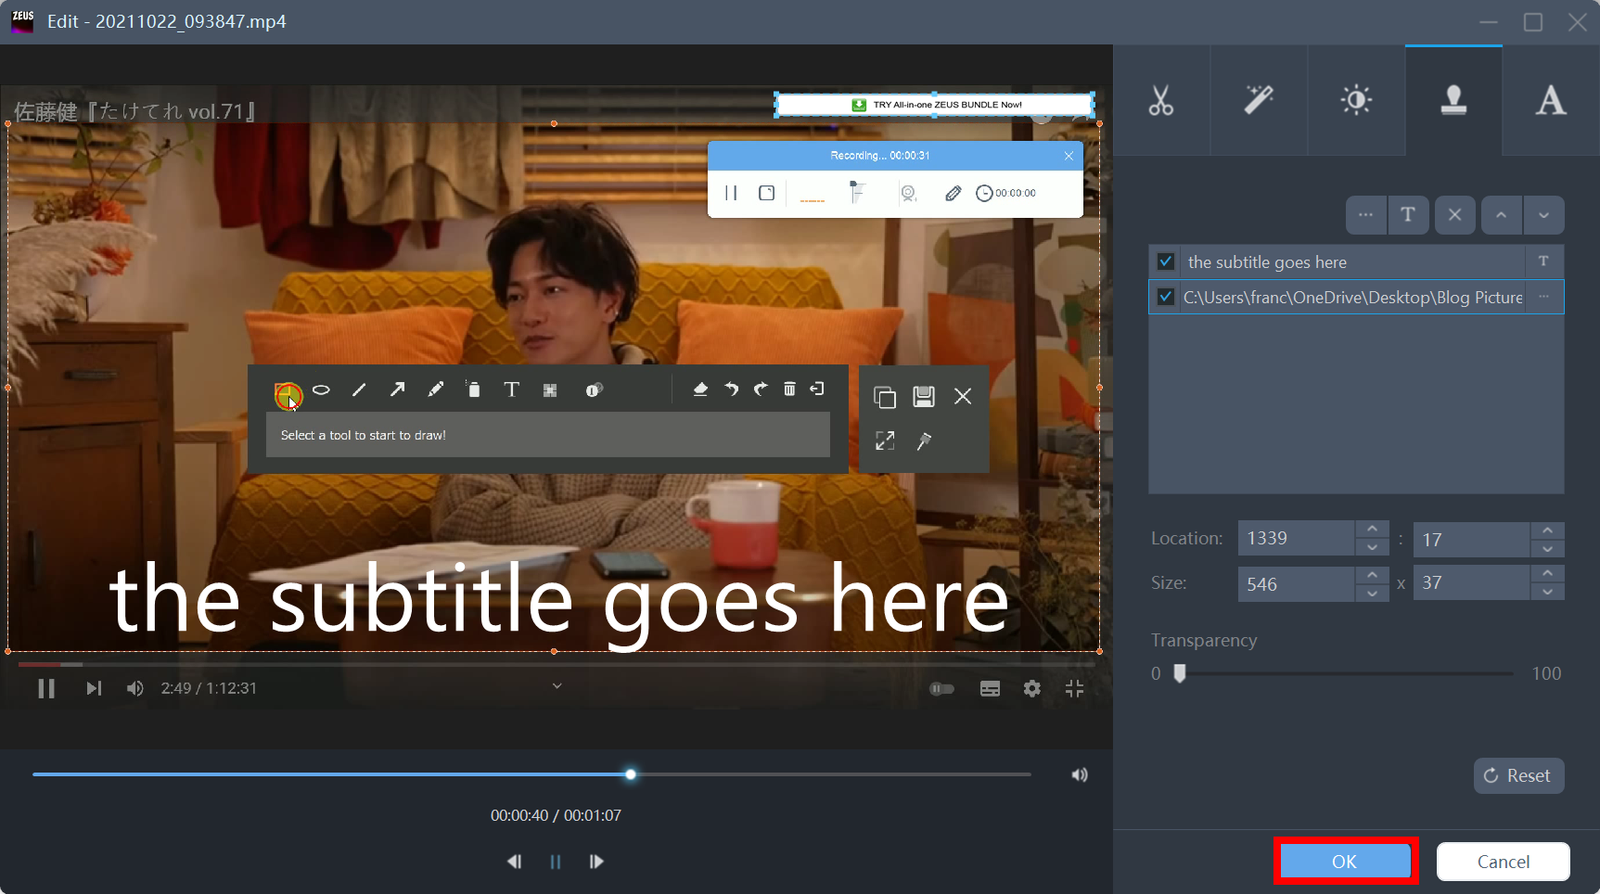
Click the Watermark tab.

Add a watermark
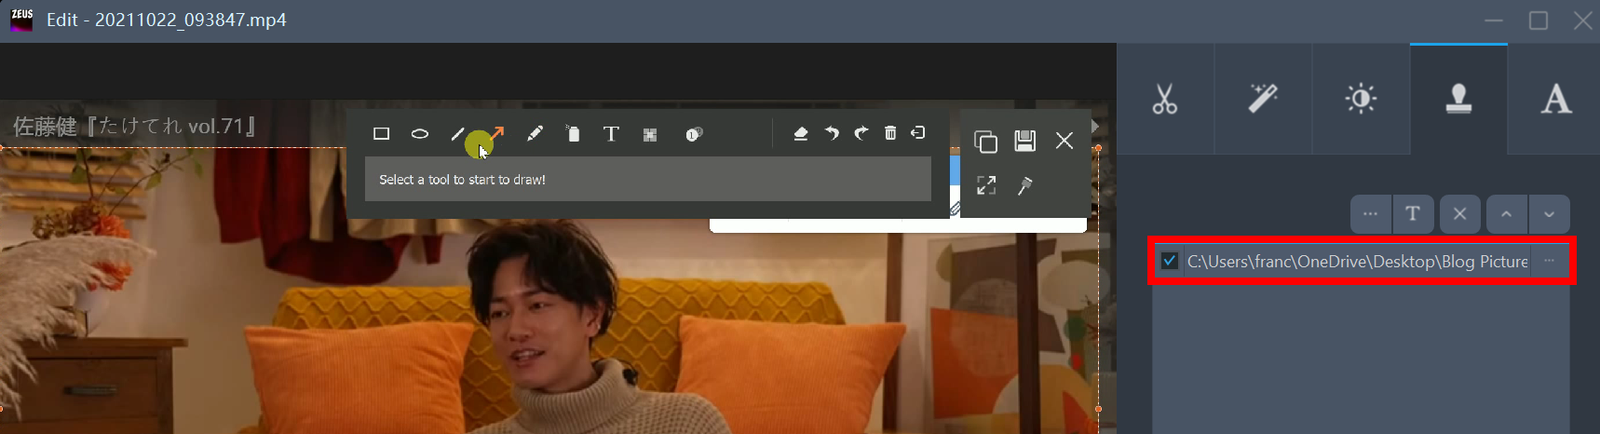
To add an image file, click the button below.
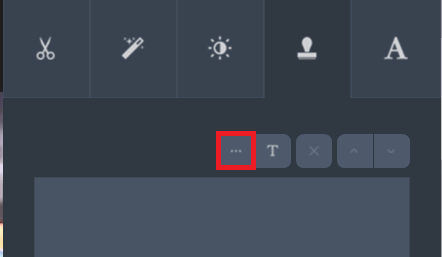
A layer for the added image will be displayed on the list.
Click the “T” button to add texts .
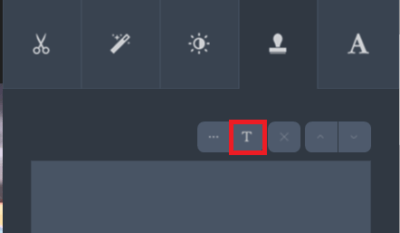
Enter the texts on the newly added layer in the list.

If you want to change the text color or font, click the “T” beside the added texts.

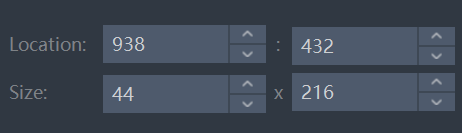
You can change the position and size by dragging the watermark on the preview .

The position and size can be manually modified.
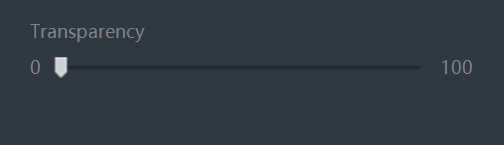
Select the watermark and move the “Transparency” bar to the right to make the subtitles translucent.
If it is set to 100, it will be completely transparent.
Click OK when you have set the watermark.
Step 3: Save the watermark added video
Check the output folder
You can check the output folder in the following part.

If you want to change the output folder, click the highlighted button below.

You can save the created video by clicking the “Convert” button at the bottom right of the screen.
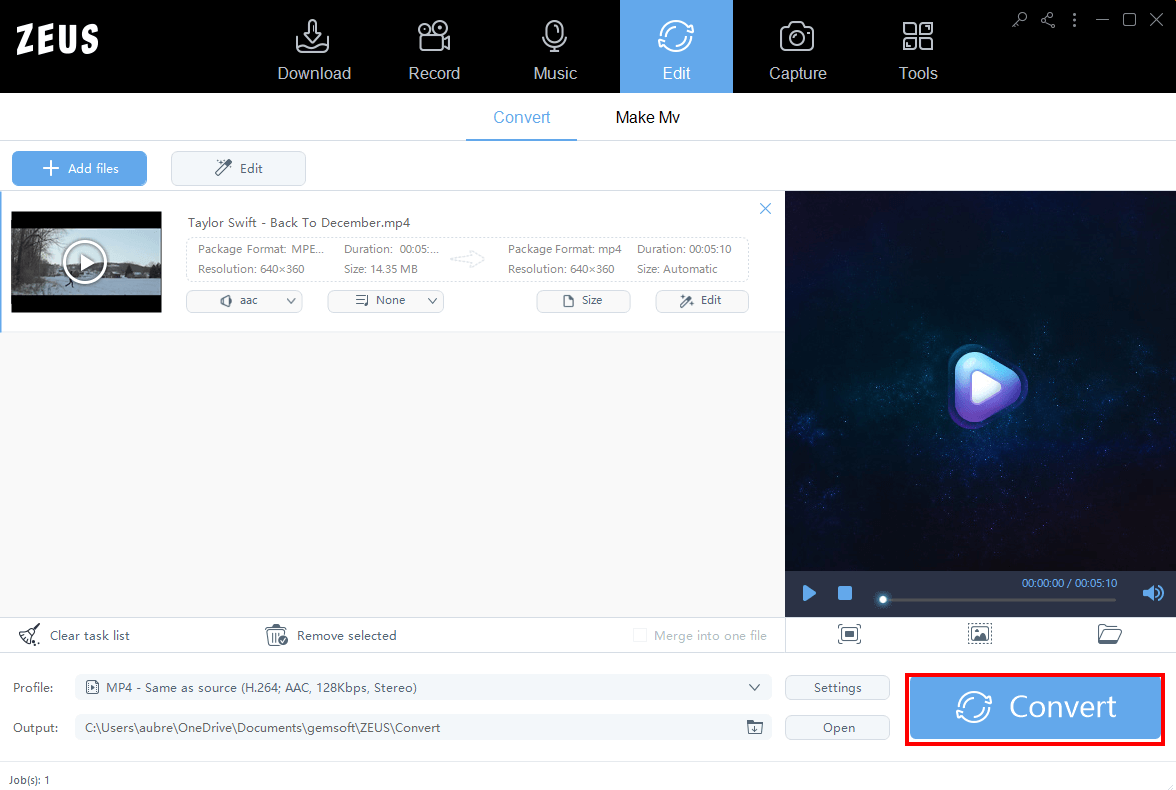
After saving, you can check if the watermark added video is saved in the output folder.
That’s all for adding watermark (images and text) to videos using ZEUS EDIT .
Leave A Comment