ZEUS RECORD can record web videos from various video streaming sites.
This page will show you how to select a range and record it.
Download and try the recording function now!
Step 1: Make the video you want to record ready to play
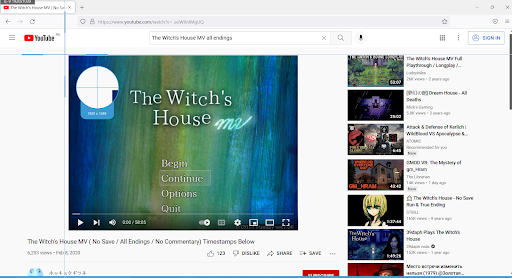
Using a web browser, open the shared site that contains the video that you want to record and make the video ready to play. If playback has started, pause it.

* In this state, check that both video and audio can be played back without any problems.
Also, in order to record smoothly, close applications that are not necessary for recording.
Step 2: Launch the product software and start recording
After starting the software, launch the Record tab.
Click the record button(1) and select “Region”(2) .

Step 3: Area selection
When the area is selected, the automatic selection frame is displayed according to the mouse position.
In the image above, the inside of the window where the mouse cursor is located is automatically selected. Normal brightness is applied only within the selected range, and darkening occurs outside the selected range.
* While the range is selected, the information on the screen will be in the “paused” state and will not be updated for easy selection.
If the video playback part is automatically selected, click it to use the automatic selection frame. If it is not selected, manually select the range.
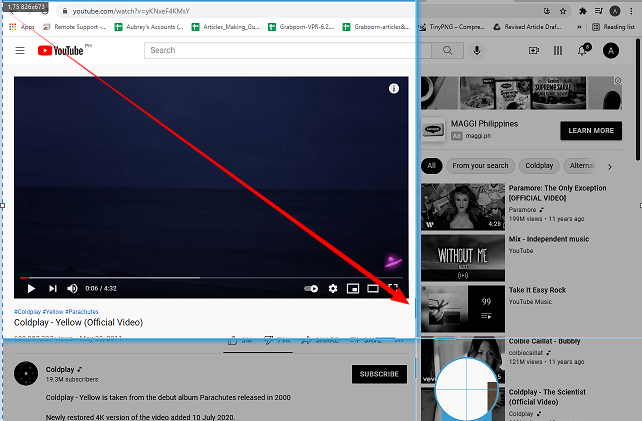
Manually set by dragging from the upper left to the lower right of the range. A “loupe” is displayed at the bottom right of the cross cursor. Check the exact position and drag. After selecting, you can modify the range.
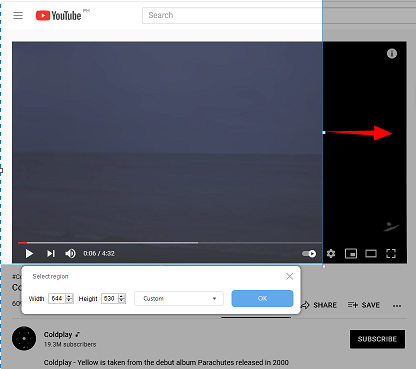
Click the OK button (red arrow) to start recording.

A 3-second countdown will be displayed before recording, so play the video.
* In this screen example, it is in the middle of the video, but if necessary to start from the beginning, rewind it.
* If you use ZEUS EDIT, you can cut unnecessary parts after recording.
Step 4: End recording
The next screen is displayed during recording.

The panel you are recording has many features, but usually you do not need to do anything. When the video finishes playing, click the stop recording button (red arrow) to end the recording.
* By default, the mouse cursor is also recorded. Be careful not to put the mouse cursor in the recording area during recording.
You can change this setting.
Step 5: Recorded video file
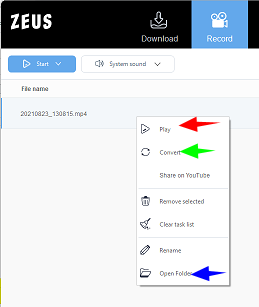
When you click the stop button to end the recording, a recording task (recording saved files) will be added to the main screen. The recorded file is saved with a name like date_hours, minutes, seconds.mp4, as in the task.
From the menu that appears when you right-click a task, you can play the saved video file (red arrow), edit / convert (green arrow), open the save destination folder (blue arrow), and so on. This completes the recording of the web video.
Leave A Comment