How to Record Video on Windows 10 using ZEUS RECORD
Users who have purchased ZEUS RECORD and ZEUS BUNDLE can record video on Windows 10. This software can record videos being played and can delete unnecessary parts by using the Edit functions.
You can record videos playing on any PC such as BD / DVD, YouTube, or any online videos. This software is compatible with Windows 11/10/8/7.
Click the button below to try ZEUS functions!
Part 1: Screen Recording Videos
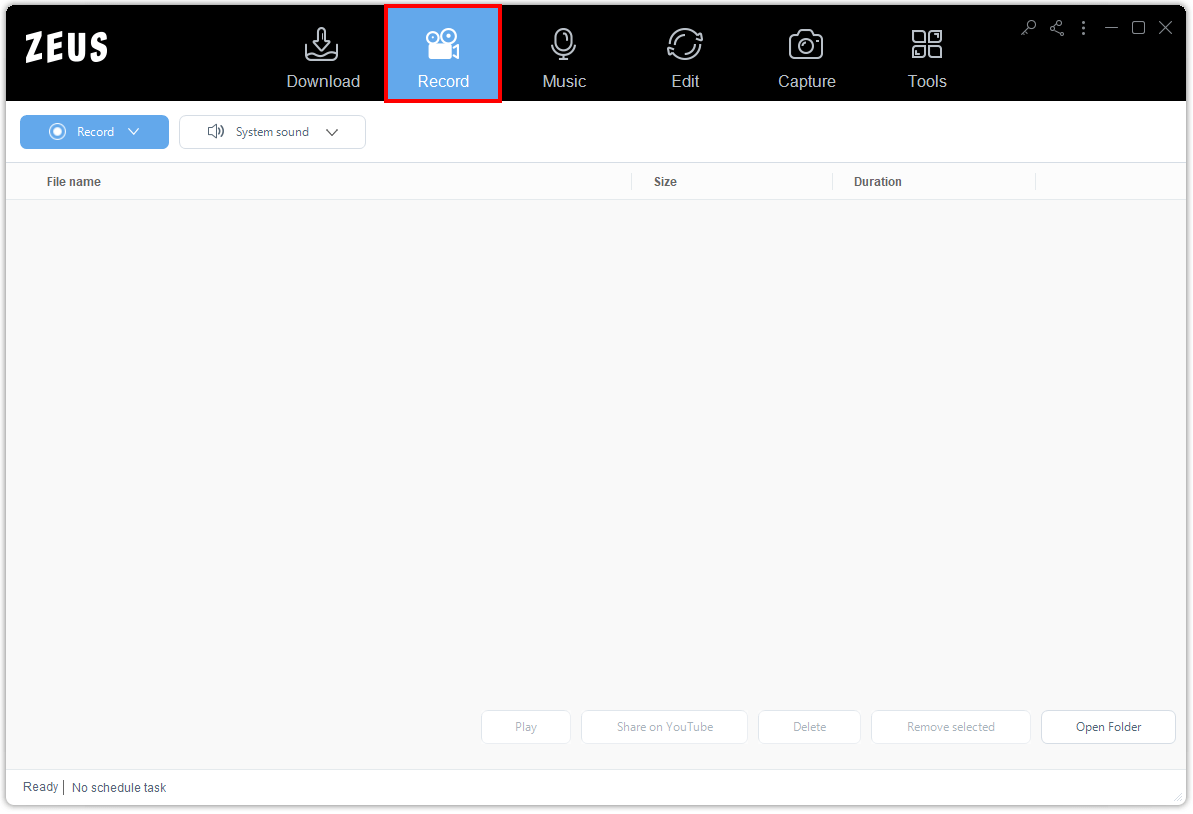
Step 1: Go to Record Function Screen
Launch ZEUS and click the “Record” function menu to open the Record function screen.
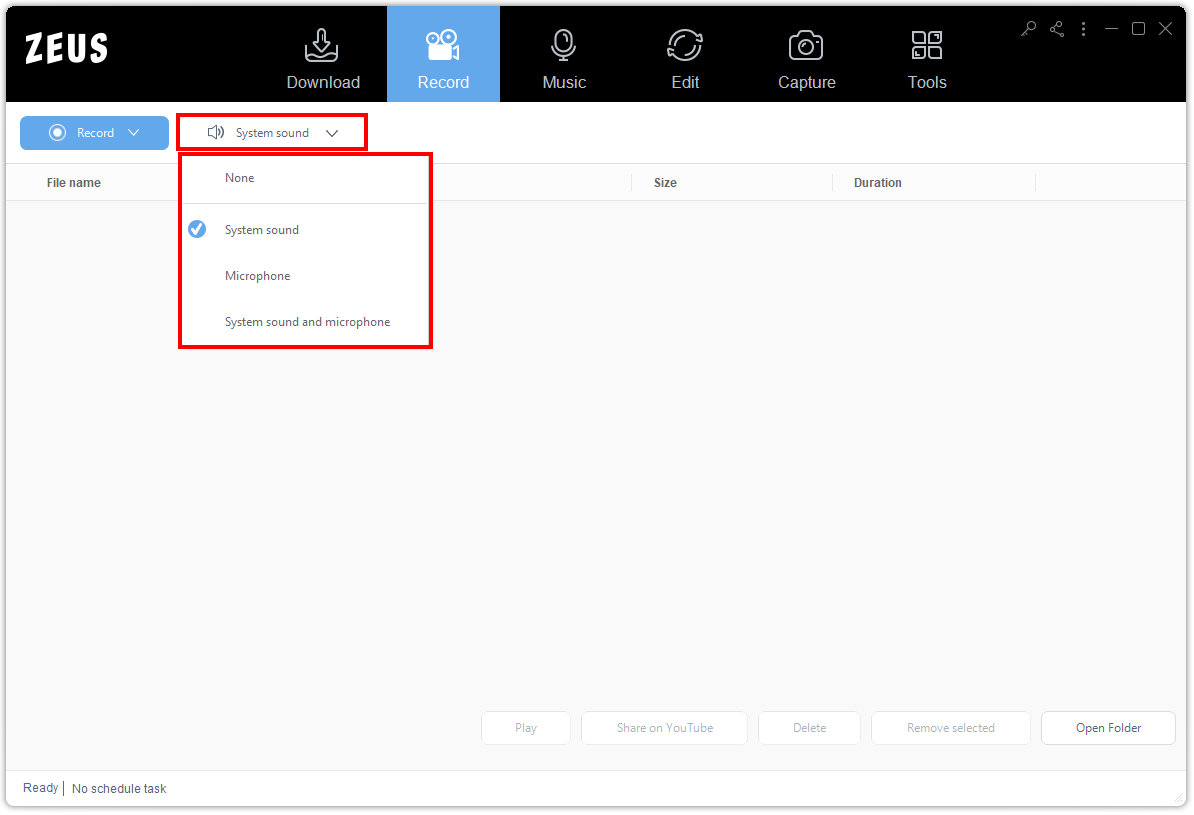
Step 2: Set the Audio Input
By default, the Audio Input is set to “System Sound”. Click it it to change other options. You can choose from None, System Sound, Microphone, System Sound and Microphone.
To avoid external noises, it is recommended to set the Audio Input to “System Sound”.
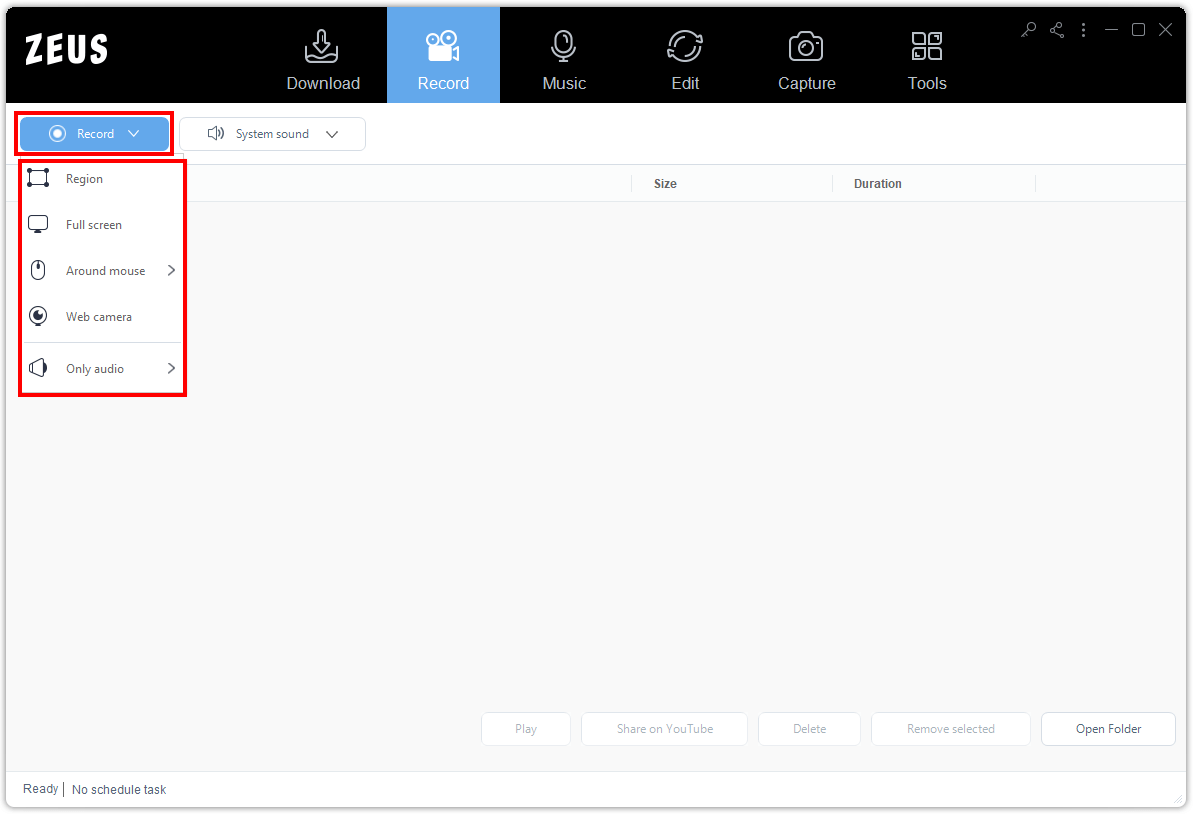
Step 3: Choose a recording mode
Choose your preferred recording mode by clicking the “Record” button. You can select from the options: Region, Full screen, Around mouse, Web camera, Only Audio.
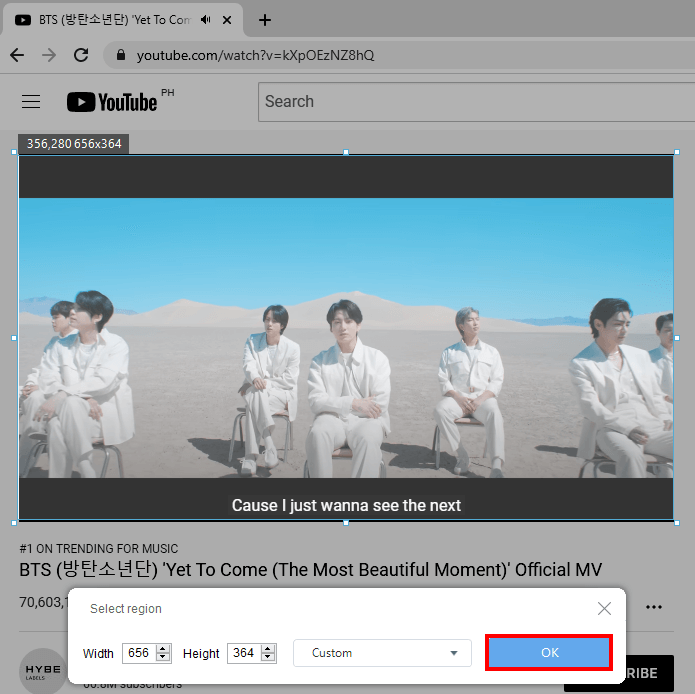
Step 4: Select the Recording Area
Click and drag your mouse to select your preferred recording area. Then click “OK” to proceed.
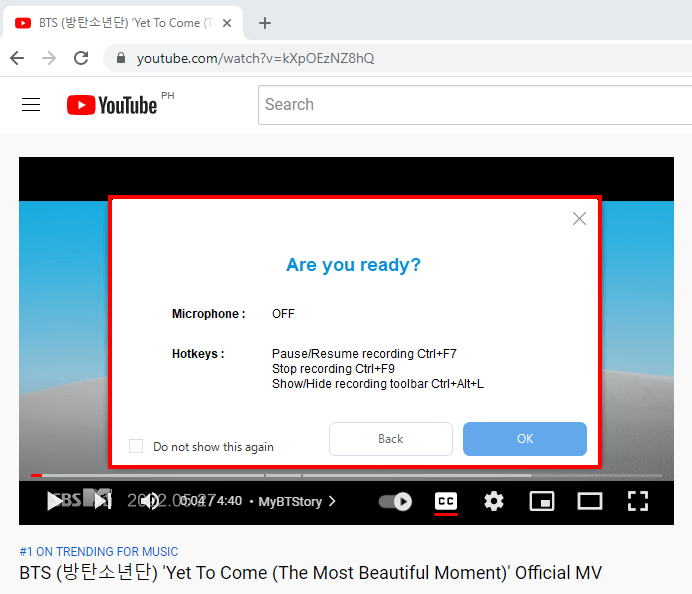
Step 5: Begin the recording
A notification will pop-up asking if you are ready. If you are ready for recording, click the “OK” button.
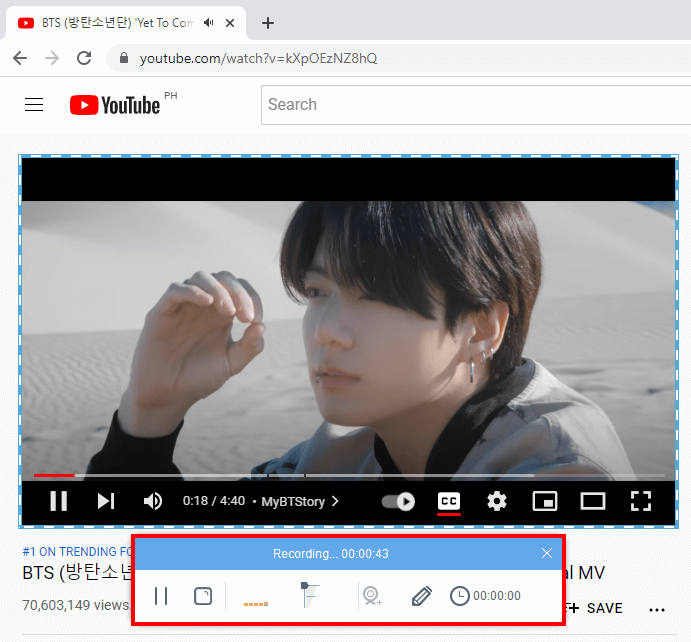
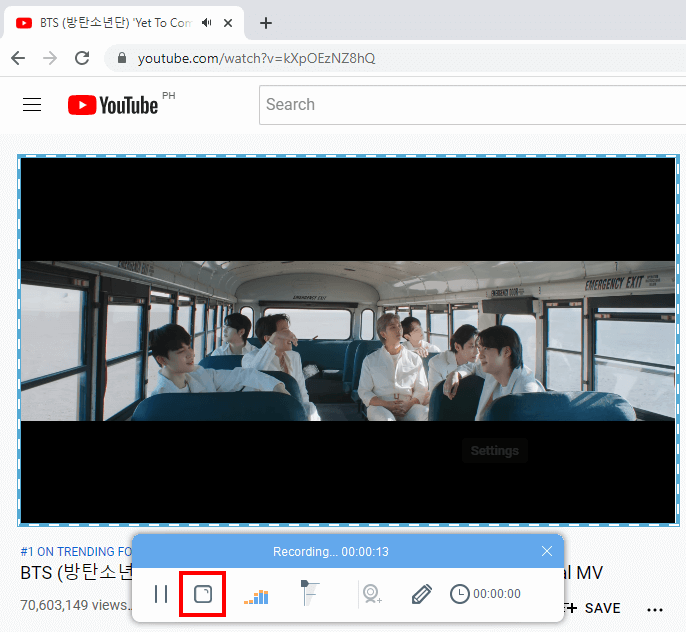
A recording toolbar will pop up indicating that the recording has started. You can click Pause to halt the recording, click the “Pencil” icon to enable the annotation, and click to enable the camera.
Then play the video to have it recorded.
Step 6: Finished Recording
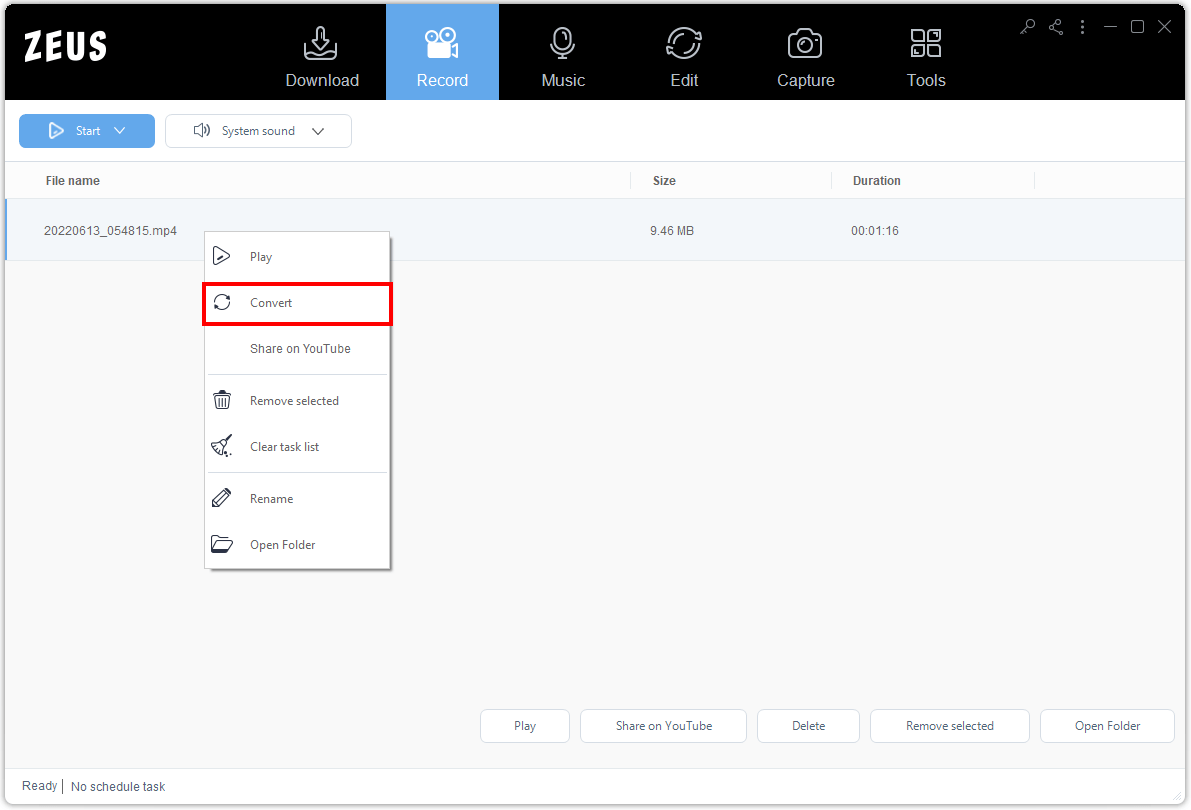
When the video is finished, click “Stop” to end the recording.
All recorded files will be added to your Recording list. Right-click to see more options such as Play, Convert, Share on YouTube, etc.

Part 2: Edit to Trim the Recorded Videos
Step 1: Add the Recorded Video to Edit Function
To add the recorded video to the “Edit” function screen, right-click the recorded file, and select “Convert” from the options.
You will be redirected to the “Edit” function screen. Click “Edit” to begin the video editing.
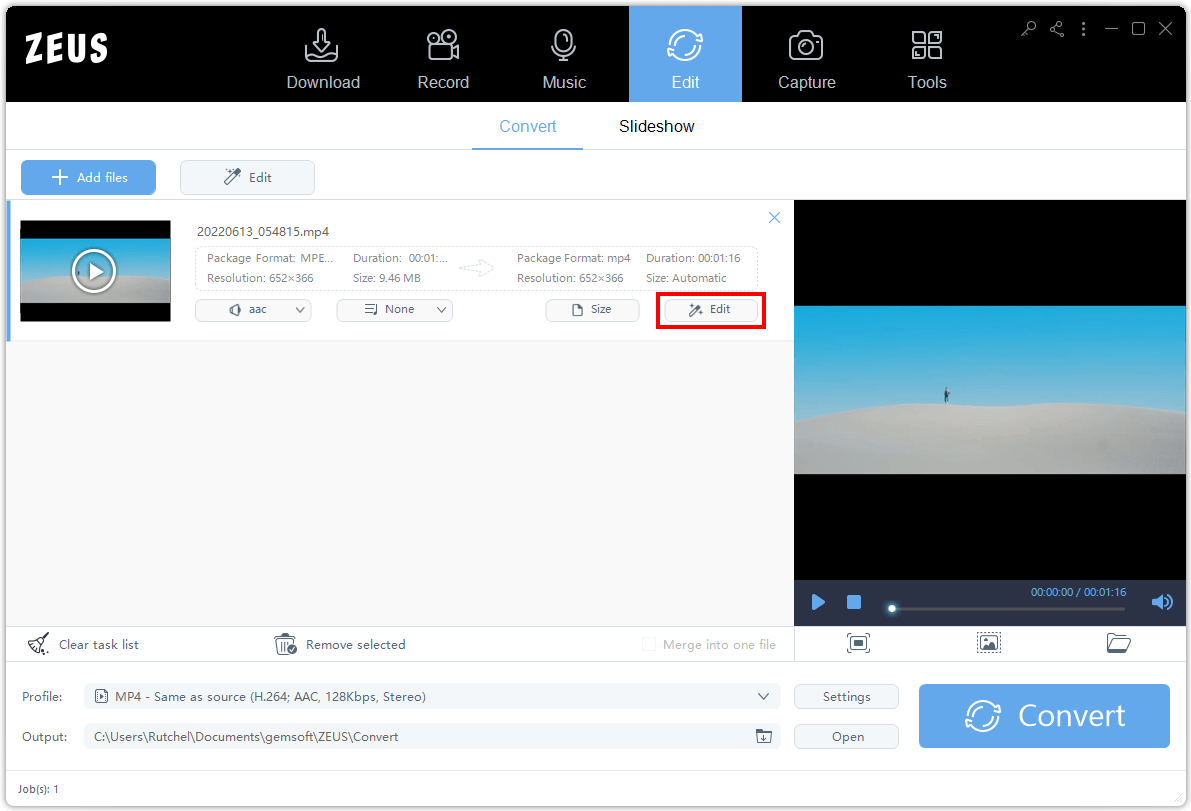
Step 2: Trim the Video
On the part of the video that you want to trim, click “Select trimming area” and drag the marks at both ends. You can click this button multiple times to trim multiple parts of the video. Then under “Preferences” select what you want to do with the selected areas. You can choose to “Keep the selected section” or “Delete the selected section”.
Once done, click “OK” to apply the changes.

Step 3: Convert the Video to Save
When the changes are applied, click “Convert” to save the changes made on the video. This will be saved as a new file and it will not overwrite the original file.
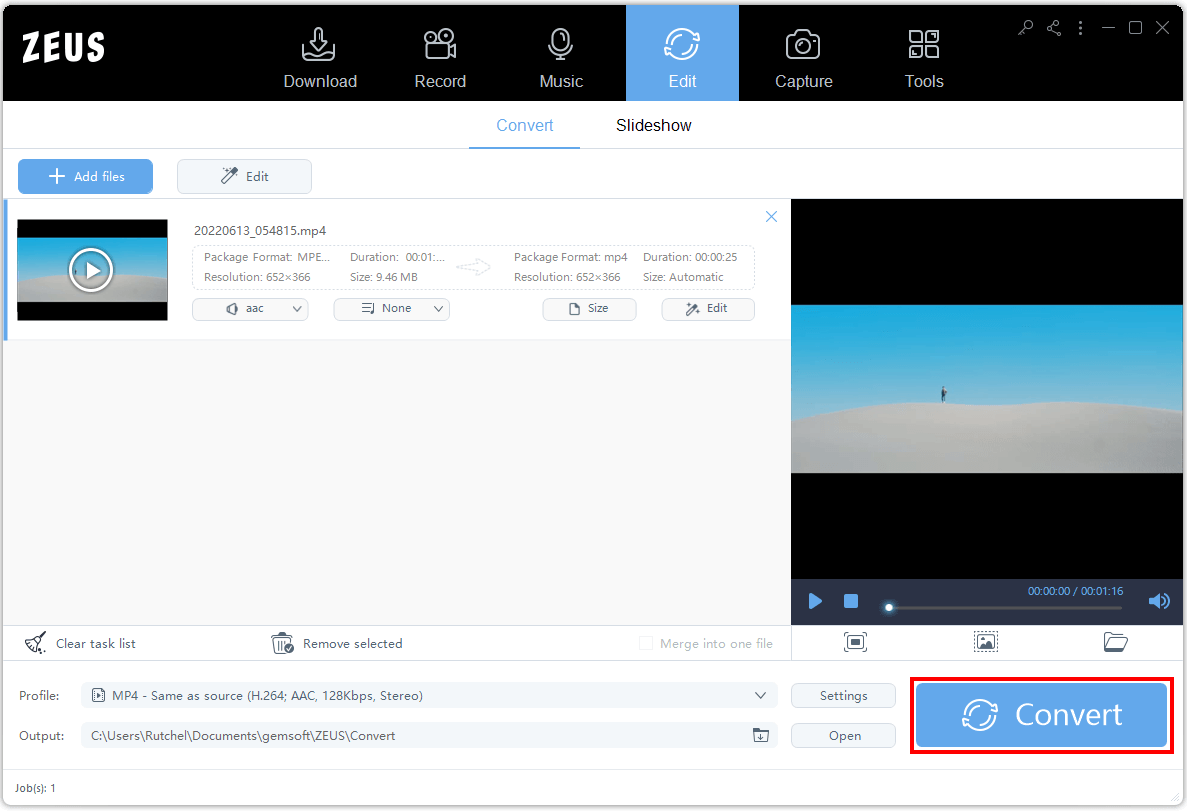
When the conversion is completed, the output folder will open automatically.
