How to Record with Mouse Cursor in an Easy-To-See Manner
ZEUS RECORD can include a mouse cursor in the recorded video. The mouse cursor is small and can be lost. On this page, we will guide you through the emphasis settings that can customize and record mouse cursor that is easier to see.
Try the recording function now!
Step 1: Launch software and open the setting screen
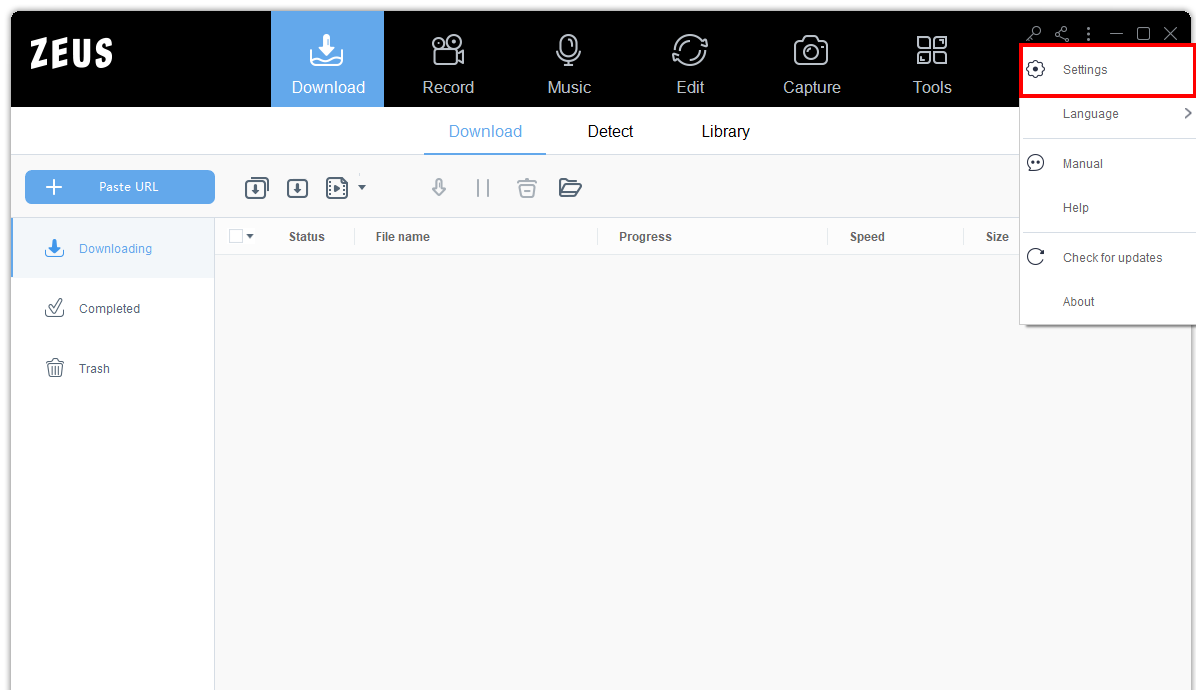
Click the menu icon at the top right of the product screen and select “Settings” to open the settings screen.

Step 2: Open the “mouse style” menu
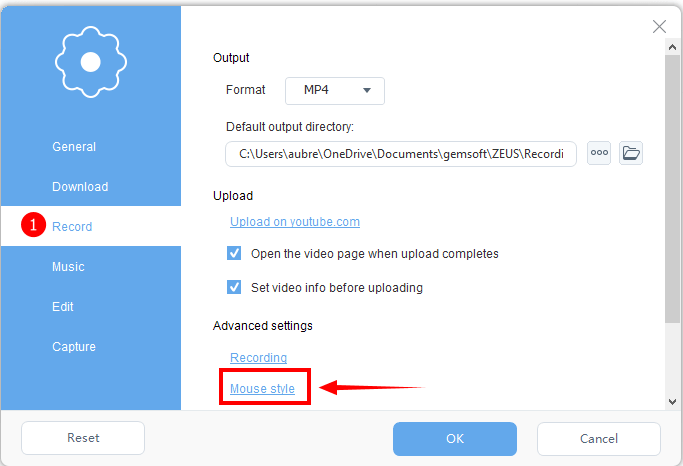
On the setting screen, open the “Record” tab. Then click “Mouse Style” in the advanced settings.

Step 3: Choose a mouse cursor effect
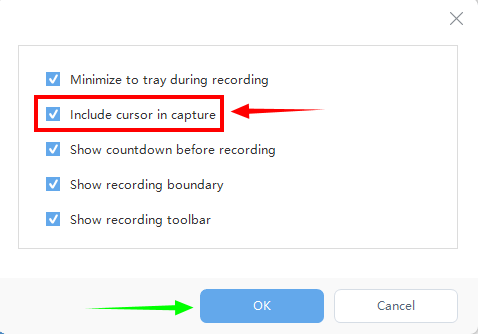
If you check “Include cursor when capturing”, the mouse cursor will be included when recording. If unchecked, the mouse cursor will not be recorded even if the mouse cursor enters the recording area.

1) Mouse cursor animation effect
Turns on / off the animation effect applied in the Windows mouse cursor settings. If the mouse cursor is difficult to see due to the animation effect, turn it off and use the standard cursor.
2) Effects when clicked
If you check “Click the mouse to display the animation effect”, the mouse will be circled when clicked. You can set different colors by left-clicking and right-clicking. To change the color, click the color square to display the palette.
3) Always add a round background to the mouse cursor
If you check “Display a circle around the mouse cursor”, a round background will be added to the mouse cursor. You can change the color and size. These effects are not reflected on the screen during recording. You can check it only in the recorded video. The appearance of the recorded mouse cursor with the default values is as follows. Left-click animation color is red. Right-click animation color is blue.

After changing the settings, click the OK button to close the advanced settings screen. This completes the settings that make the mouse cursor easier to see.