How to Display the Recording Toolbar in ZEUS RECORD
This page introduces how to display the recording toolbar in ZEUS RECORD. The recording toolbar is required when adding characters and shapes in the recorded video. If you want to use the comment editing function such as characters and figures when recording the screen, set the recording toolbar to the display setting in advance to make it smoother.
You can try the screen recording software “ZEUS RECORD” for free.
Step 1: Display the setting screen
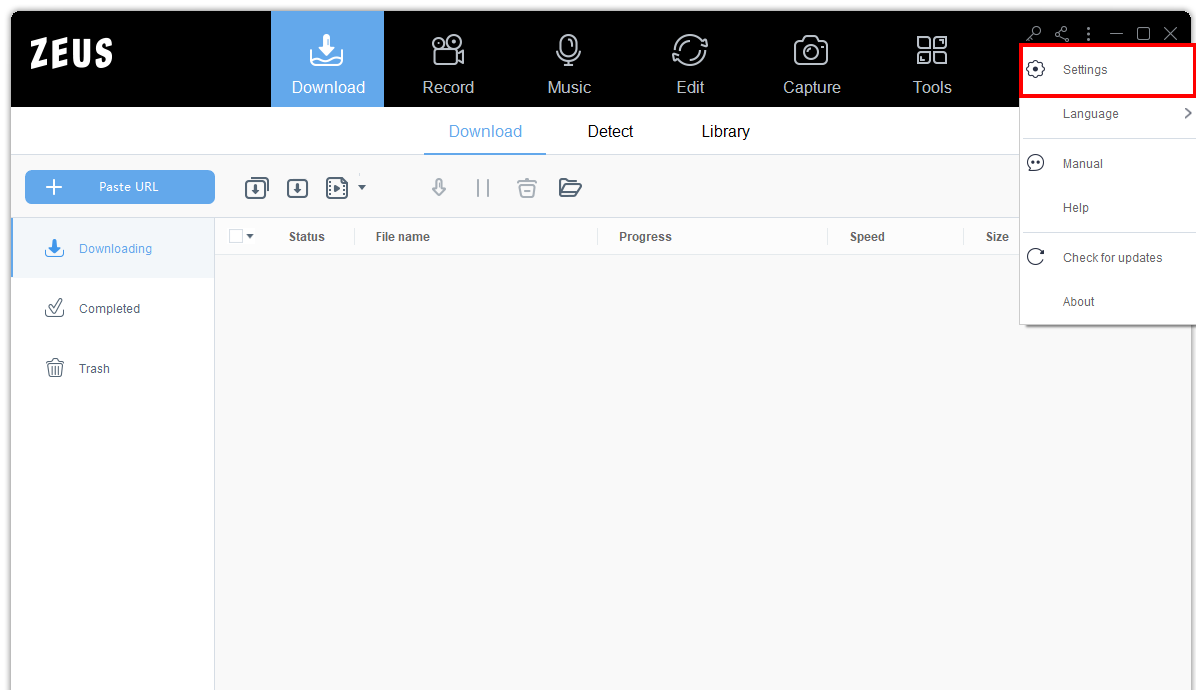
Click the following part on the upper right.

Click “Settings”.
Step 2: Setting up the recording toolbar
Click the Record tab.
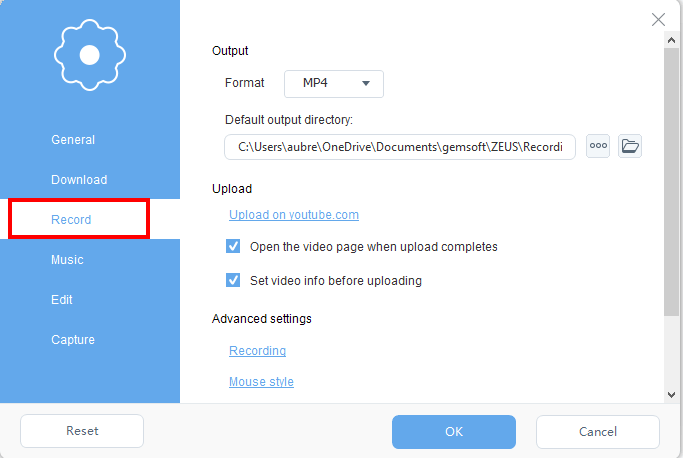
Click “Recording” in the advanced settings

If “Show recording toolbar” is not checked, check it.
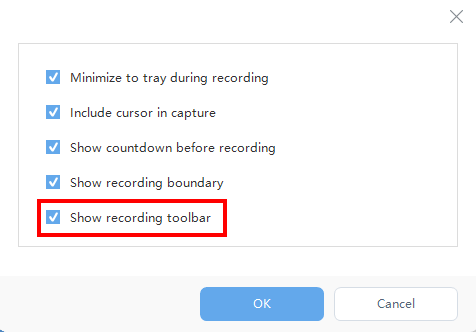
Click “OK” ⇒ “OK” to close the setting screen.

You have set the recording toolbar to be displayed when recording.
Note: You can also show or hide the recording toolbar by pressing the “Ctrl + Alt + E” keys during recording.
Shortcuts can also be changed from the settings.
That’s all for displaying the recording toolbar while recording with ZEUS RECORD.