Birthday Slideshow Maker | Create Birthday Slideshows Instantly!
Birthday is one of the most special events that you can celebrate with your friends and family. It’s a great time to thank God for the gift of life and another year to make more memories. What’s amusing is that we tend to get more excited than the celebrant himself. We wanted to express our love and let them know that we remember their special day. One of the easiest yet most touching gifts that you could give is a birthday slideshow.
Stop just stocking photos on your camera roll and make the most out of it. There are multiple birthday slideshow makers online and offline that you can use to make splendid birthday slideshows. Check out these top-notch best birthday slideshow maker apps for offline creation below!
Part 1: Create Birthday Slideshow with ZEUS EDIT
ZEUS EDIT (All-in-one Video Solutions)
If you’re looking for an easy-to-use Birthday Slideshow Maker for Windows PC, then ZEUS is the most recommended software for you to try. It is a lightweight software that supports Windows 11 / 10.1 / 10 / 8 / 7.
ZEUS is built with an easy-to-use interface which is perfect even for non-technical users. It is packed with modern transitions for great slide effects of photos and videos. You can also add background music to set the tone and inspire emotion. The resolution of the slideshow is set depending on the recommended image size as default but you can customize the size as preferred.
Unlike most application tools, with ZEUS you can start with a lower price and can easily add more useful functions like Universal Search and Download, Record screen and videos, and many more.
How to Create Birthday Slideshow with ZEUS EDIT
Step 1: Launch ZEUS Slideshow and Add Pictures
Launch ZEUS EDIT on your PC and go to the “Edit” function screen. Then click “Slideshow” from the sub-menu tab.
To start your slideshow creation, click the “Add Pictures” button to import photos from your local files.

Once added, all pictures will be displayed on your timeline at the bottom.

Step 2: Add Transitions and Music
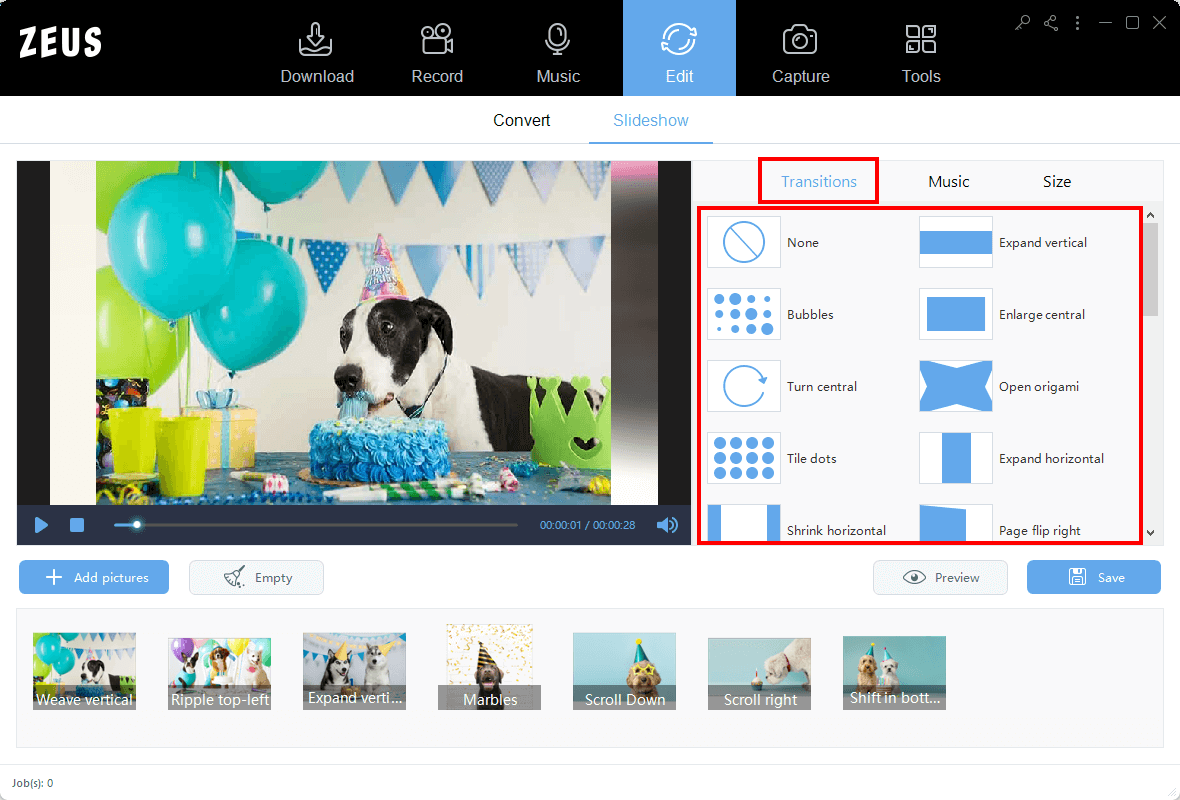
2.1 Add Transitions
Transitions refer to the animation or effects applied when changing from one picture to another picture.
To add transition effects to your photos, just click the “Transitions” section tab. A list of available transitions will be displayed for your selection. By default, the transitions are applied randomly to your photos but you can customize by selecting transitions per photo as you preferred.
2.2 Add Background Music
Click the “Music” section tab and click the “Add Music” button. Then select your preferred music to use from your local files.

Step 3: Set Slideshow Size and save as MP4
Slideshow size is set by recommended as a default. You may customize the slideshow size by clicking the “Size” section tab. To customize it, click the “Customize option and specify your preferred ratio and size. If all is set, click the “Save Settings” button.

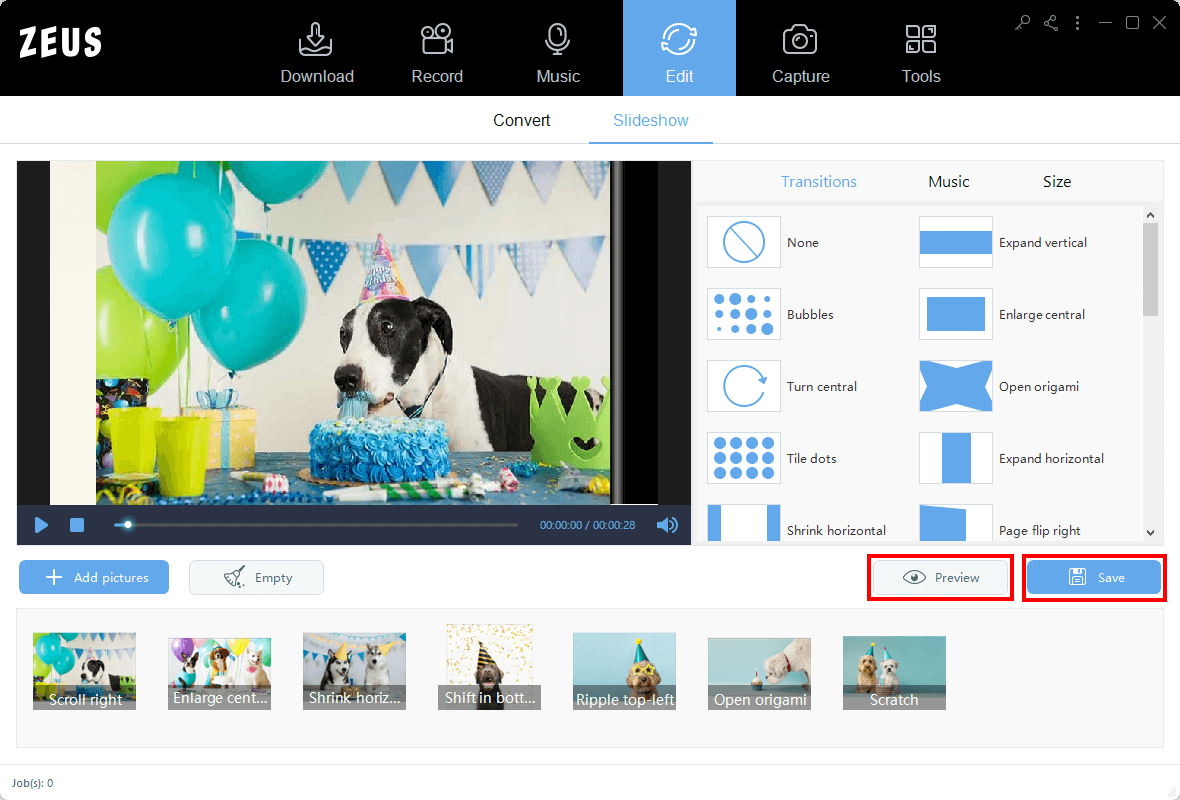
Step 4: Preview and Save Slideshow
Click the “Preview” button to preview your slideshow. Once satisfied, click the “Save” button to save it to your local files.
Part 2: Create Birthday Slideshow with VideoPower BLUE
VideoPower BLUE (Video Converter, Video Editor, Video Collage, Slideshow Maker)
Another great slideshow maker that you can use is VideoPower BLUE. It is a multifunctional software that offers a user-friendly interface with pre-built themes. In just one click, you can instantly have your birthday slideshow ready with these elegant and stylish pre-made themes.
Unlike most birthday slideshow makers, VideoPower BLUE also offers many add-ons functionalities like Video Editor, Video Converter, and Video Collage. This software comes with a lifetime license which is supported by Windows 11 / 10.1 / 10 / 8 / 7.
How to Create Birthday Slideshow with VideoPower BLUE
Step 1: Launch VideoPower BLUE
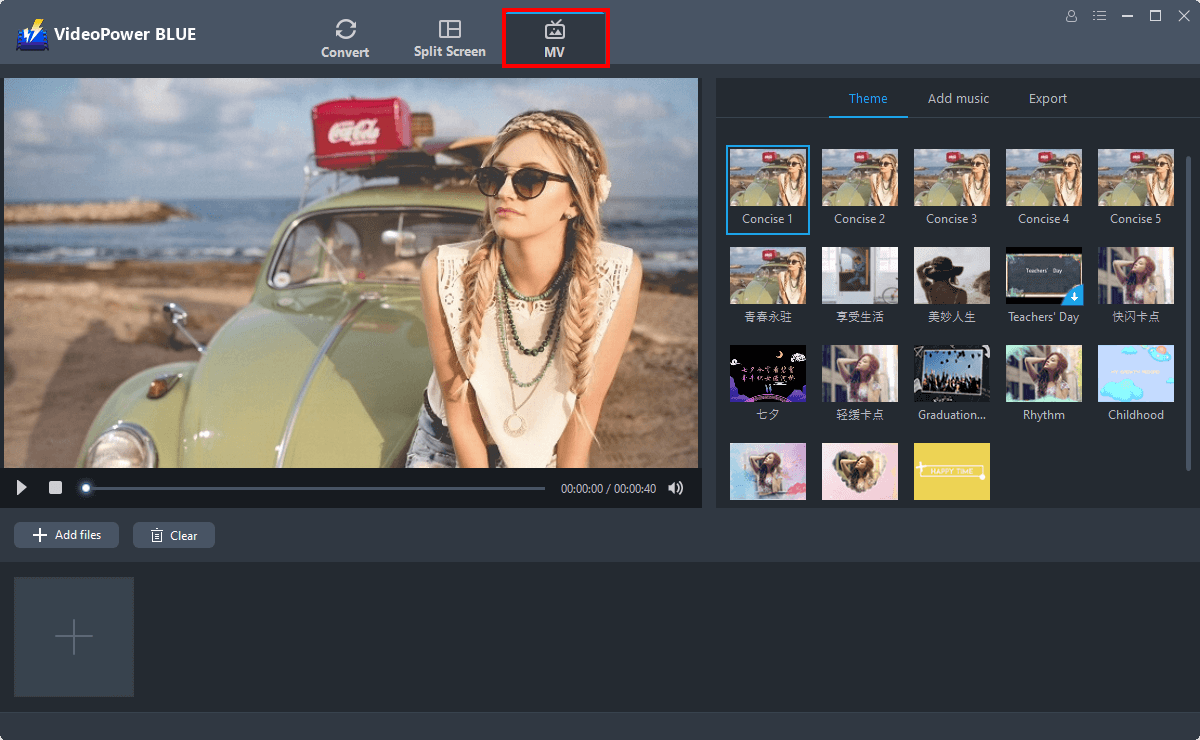
Launch VideoPower BLUE and go to the “MV” function screen.
Step 2: Add Media Files
Add your photos and videos to the software to begin your slideshow making. To do this, just click the “Add Files” button above the timeline or you can directly drag your photos and videos from local files to the timeline.

Step 3: Select a Theme
All photos and videos added will be displayed on the timeline. Then select your preferred theme by clicking the “Theme” sub-menu tab. All pre-built themes will be displayed. Click on your preferred theme from the list to apply it to your slideshow.

Step 4: Add Background Music
To do the final touch, you can add appropriate background music to set the mood of your slideshow. Just click the “Add Music” sub-menu tab, click the “Add music” button, and select the music from your local files. You can also adjust the volume as you preferred.

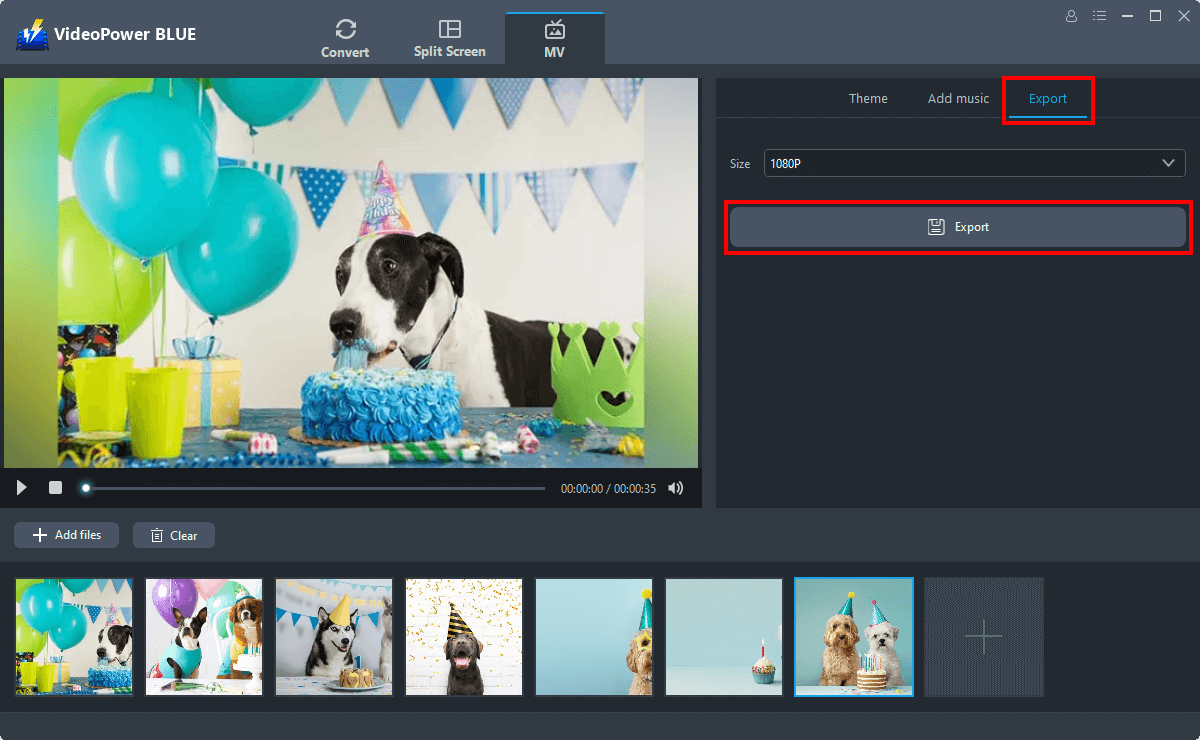
Step 5: Preview and Export Slideshow
Preview the slideshow you created by clicking the “Play” button on the slideshow player. If satisfied, you can then export it to save it on your local files. Just click the “Export” sub-menu tab, select your preferred resolution (360P, 720P, 1080P), and click the “Export” button.
Conclusion
Aside from Birthday Slideshow Maker, both ZEUS EDIT and VideoPower BLUE are also good Birthday Invitation Slideshow Maker. With just a few clicks, you can have your invitation slideshows ready to be shared and sent out online.
Why hassle when you can do it on your own with ease. Show your creativity and express your love to the celebrant on their special days!