Windows Video Recorder Alternatives: 2 Best Screen Recorders Windows
Fortunately, Windows 10 and 11 have a built-in screen recording function. It can record both the audio and video in good quality using the Xbox Game Bar. Whether you want to record gameplay or create a tutorial, having a good screen recorder at hand is extremely helpful for easy sharing and safekeeping.
Unfortunately, Windows Video Recorder can’t capture some programs or the entire desktop. Thus, ZEUS RECORD and VideoPower GREEN are needed.
In this article, we will introduce you to the following:
1. How to Screen Record on Windows Video Recorder with Audio using Xbox Game Bar on Windows 10 and 11?
2. How to Screen Record on PC using Alternative Tools
- ZEUS RECORD – Video and Screen Recorder
- Steps on How to Begin Recording with ZEUS RECORD
- VideoPower GREEN – Screen and Video Recorder
- Steps on How to Begin Recording with VideoPower GREEN
How to Screen Record on Windows Video Recorder with Audio using Xbox Game Bar on Windows 10 and 11?
- Open the app you want to record. Unfortunately, the screen recorder tool can’t capture some programs — such as File Manager, or the entire desktop — but it does work in regular desktop apps (and those from the Windows Store).
- Press the Windows key + G at the same time to open the Game Bar dialog.
- Click the Capture menu and the recording toolbar will be displayed.

- Click on the Start Recording button (or Win + Alt + R) to begin capturing the video.
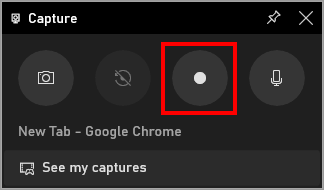
- Stop the recording by clicking on the red recording bar that will be on the top right of the program window. (If it disappears on you, press Win + G again to bring the Game Bar back.)

How to Screen Record on PC using Windows Video Recorder Alternative Tools
1. ZEUS RECORD – Video and Screen Recorder
Do you want to get a high-end screen recorder that allows you to start at a lower price and intend to upgrade for additional functions for more multimedia solutions? Grab ZEUS RECORD now! It is an all-in-one package including screen recording to record Google Hangout meetings in high quality.
Get this software now!
Using the free trial version of the software, the recording will have a watermark. An upgraded version is needed to exclude it from your recording.
Main Features:
- Flexible recording modes: By Region, Fullscreen, Around mouse, Web Camera, Audio-only.
- Records audio and/or video in high-quality.
- Multiple output formats available for audio: MP3, AAC, OGG, WMA, WAV, FLAC
- Multiple output formats available for video: MP4, WMV, AVI, MOV, FLV, MPEG, VOB, ASF, GIF
- Customized and Animated Mouse Clicks
- Real-time Annotation
- Direct Share to YouTube
Pros:
- Cost-effective
- Easy upgrade to add multiple functions
- User-friendly interface
- Captures in high-quality and professionally
- Available options to purchase a 1-year subscription or a Lifetime subscription
Cons:
- The free trial version comes with usage limitations and watermarks
Steps on How to Begin Recording with ZEUS RECORD
Step 1: Join Google Hangout Meeting
On your PC browser, open your Google Hangout meeting using the Meeting URL provided. Then click the “Join Meeting” button to enter the meeting call.

Step 2: Select the recording area
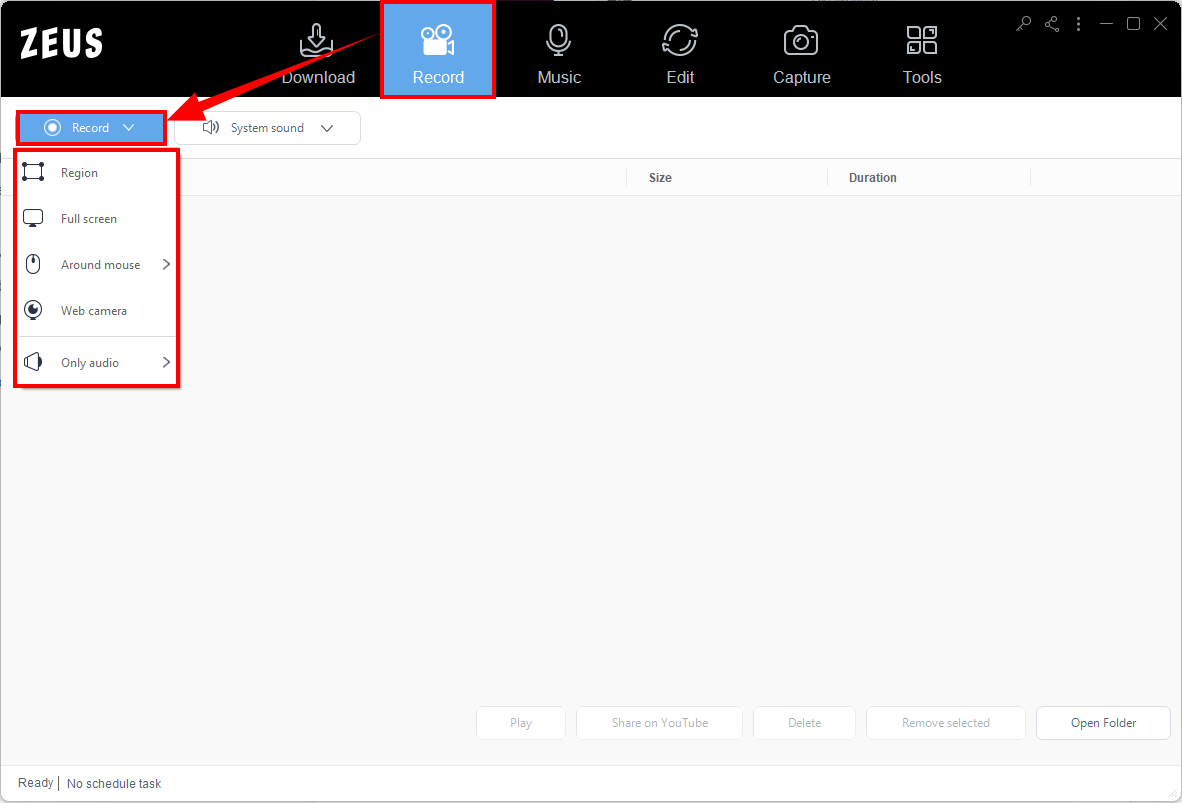
When you’re joined in the meeting call, switch to ZEUS and go to the “Record” function screen. Then select a recording mode by clicking the “Record” dropdown button and select from the options list: Region, Fullscreen, Web camera, Around mouse, or Audio-only. In this example, we will set the recording mode to “Region”.
Step 3: Prepare for recording
Then select the area you want to include in your recording.

Once an area is selected, a toolbar for area customization will pop up. If satisfied, just click the “OK” button to continue.
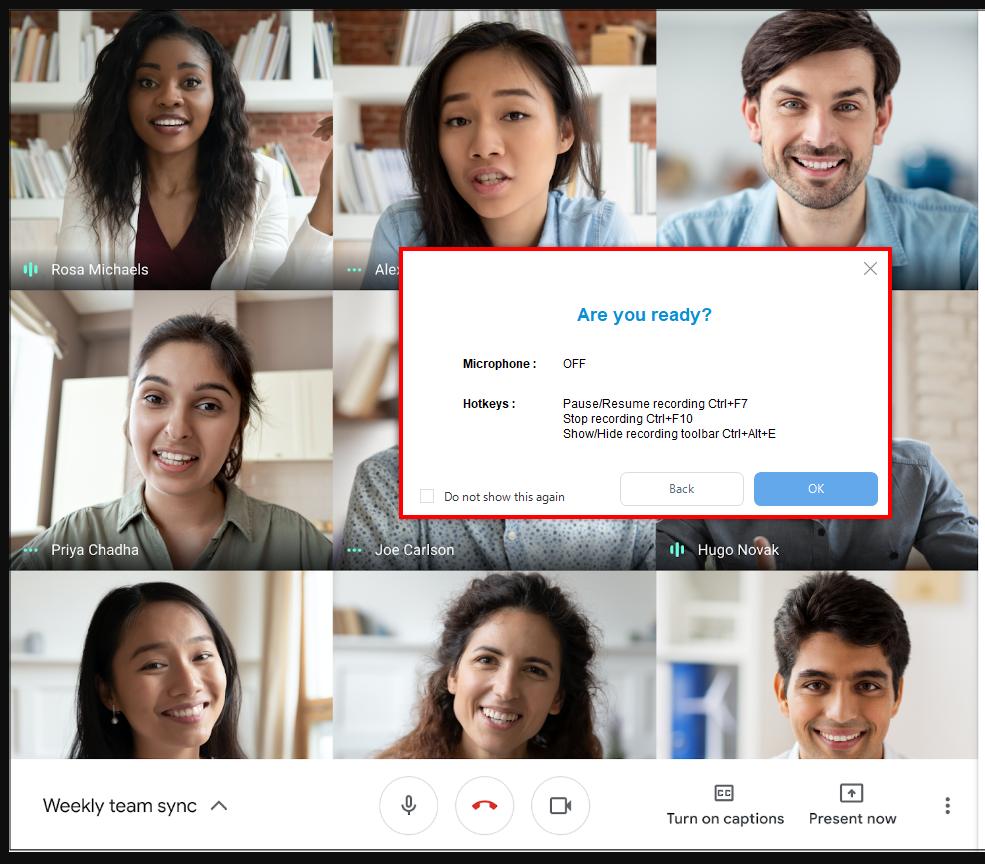
A confirmation will prompt asking if you are ready to begin the recording. If ready, just click the “OK” button.
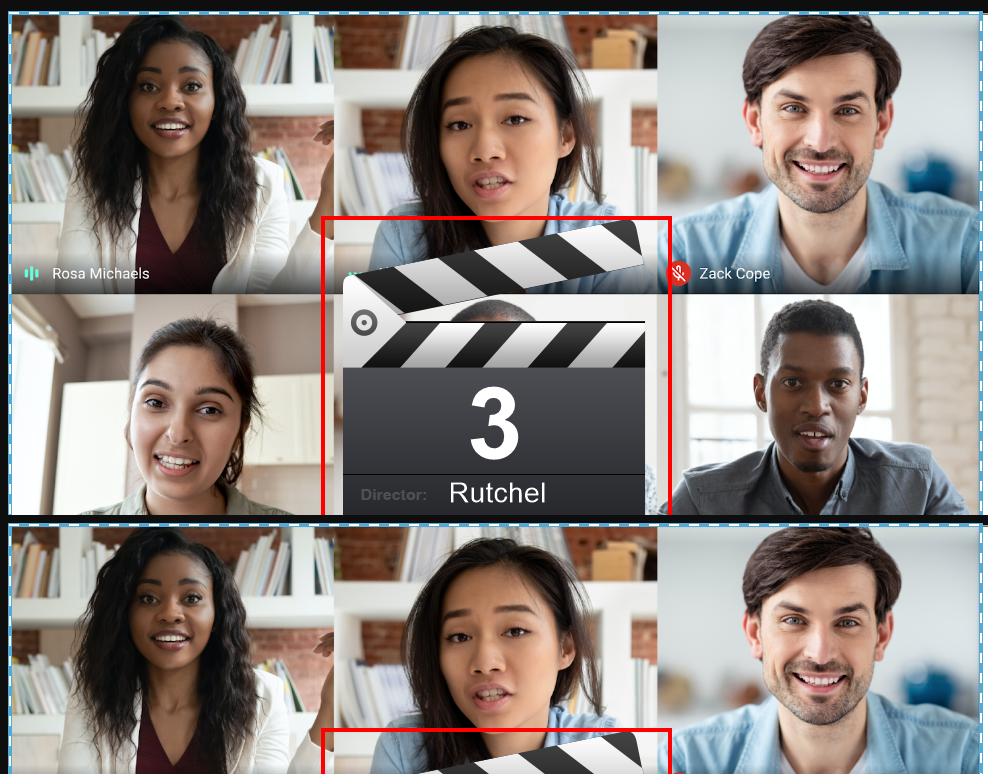
A 3-second countdown will start and the recording will automatically start when it reaches zero.

Step 4: Begin the recording
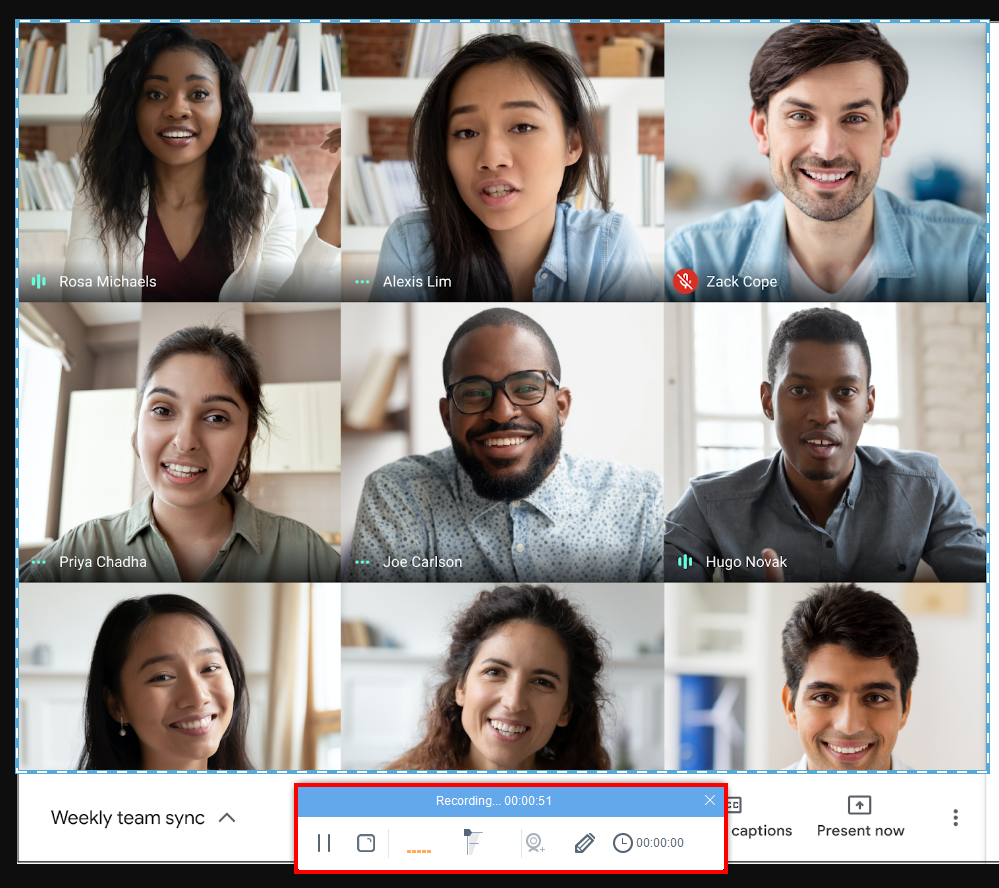
When the recording starts, a recording toolbar will pop up where you can take control of your recordings. You can click “Pause” to halt the recording, click the “Pencil” icon to enable annotation, or click the “web camera” icon to enable front cam.
Step 5: Manage the recorded file
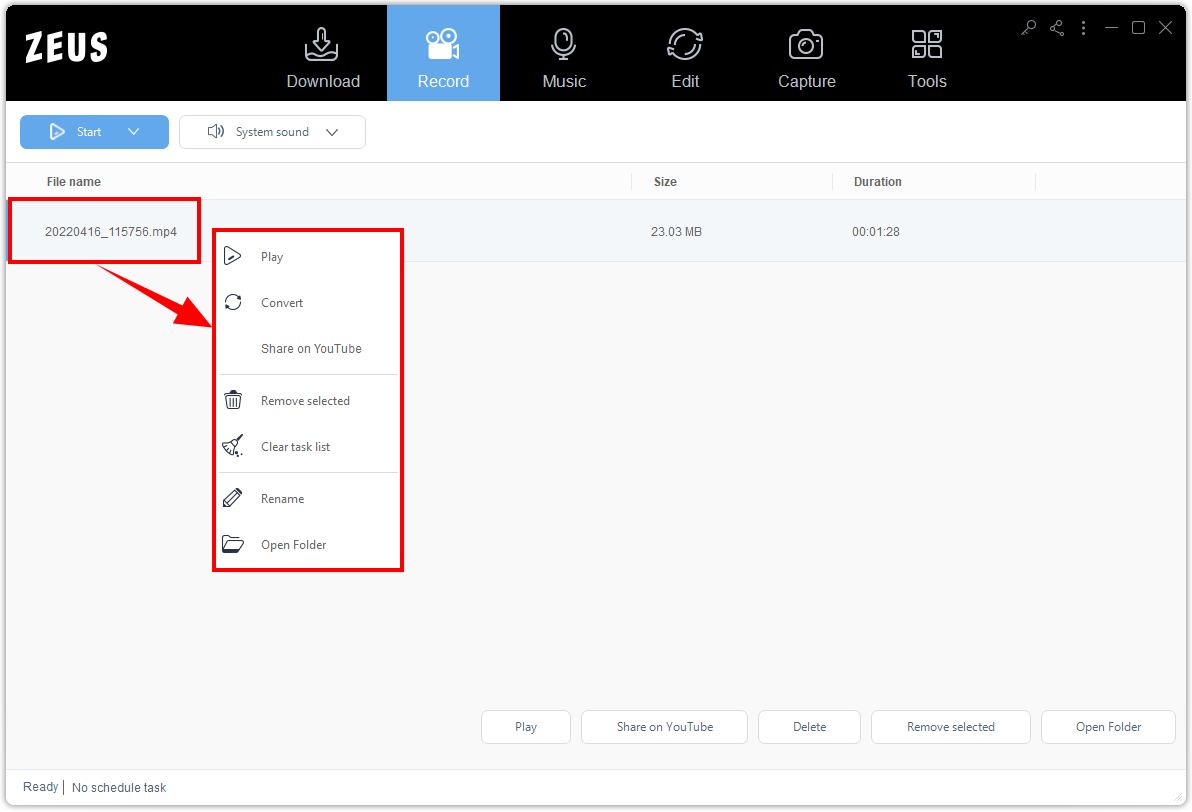
Once done, click “Stop” to end the recording. The recorded files will be added instantly to your record list. You can manage the recorded file by right-clicking it. A list of options available will drop down for your selection.
2. VideoPower GREEN – Screen and Video Recorder
If you are a non-technical user and prefer to use a straightforward screen recorder then VideoPower GREEN is the best tool for you! It is built with a cute and simple user interface. Through this, users can easily understand how to use it and finish the job in just a few clicks without sacrificing the output quality.
So, what are you waiting for? Get this now!
Using its free trial edition, you can record for up to 3 minutes interval. Just lift its limitation to continue recording.
Main Features:
- Flexible recording options
- A wide array of output formats supported
- With Screenshot function
- Real-time annotation
- With a built-in video editor
- Schedule recording task
Pros:
- Lifetime subscription
- Easy to edit, record, and share
- User-friendly interface
- Straightforward user interface
- Many additional functions
Cons:
- The free trial version comes with usage limitations and watermarks
Steps on How to Begin Recording with VideoPower GREEN
Step 1: Set the recording audio input
Launch VideoPower GREEN and click the “Audio input” menu. A list of sound source options will drop down for your selection such as System sound for the internal sound source, Microphone for the external sound source, both System sound & Microphone, or None.
In this example, we will set the audio input to both System sound and Microphone.

Step 2: Set a recording mode
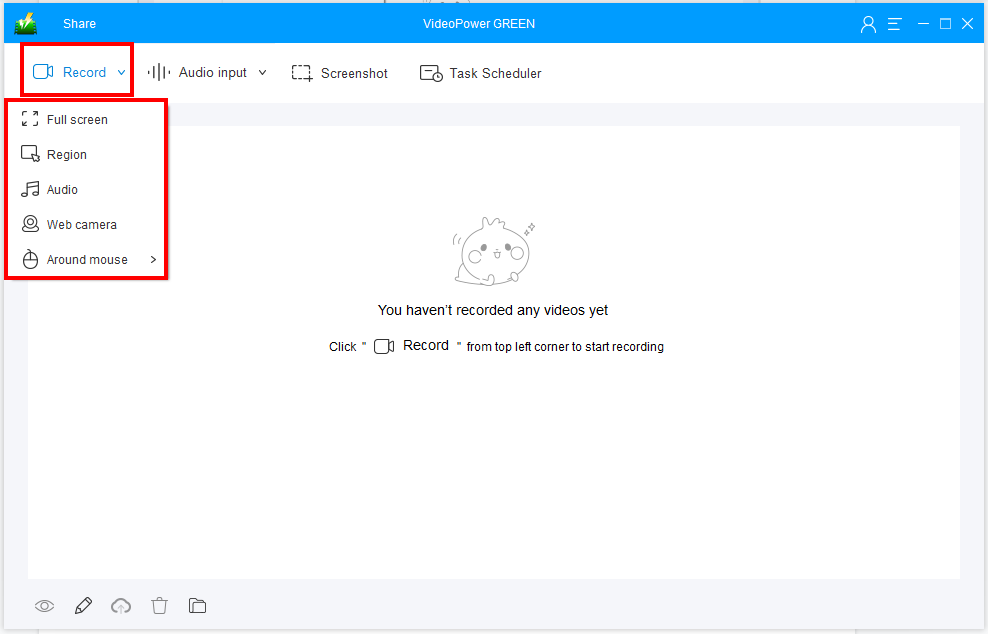
Click the “Record” menu. A list of recording modes available will drop down such as Region, Fullscreen, Audio, Web camera, and Around mouse.
In this example, we will set the recording mode to “Region”.
Step 3: Select a recording area
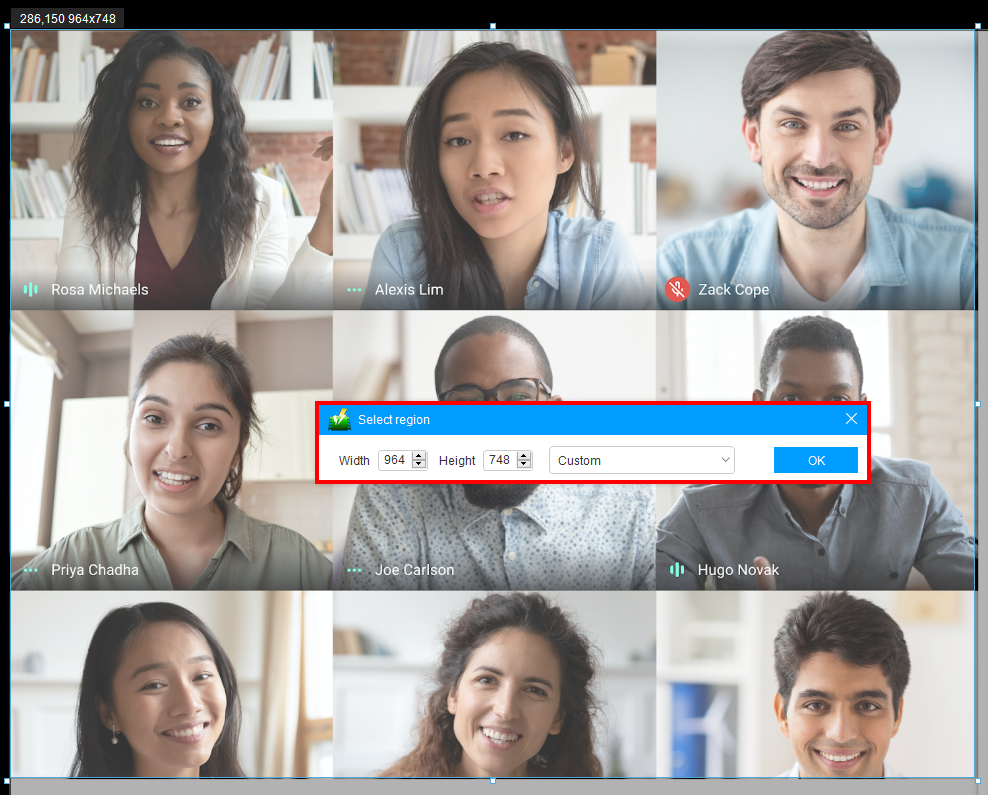
Then select an area to include in the recording.

A toolbar to customize the recording area will pop up. If already satisfied, just click the “OK” button.
Another confirmation will prompt asking you if you are ready for the recording. If you are ready, just click the “OK” button.
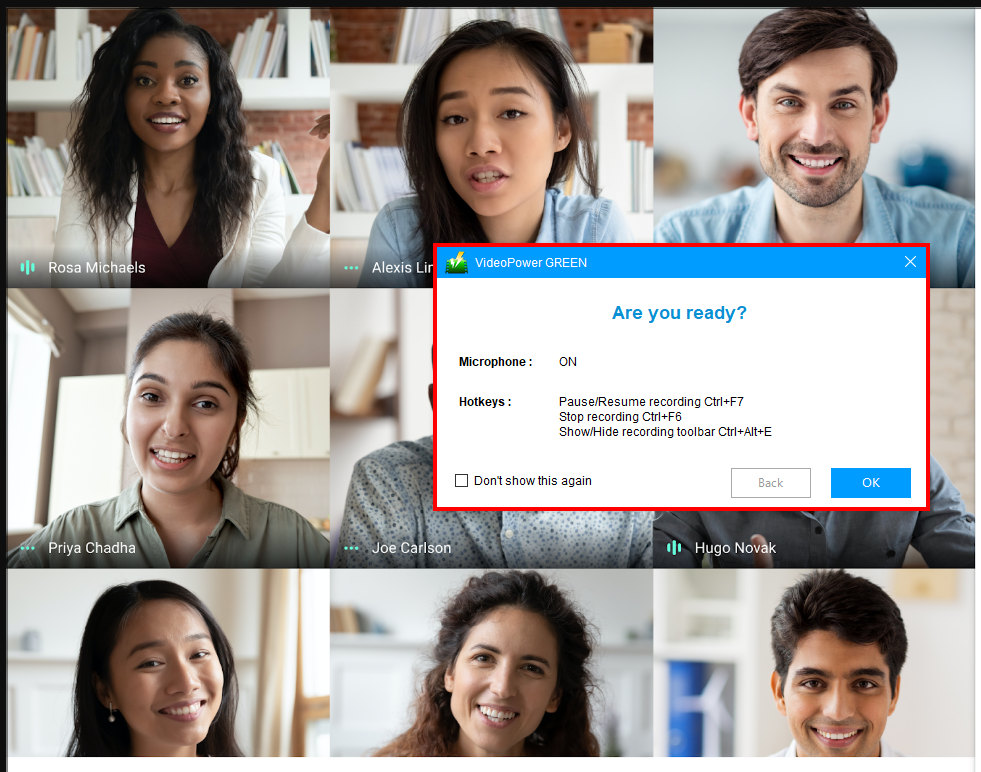
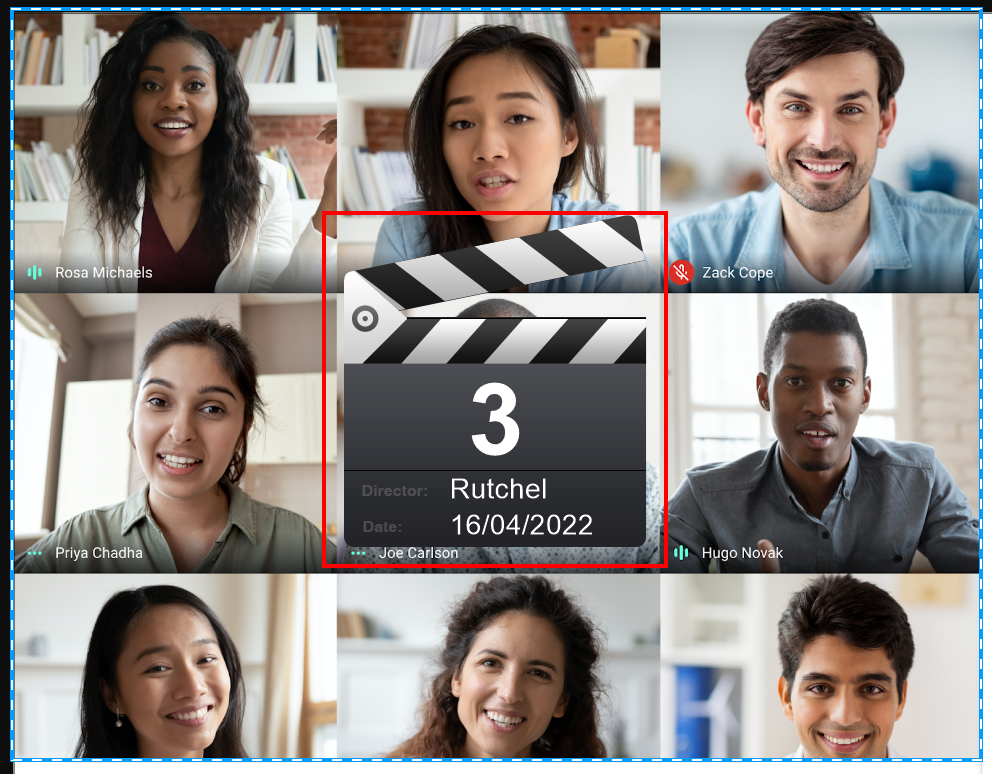
A 3 seconds countdown will start and once reaches zero, it will automatically start the recording.
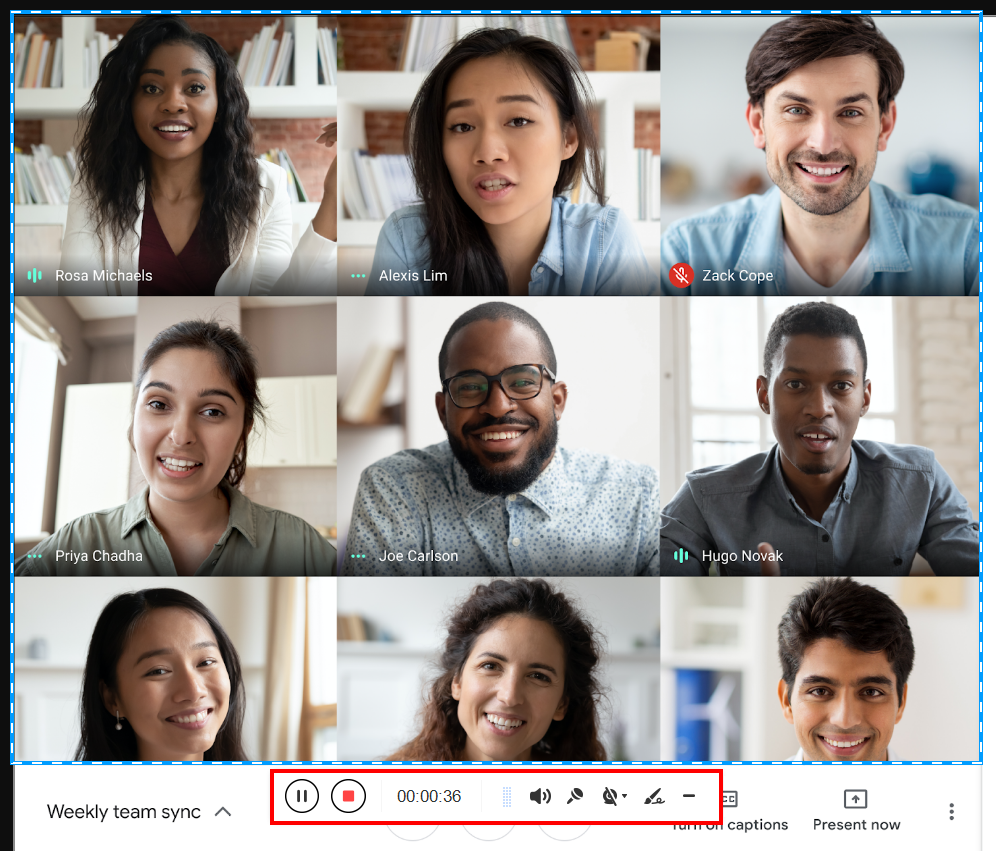
Step 4: Begin the recording
When the recording starts, the recording toolbar will pop up where you can take control of how the recording goes. You can click Pause to halt the recording, click the Pencil icon to annotate, or enable the web camera to include your face camera.
Step 5: Finished recording
When the recording ends, click the “Stop” button. The recorded file will be added instantly on your records list. Right-click the recorded file to see more options such as Play, Edit, Open folder, etc.

Conclusion
We hope that this article helps you to find the best alternative screen recording tool for Windows Video Recorder and for you to record Google Hangout meetings. If you’re still struggling, you should take a closer look at the following important factors.
- Features – it is important to check the features it offers that can provide solutions to your needs.
- OS supported – the software must be compatible with your device/s.
- Price – you must choose a tool that is within your budget.
May it either be for business or education, Google Hangout meetings would be handier with an assistance of a great screen recording tool: ZEUS RECORD or VideoPower GREEN. It helps capture an important discussion anytime you need it.