How to Record Skype Meeting on Windows PC (Audio & Video)
Skype is one of the most popular platforms used for video conferencing. It enables users to communicate via group calls and instant messages. You can, of course, share your files with other people who are also using this application. Companies frequently use Skype to connect with their employees, particularly BPO agents, virtual assistants, and others. Since the pandemic is still ongoing, most workers prefer to work from home. Skype is ideal for online meetings since, in addition to its 1080p video quality, it has a maximum call duration of 24 hours and can accommodate up to 100 people.
Can you Record Skype Meeting?
Skype allows cloud-based recording of calls, meetings, and conferences. It can capture audio, webcam, and even the shared screen. When the called meeting ends, the recorded meeting will automatically be stopped and will be sent to the group meeting thread. It can record for a maximum duration of 24 hours. Longer than that, the recording will be split into multiple files. The downside of this Skype feature is that all recordings will be available in the group thread within 30 days only. This could be a bit of a hassle when it comes to managing meeting recorded files.
ZEUS RECORD and VideoPower GREEN can record Skype meeting and the most recommended online meeting recorders without duration limits. All recordings are also added to the recording list and automatically saved in your local drive therefore it is easier to manage.
ZEUS RECORD as Skype Meeting Recorder
ZEUS RECORD is the most reliable software for recording your Skype meeting. It supports a variety of recording formats including Region, Fullscreen, Around Mouse, Web Camera, and Only Audio. The Only-Audio recording mode, as the name implies, records only audio. You have the option of selecting the sound source for recording. The “Audio Input” can be set in four ways: System Sound, Microphone, both System Sound and Microphone, or None.
You can record screens and videos for conferences, meetings, etc. using the screen recording function of ZEUS. This tool has great functionalities when it comes to screen recording. You may also want to have this tool since you can start at lower prices, unlike any other recording application. You may also want to purchase or add the video editor function for basic editing like adjusting brightness/contrast, adding watermarks, trimming, etc. to make a presentation or edit the video you recorded.
Hurry and get this app now!
Using the free trial edition of ZEUS, you can record for up to 3 minutes. Expect a watermark when you record using a webcam, scheduled task, and a real-time annotation.
How to Record Skype Meeting using ZEUS RECORD
Step 1: Pick Sound Source
To include the audio in the recording, just open the software and click the “Record” button. Click the Audio Input which is set to “System Sound” by default.
For Skype meetings, it is recommended to set the Audio input to System Sound and Microphone to capture both the sounds from your computer and your microphone.

Step 2: Select Recording Mode
Click the “Record” button to see the options list for recording. You may choose from Region, Fullscreen, Web Camera, or Only Audio.

After you selected the recording area, a toolbar will appear with the recording area details. You can also customize the width and height from the toolbar. Once done, click the “OK” button to start the countdown.
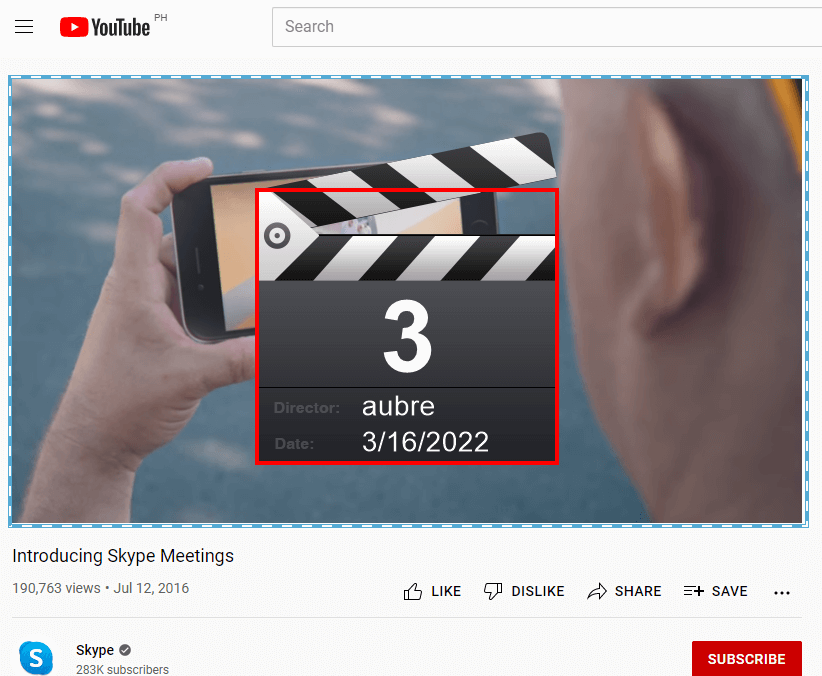
Step 3: Start and End Recording Skype Meeting
Once the countdown ends, the recording will begin. Use the control bar of the software to annotate, pause, or stop your recordings.
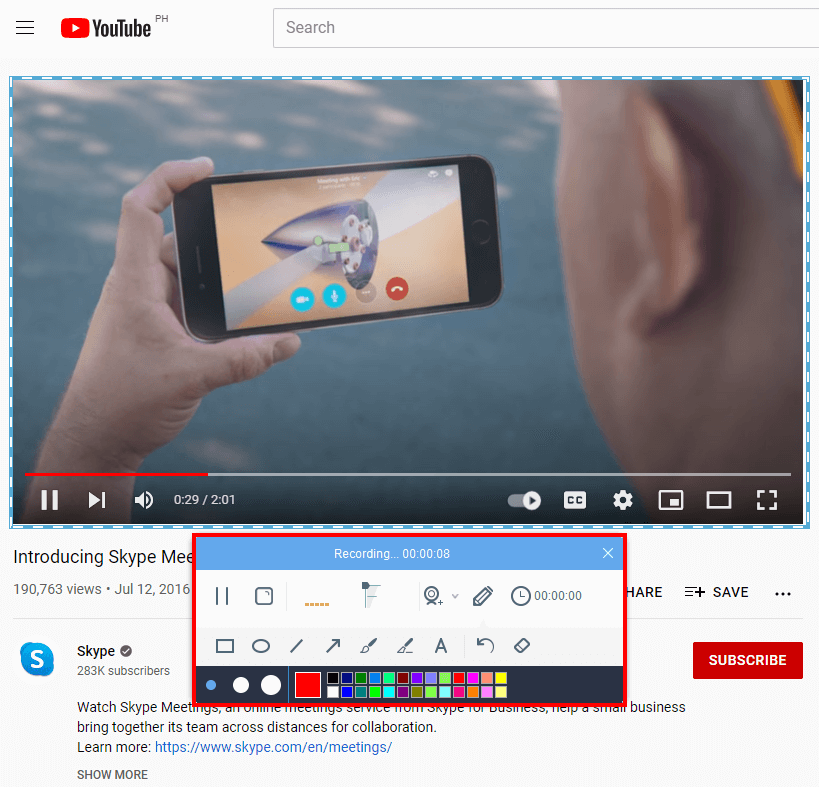
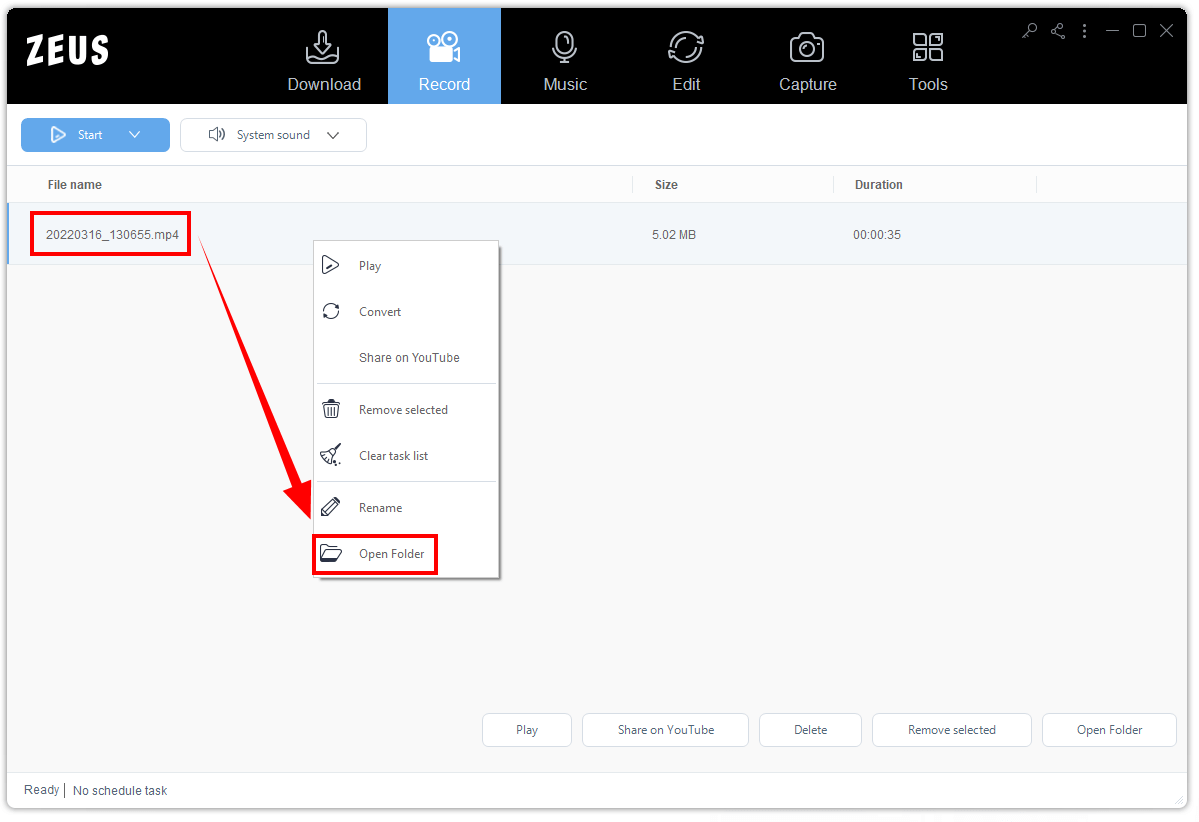
Step 4: Check the Recorded Skype Meeting
The recorded file will be saved instantly on your computer and will be added to your ZEUS recording list. To check it, right-click the file then select the “Open Folder” format to see its location.
Alternative: VideoPower GREEN as Skype Meeting Recorder
Another alternative to record skype meeting is the VideoPower GREEN application. This software is also helpful in doing a screen recording. You may also choose the output format in recording that is suitable to your devices such as MP4, WMV, AVI, and many more. Ultra-High quality is also possible to set up for recording to get good quality video. You may also have a lifetime license once you purchase this tool. Amazing, isn’t it?
How to Record Skype Meeting using VideoPower GREEN
Step 1: Select Audio Input
Open the VideoPower GREEN application to select the audio input you want to use. Simply click the “Audio Input” button for dropdown selections to display.
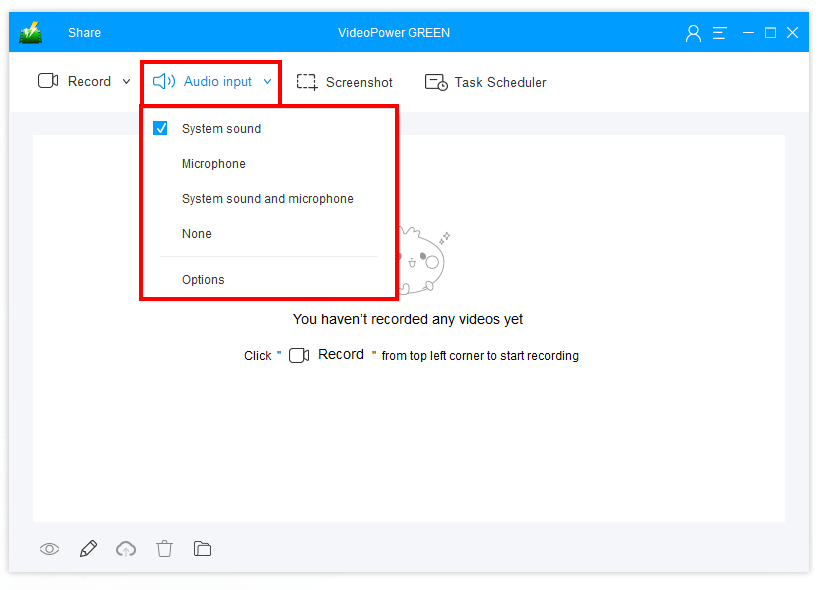
Step 2: Choose Recording Mode
To select the recording mode you want, just click the “Record” button of the software. A list of selections will then display for you to choose from such as Region, Fullscreen, Audio- only, etc.

Step 3: Start Recording the Meeting
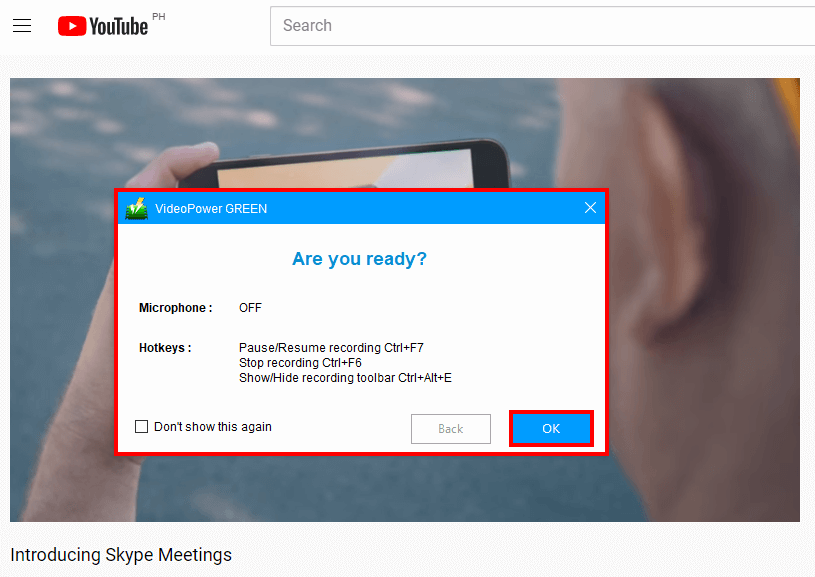
After selecting your preferred format for recording, a new window will display asking you if you are ready for recording. Click the “OK” button to continue.
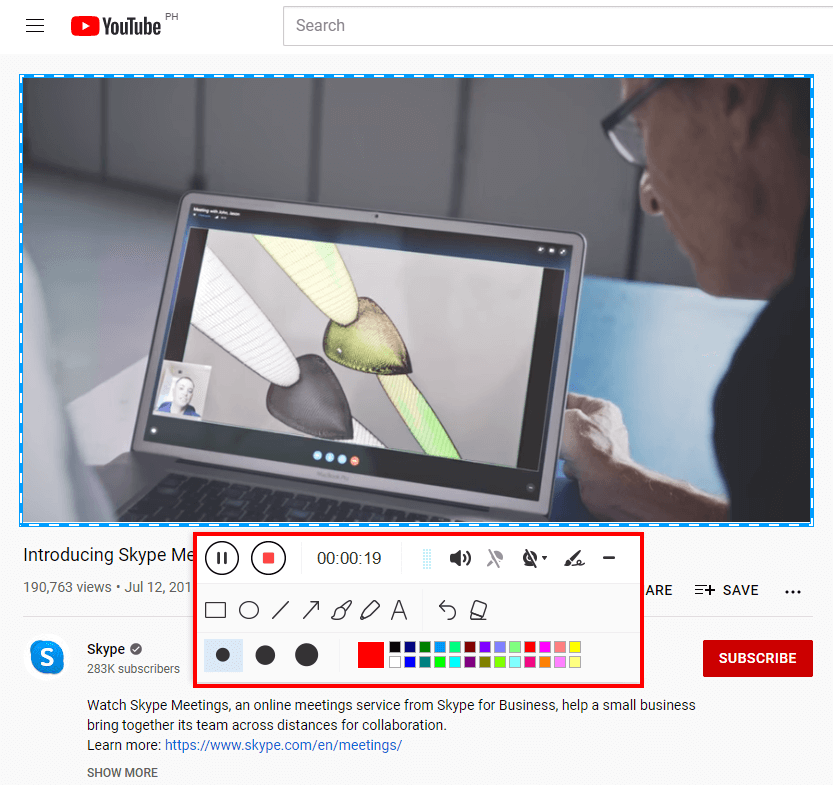
A countdown will then begin. Once it reaches 0, the recording will automatically start. Click the “Pencil” icon to annotate like add texts, shapes, lines, arrows, etc. After the meeting is done, you may end the recording by simply clicking the “Stop” button.
Step 4: Recording Skype Meeting is Completed
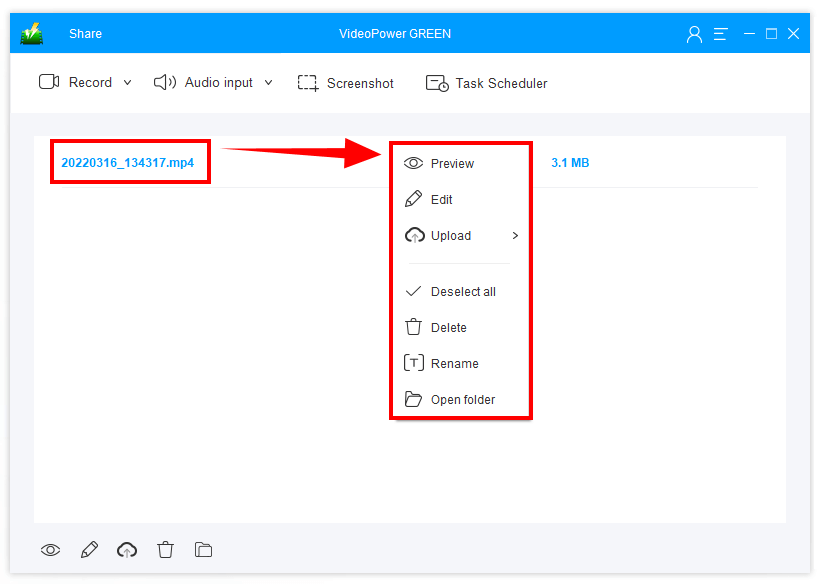
Once you click the “Stop” button of the software, it will automatically be saved in your recorded list. Double-click the file to play your video and replay it. You may also right-click for more options to manage your recorded file like Edit, Upload, Rename, etc.
Conclusion
The majority of entrepreneurs use Skype to communicate with their employees. They use Skype meetings to address essential business-related issues and agendas. That is why it is important to take careful notes during a discussion like this.
Fortunately, ZEUS RECORD and VideoPower GREEN applications are available to assist you to record skype meeting. You can add additional emphasis to the main points stated in your recorded meeting by annotating in real-time.