Webinar Recording: How to Record Clickmeeting Webinar
 Clickmeeting is one of the best webinars used by professionals and students today. It is a great web video conferencing platform for online meetings, online classes, training, presentations, etc. This platform excels in live events, breakout rooms, and webinars that could cater to a large number of attendees.
There are many advantages when using Clickmeeting such as:
- Its user interface is responsive and easy to navigate
- Packed with many features for webinar and event hosts
- Can handle a large number of attendees
- Intuitive file collaboration
- Built-in support for live streaming
HHow to record Clickmeeting webinars?
Sometimes it is necessary to record Clickmeeting webinars to allow easy checking, content distribution, or use as reference material. If you are the event organizer, you can easily enable the webinar recording within the application.
To record the Clickmeeting webinar, simply join the webinar event and turn on the recording on the upper right of the interface. You have the option to set the recording mode to All pods, Presentation and video, Presentation, or Presentation, video, top bar.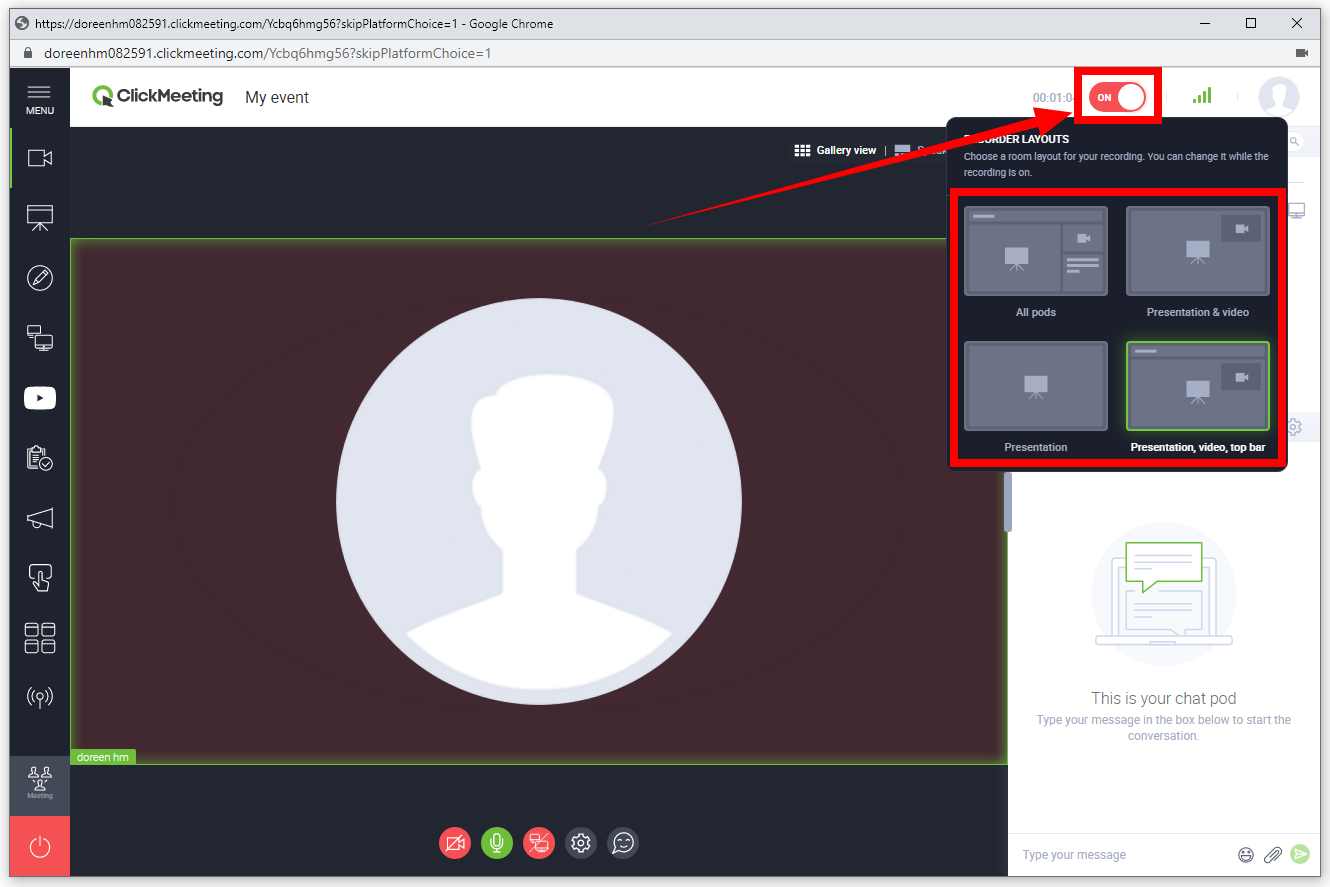
To manage the recorded files, go back to your account panel.
How to record Clickmeeting webinar as an attendee?
One downside of Clickmeeting webinar recording is that it can only be used if you are an organizer. If you are just the attendee and you wished to record the meeting, it is recommended to use ZEUS RECORD.
ZEUS is a lightweight software application that offers all-in-one multimedia solutions. This includes its screen recorder function popularly known as ZEUS RECORD. It has the capability to record webinar videos in lossless quality with multiple recording modes available such as fullscreen, region, only audio, and more! With ZEUS, you can guarantee easy and fast recording with the highest quality output.
Hurry and get this app now!
How to Record Clickmeeting Webinar with ZEUS RECORD
Step 1: Go to the “Record” function screen
Open the ZEUS software and click the “Record” function menu.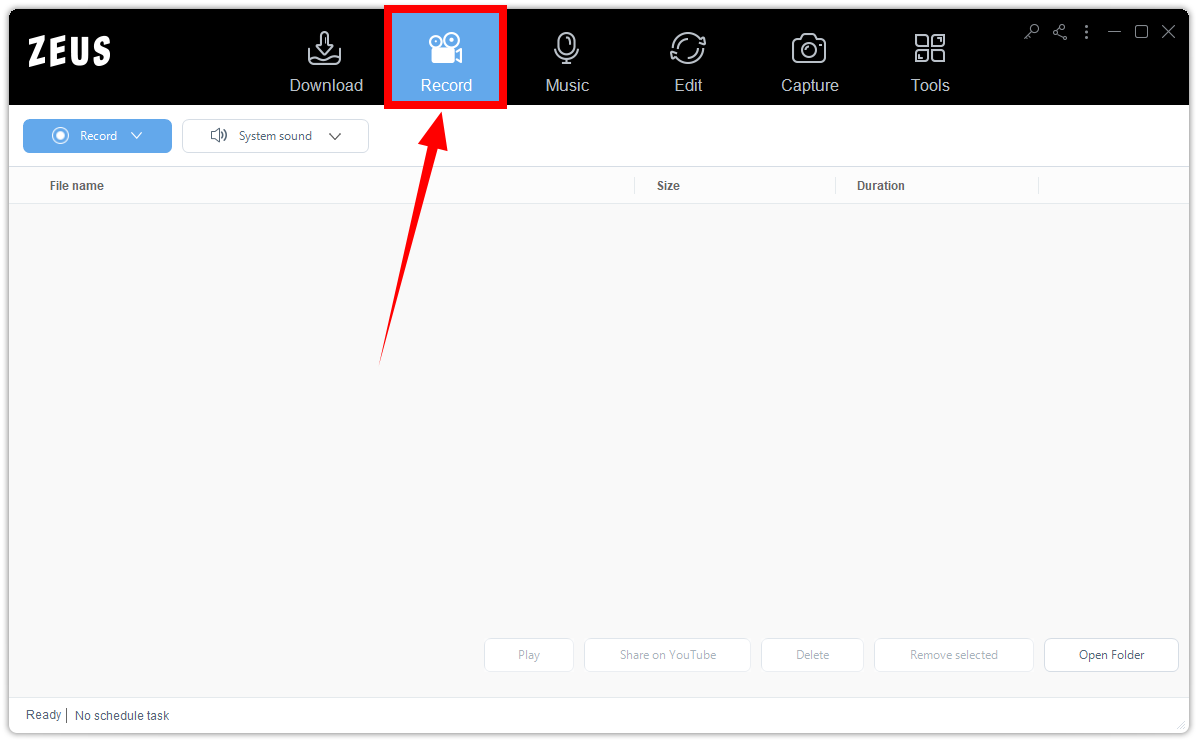
Step 2: Set the audio input
On the “Record” function screen, click the “Audio input” button to select a sound source. By default, it is set to “System sound”. You can change it to “System sound and microphone” to record both sounds from your PC and your microphone.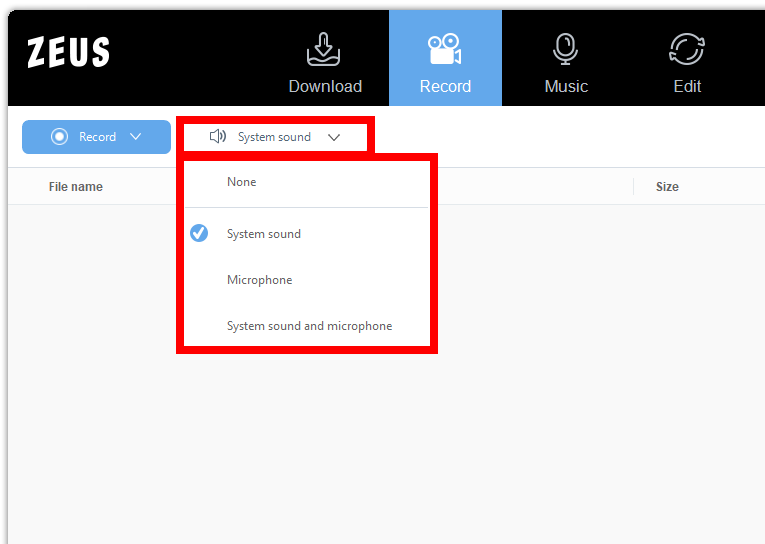
Step 3: Choose a recording mode
To begin the recording, you need to select a recording mode first. To do this, click the “Record” button beside the audio input and select the preferred recording mode from the dropdown list. In this example, we will set the recording mode to “Region”.
Step 4: Select a recording area
Drag the pointer to select a recording area.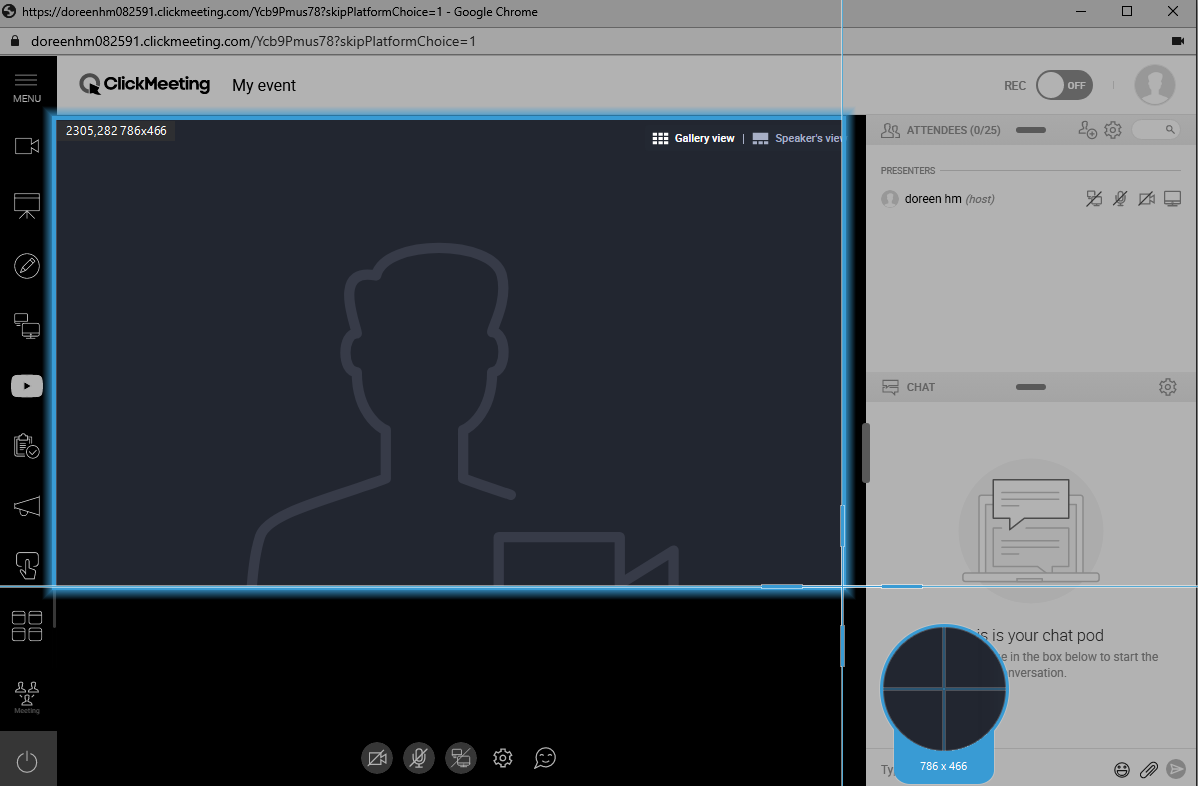
Step 5: Begin the Clickmeeting webinar recording
A confirmation will prompt asking if you are ready to begin the recording. If ready, click “OK” to proceed.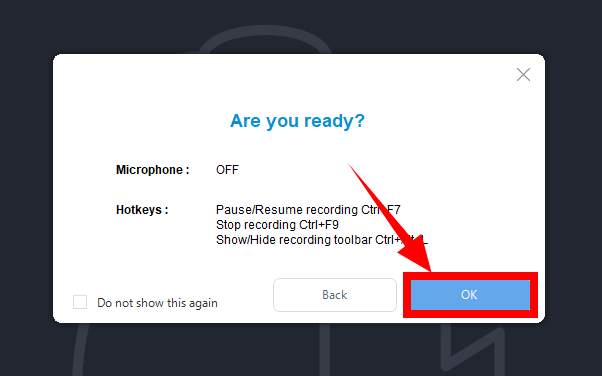
The recording toolbar will pop up which indicates that the recording has begun.
Step 6: Finished recording the Clickmeeting webinar
When the recording is finished, click “Stop” on the recording toolbar to end the recording.
The recorded file will be added to your recording list. You may right-click the recorded file to see more options.
Conclusion
With Clickmeeting, organizing events and managing your files is easier. You can even find several ways to utilize your recordings within the app. However, this is only available if you are hosting the event. If you are just the attendee, you need help from a great screen recorder tool like ZEUS RECORD to efficiently record Clickmeeting webinars.
ZEUS RECORD is a straightforward screen recorder tool with an easy-to-use interface for easier navigation. It is capable of recording any on-screen activities in lossless quality. Through it, you can also directly share the recorded files directly to YouTube.