Simple & Quick Guide on How to Record Your Zoom Meetings on PC
 Zoom is a free software program developed by Zoom Video Communications that enables you to hold virtual meetings, virtual classes, and video conferences. In a meeting, it is important to take note of important details such as discussions, announcements, & conclusions. Of course, one of your options is to jot down notes. That is if you’re fast in listening while concentrating on writing. Not everyone is equipped with such skills especially having to remember everything in a meeting physically or virtually without taking down notes.
Thus, Zoom enables recording video conferences during your virtual meeting sessions. However, you are only allowed to record zoom meetings if you’re the host that enabled you and your participants to record the virtual meeting via the ‘Record’ option of the software application on the right side where the chat box usually is. If the host disabled permission to record meetings, being a participant, you are unable to record the meeting using that method. The quickest & most convenient method of combating this issue is recording your screen with screen recording apps.
Can you really record Zoom meetings without permission? Yes! This article presents you with the best screen recorder software to record zoom meetings secretly! Let’s start, shall we?
Best Screen Recorders to Record Zoom Meetings
1: ZEUS RECORD (Screen Recorder & Video Downloader)
ZEUS RECORD is a multifunctional multimedia software that doesn’t just download videos and audio but also records and captures your screen! It is your ultimate tool AND best friend for multitasking media needs. This is the most recommended screen recorder that you can use to record Zoom meetings on laptop or desktop that support Windows 11 / 10 / 8.1 / 8 / 7. Its screen recording feature offers convenient recording modes that allow users to easily select the recording area by region area selection, window, fullscreen, around the mouse, or using a web camera. It also allows recording of audio-only, and saving to different audio formats such as MP3, FLAC, WAV, etc. Adding customizations while recording is also available through its real-time annotation function.
What makes it unique is its capability to capture audio and video without losing quality. What you see is what you truly will get, no compromisations. With ZEUS RECORD, you can start with a lower price, choosing to get the full version of the record feature first, and can easily upgrade to add more functions that you like such as audio and video downloader, video editor, screen capture, music downloader, and others.
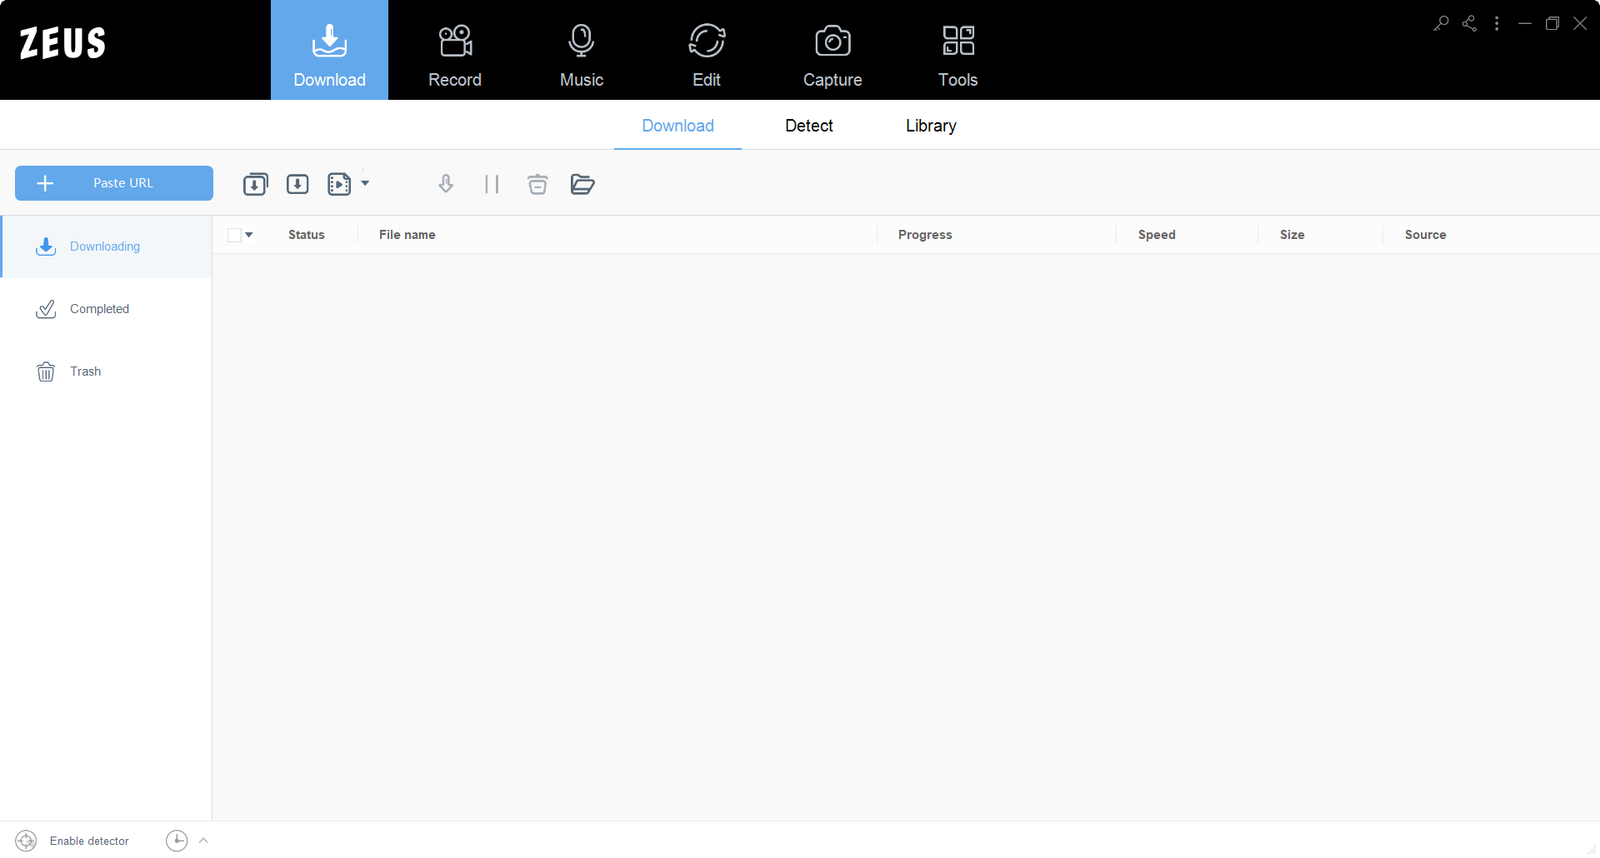
Try ZEUS now by downloading the software below!
How to Record Zoom Meetings and Video Conferences via ZEUS RECORD
Step 1: Join Zoom Meeting
Don’t forget to join your Zoom meeting before recording! Go to your Zoom app and click ‘Join Meeting’.
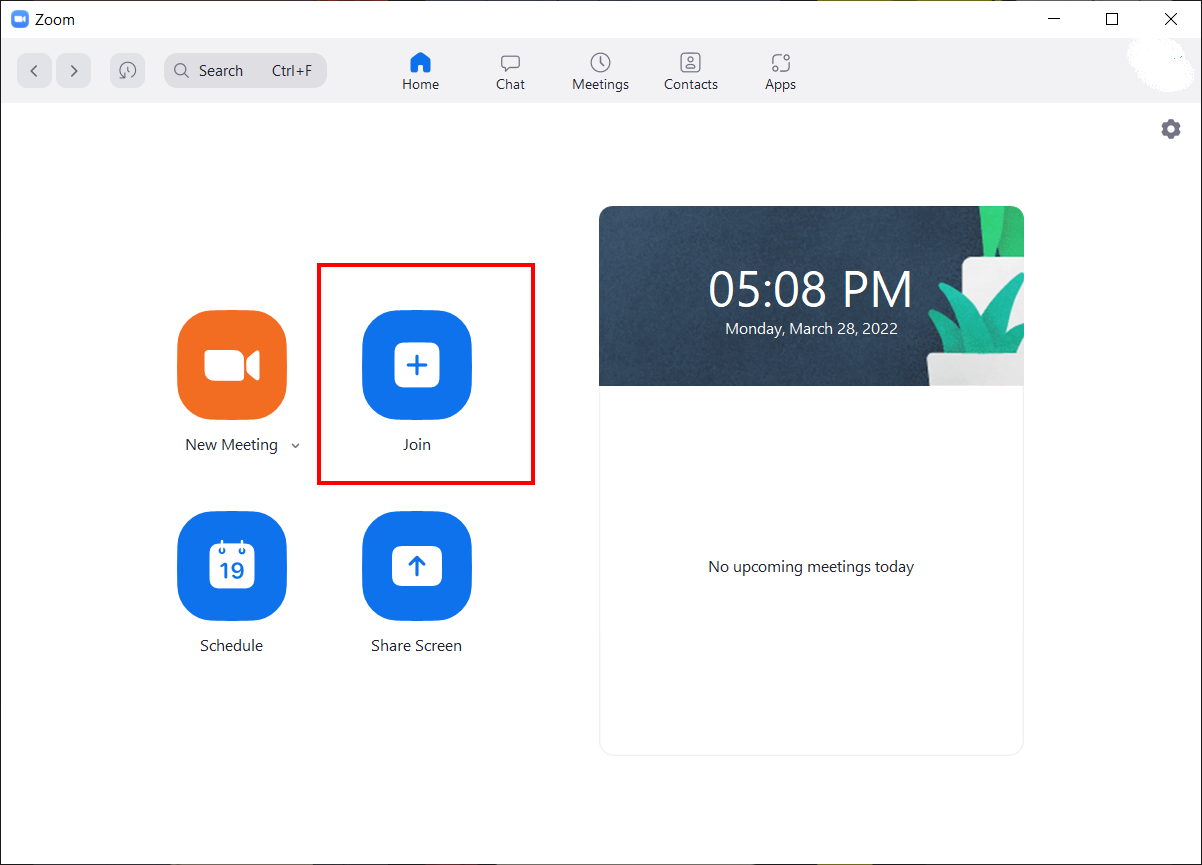
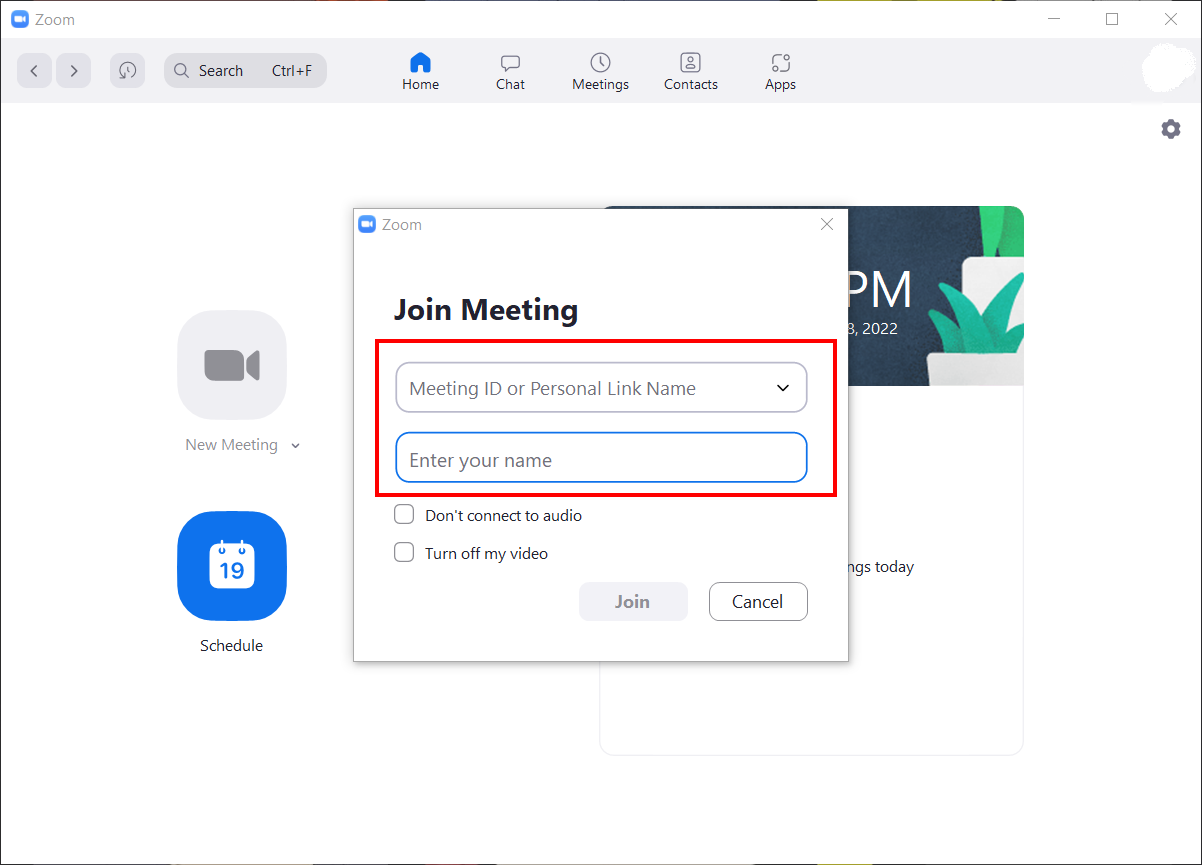
Make sure to get your ‘Meeting ID from the meeting host’ beforehand in order to join the zoom meeting. Set your name so that the host and other participants would know that you entered the meeting.
Step 2: Select Area to Record
Launch the ZEUS RECORD software and choose the ‘Record’ function. Click the ‘Record’ button and select your preferred recording mode from the dropdown box such as ‘Region’, Fullscreen, Around mouse, etc.
For this example, we will select the recording area using Region recording mode.

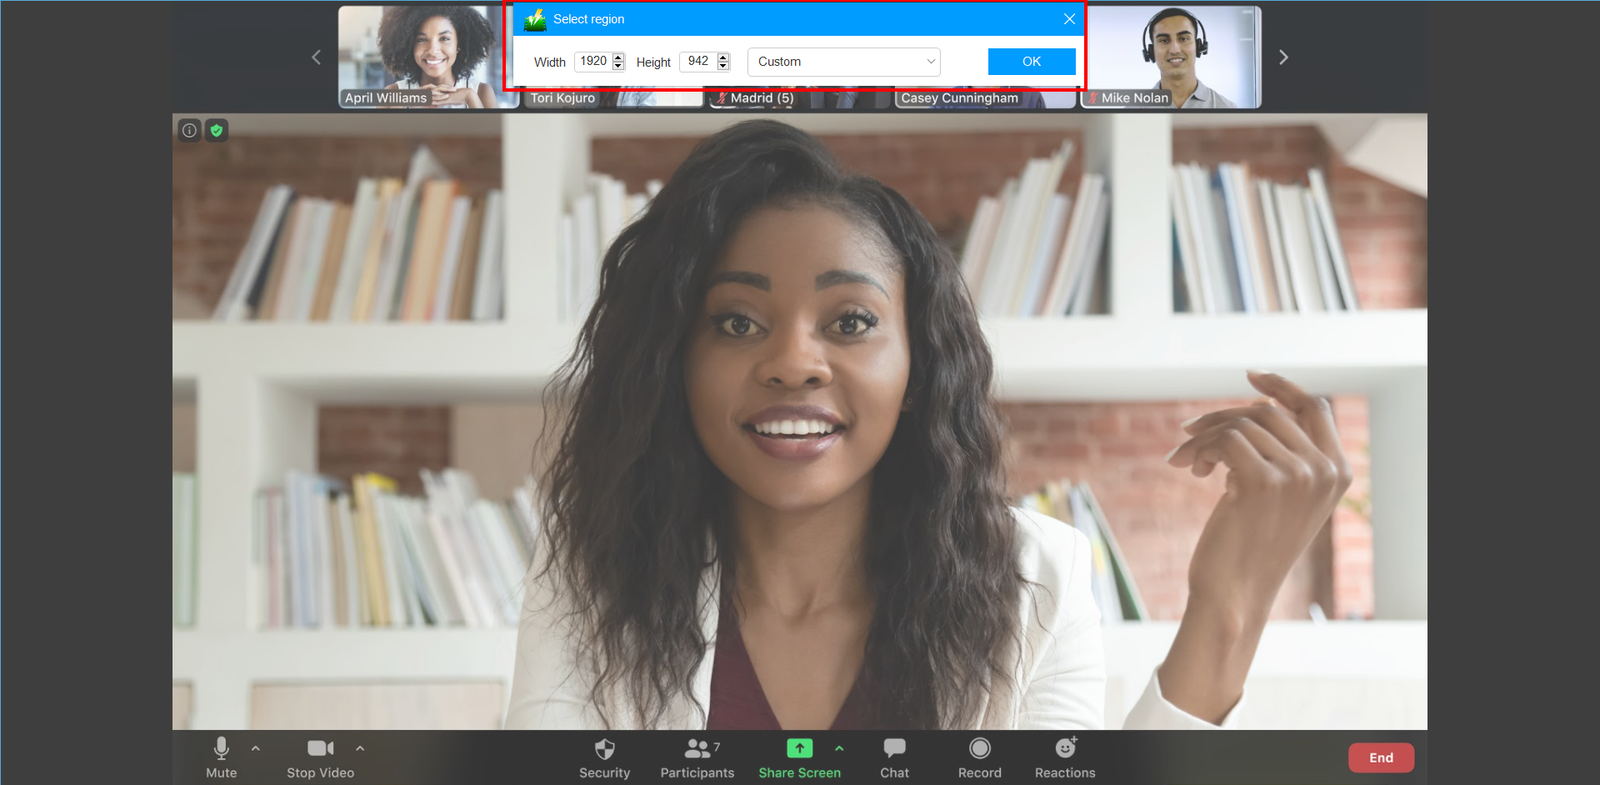
After selecting ‘Region; for your recording mode, select the area you want to include in the recording.
Step 4: Start Recording!
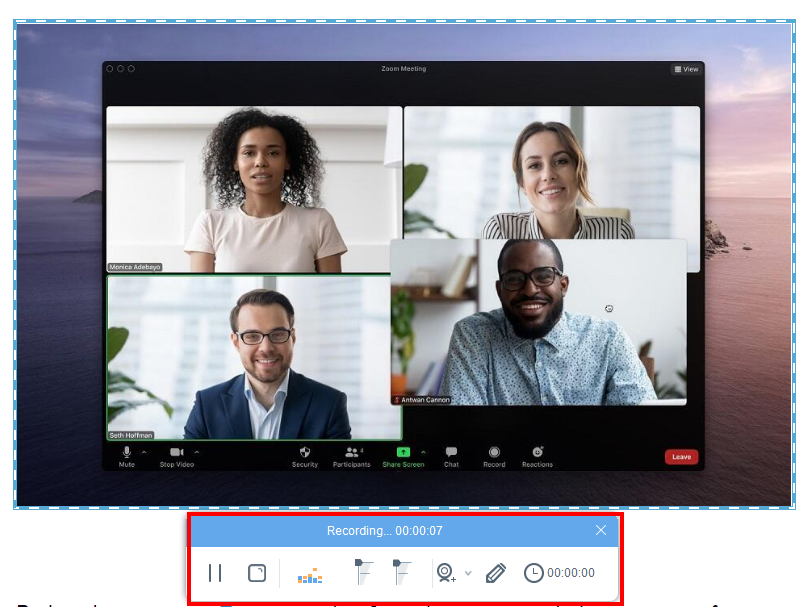
A countdown will pop up after an area is selected, indicating that the recording will start when it reaches 0. A control toolbar will show when the recording starts. You can stop or pause the recording and or click the pencil icon to annotate.
Step 5: Finished Recording
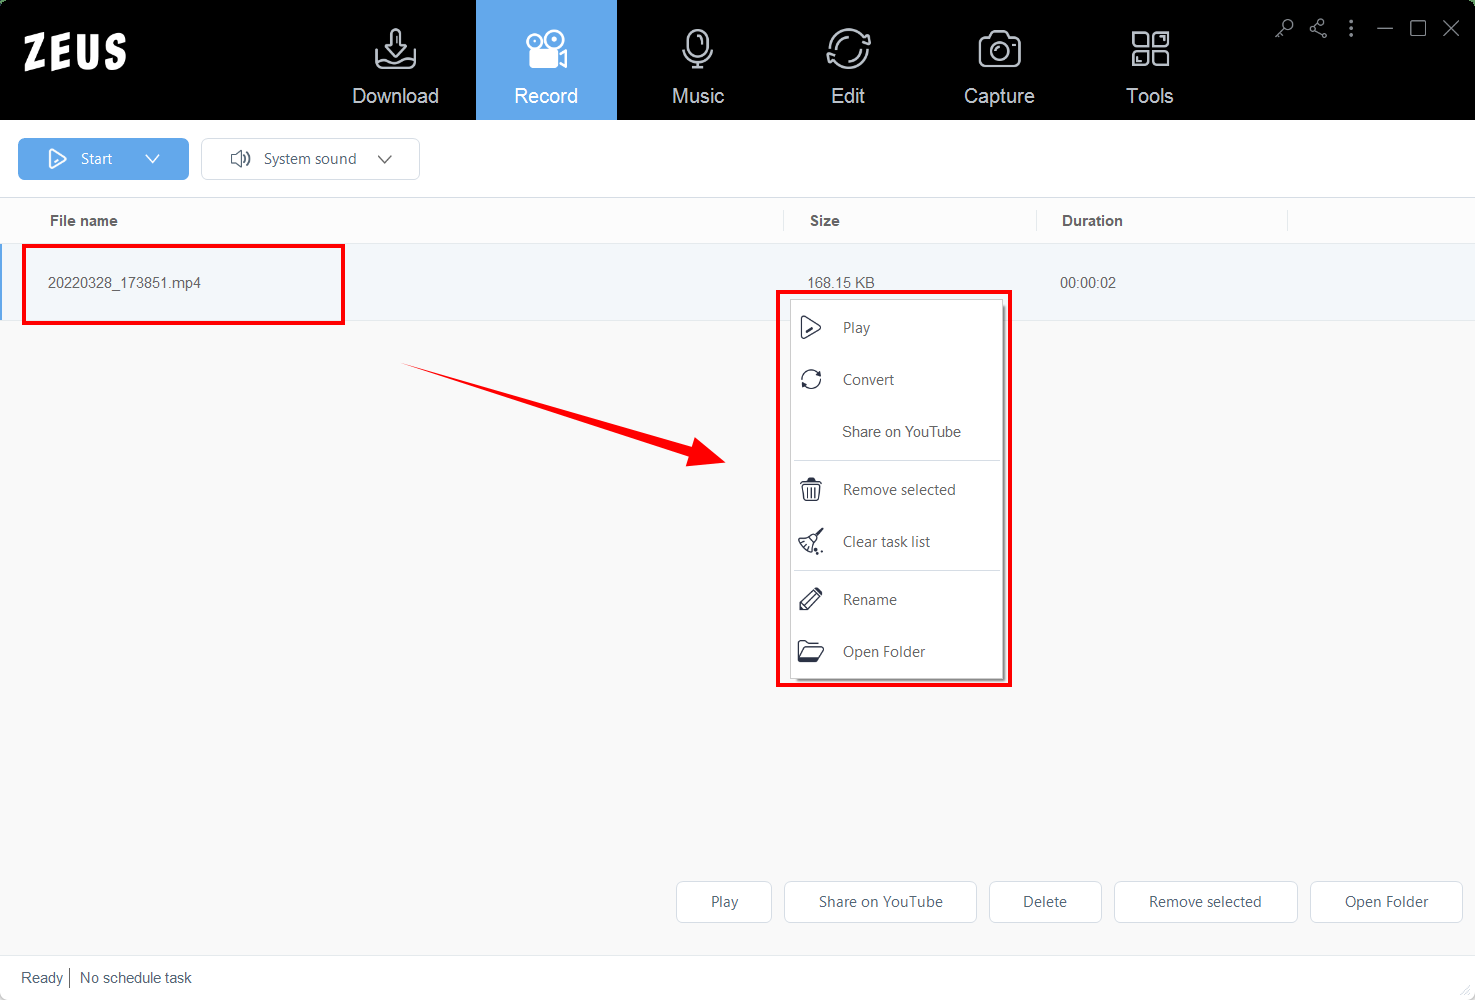
Click the ‘Stop’ button to end your recording. The recorded file will be automatically added to your recording list. Right-click your recorded file and see more options to manage files like Play, Convert, Share on YouTube, Rename, etc.
2: VideoPower GREEN (Screen Recorder, Schedule Recording)
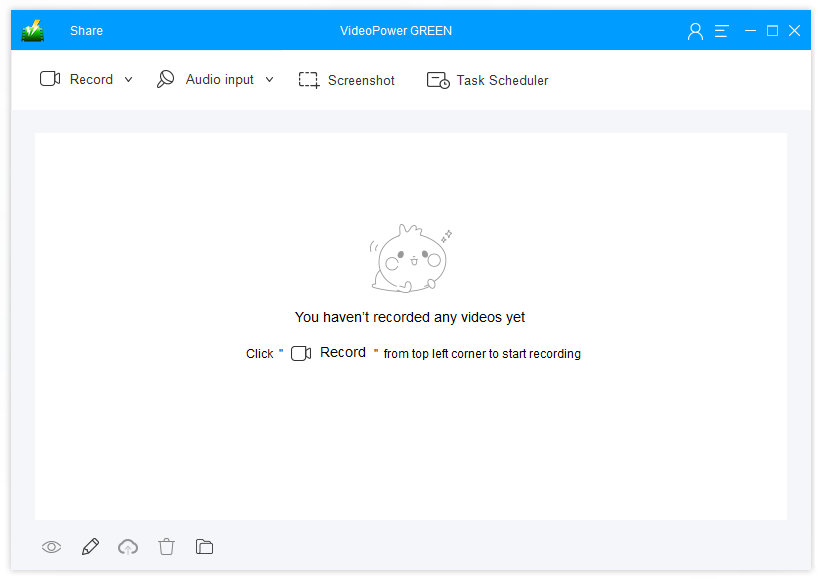
VideoPower GREEN is an essential tool for screen recording and recording Zoom meetings. As one of the most competitive screen recorders, its straightforward software interface with many add-ons functionalities helps you go over and record your screen quickly and efficiently. Makes it perfect for all users because of its simple, user-friendly yet cute interface. It offers many options for recording your screen such as in a fullscreen, window, and around the mouse. VPG is also capable of Picture in Picture (PIP) recording by enabling a web camera when recording. It can record zoom meetings with audio but if you want to record only the audio, setting the recording to ‘Audio-only’ is also available.
VideoPower GREEN offers a lifetime license with many useful features and functions added such as Screen Capture to take a snapshot of your screen and Record Scheduling to set your recording in advance whenever necessary. The real-time annotation function is also available while recording. This allows users to add texts, shapes, colors, etc. Software is supported on Windows PC (11 / 10 / 8.1 / 8 / 7).
Try VideoPower GREEN now by downloading the software below and see for yourself!
How to Record Zoom Meetings and Video Conferences via VideoPower GREEN
Step 1: Select Audio Input for Recording
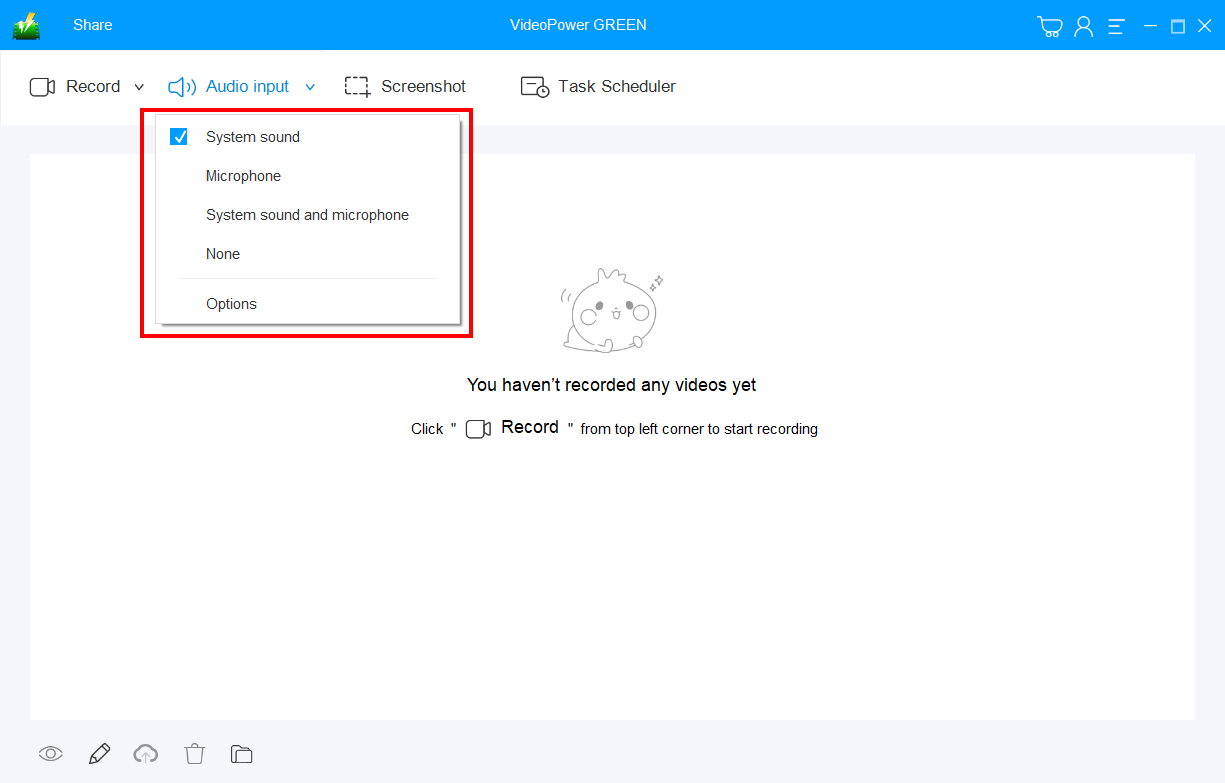
After joining the Zoom meeting and conference, launch VideoPower GREEN. Click the “Audio input” menu. You can then choose your preferred audio input from ‘System Sound’, ‘Microphone’, both’ System sound and Microphone’, or ‘None’.
It is recommended to select ‘System sound and Microphone’ to capture the audio from the computer and your microphone for Zoom meetings.
Step 2: Choose Recording Area
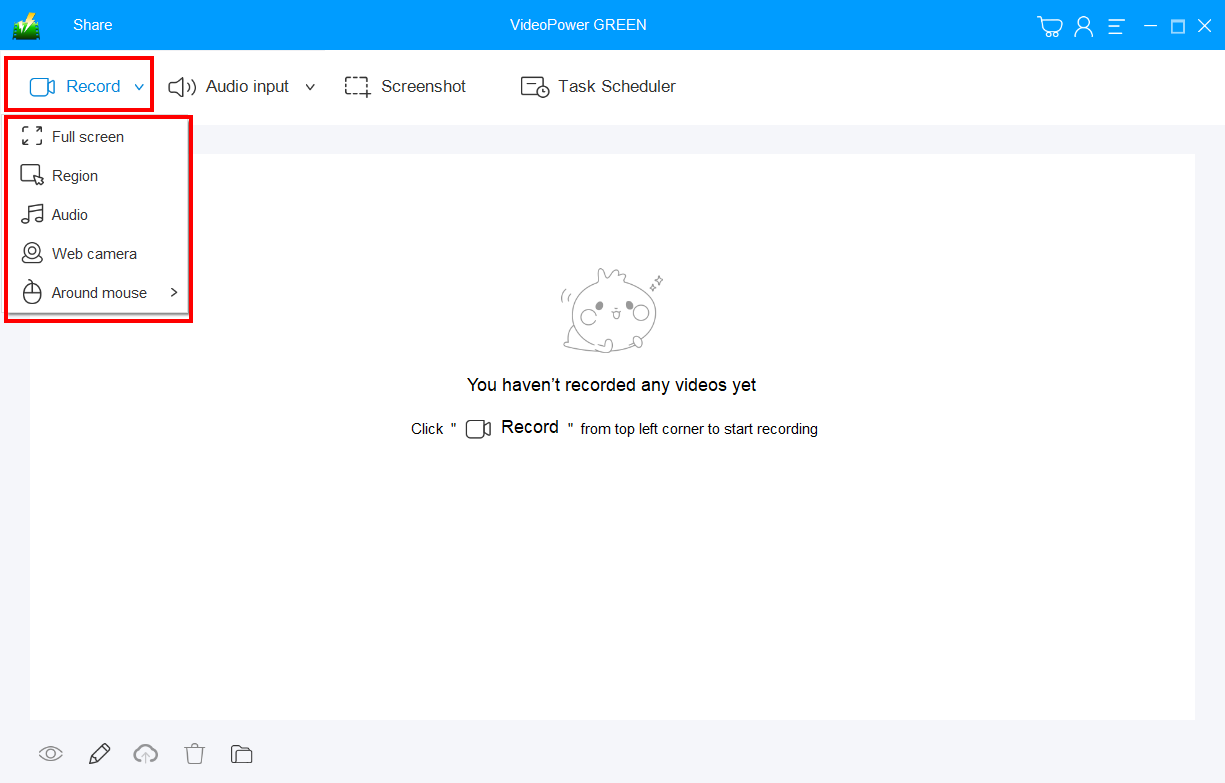
Click the “Record” menu then select your preferred recording area mode. Choose from Region, ‘Fullscreen’, ‘Audio’ (for audio only), ‘Web Camera’, and ‘Around Mouse’.
We will choose the “Fullscreen” recording mode as an example.
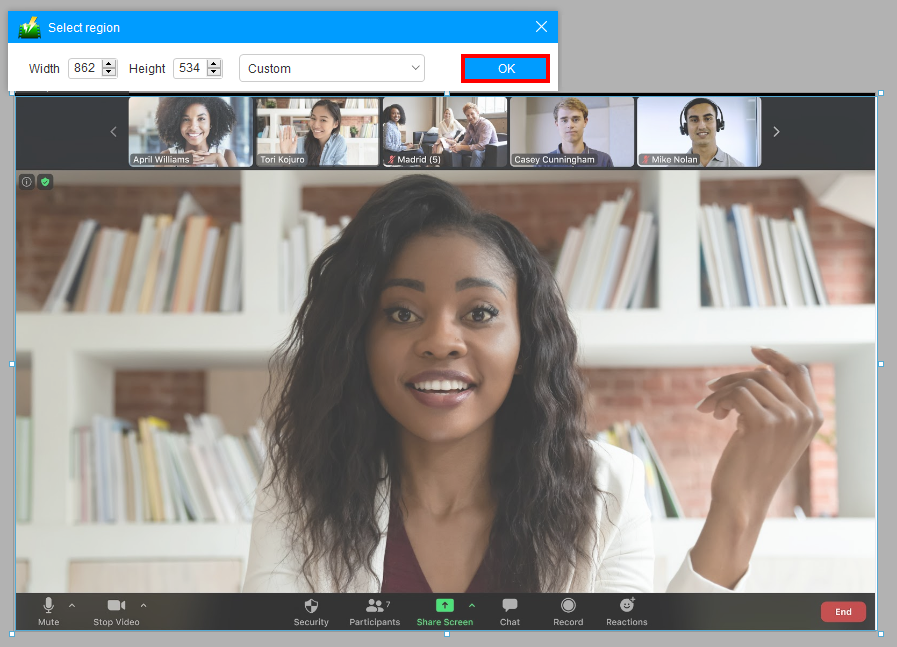
After that, select the area you want to include in your recording. Alternatively, you can fill in the customized width and height from the toolbar. Click “OK” once you’re done.
Step 3: Start Recording
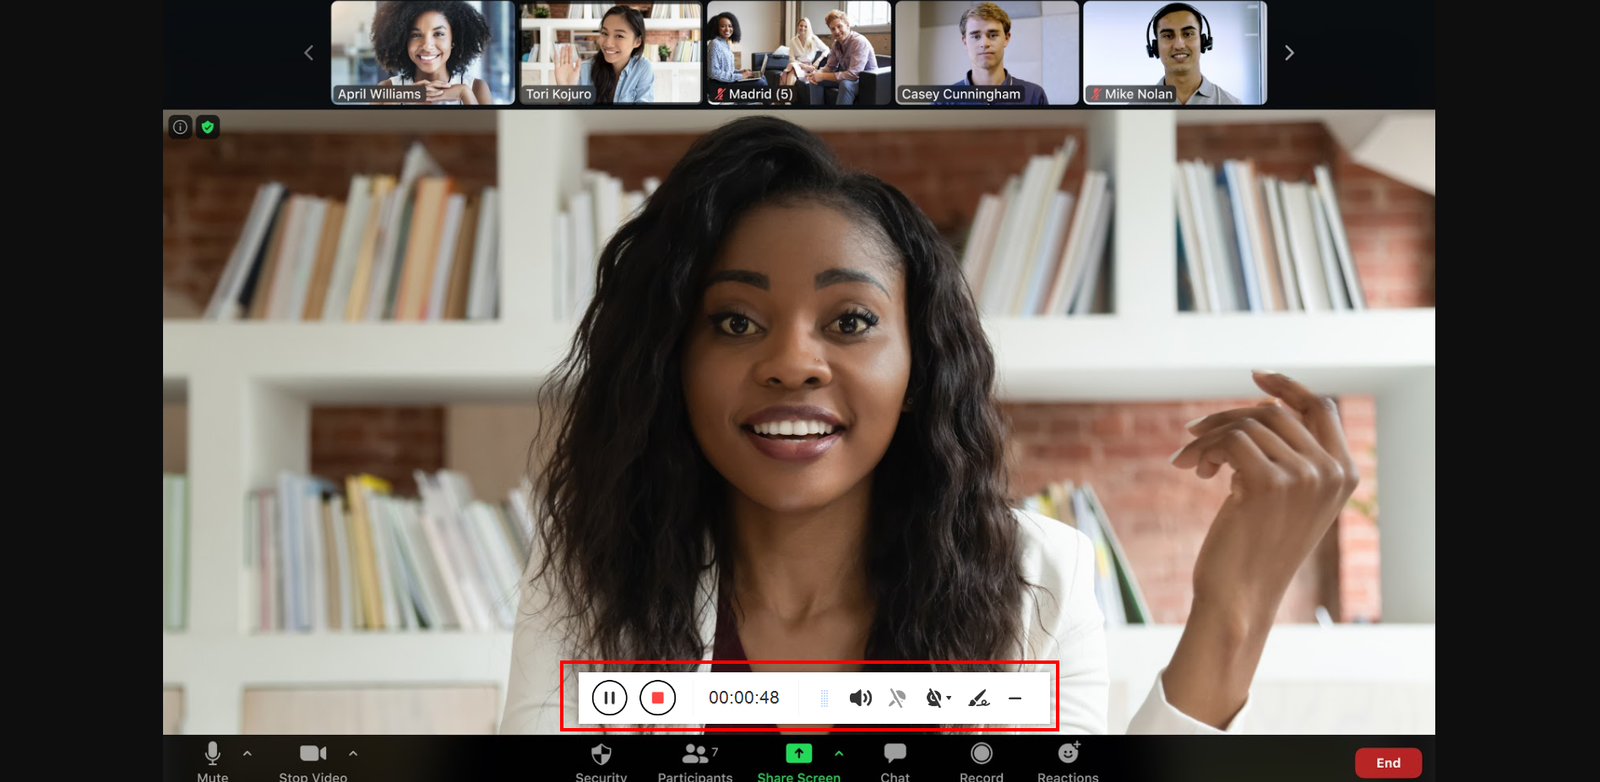
After the area of recording is selected, a 3-second countdown will appear, indicating that the recording will start. The recording toolbar will appear once it starts. You can pause or stop the recording to your liking. Clicking the “Pencil” icon to annotate is also available.
Note: You can hide/show the recording toolbar when recording, just press Ctrl+Alt+E from your keyboard.
Step 4: Finished Recording
Click on the “Stop” button from the toolbar to end the recording. Recordings will automatically be added to your recording list. Right-click your recorded file to see more options like Play, Edit, Upload, etc.

Conclusion
Whether it be a pandemic, emergency, or for convenience’s sake, it is undeniable that Zoom has become a part of our daily lives. Recording your zoom meetings is quite essential for taking note of discussions, agreements, announcements, etc. While you can listen and jot down, it isn’t a sure way to keep a record and remember what exactly happens in a meeting. One cannot always depend on human memory for it isn’t all too powerful. Screen recording software is a way of combating this for your business and meetings.
With the recommended screen recorders above: ZEUS RECORD and VideoPower GREEN, you have nothing to worry about if your host disables the recording of zoom meeting sessions anymore! These are not just the best tools to record Zoom meetings but also powerful tools for you and your business.