Learn How to Record Slack Meetings & Video Conferencing
 One of the most popular and highly recommended virtual meeting platforms available online is Slack. It’s the best platform that brings teams together. Most businesses are using this for easy collaboration, file sharing, meetings, and conferencing.
When having a meeting, it is essential to keep a record of the discussions, conclusions, and agreements made during the meeting. The oldest way we do it is through writing notes that take minutes. However, through taking down notes, it is not guaranteed that all important details will be included. Hence, you couldn’t concentrate on listening and participating. Another thing is, the members that have missed the meeting, might misunderstand what was written down. The most conventional and accurate way to resolve this is to record Slack meetings and video conferencing through a screen recorder.
So, how to record Slack meetings? This article brings you the best screen recorder software that you can use to record Slack meetings and video conferencing. Let’s go through it and learn how to use them.
Part1: Slack Meeting Recording Software
1.1. Video Downloader & Screen Recorder – ZEUS RECORD
The most recommended screen recorder that you can use for recording Slack meetings and video conferencing is ZEUS RECORD. It is well supported on PC (Windows 11 / 10 / 8.1 / 8 / 7). Its screen recording function offers flexible recording modes that allow users to easily select the recording area by Region, Fullscreen, Around Mouse, or with Web Camera. It can also record Audio-only and save to different audio formats such as MP3, WAV, FLAC, etc. You can also add customizations while recording through its real-time annotation function.
What makes it stand out is its capability to capture video and audio without losing quality. What you see is what you will get. Moreover, with ZEUS you can start with a much lower price and can easily add more functions that you like such as video and audio downloader, video editor, screen capture, music downloader, and others.

Try ZEUS now by downloading the software below!
1.2. Screen Recorder – VideoPower GREEN
When it comes to screen recording and recording Slack meetings, VideoPower GREEN couldn’t be left behind. It’s one of the most competitive screen recorders with a straightforward software interface that has many add-ons functionalities. This is perfect for non-technical users because of its user-friendly interface. It offers many options for selecting recording areas such as By Region, Fullscreen, and Around Mouse. It is also capable of Picture in Picture (PIP) recording by enabling a web camera when recording. Setting the recording to Audio-only is also possible if you want to record only the audio.
VideoPower GREEN has a lifetime license with many useful features added such as Screen capture and Record Scheduling. It also has a real-time annotation function that allows users to add texts, shapes, colors, etc. while recording. This software is supported on PC (Windows 11 / 10 / 8.1 / 8 / 7).

Try VideoPower GREEN now by downloading the software below!
Part2: How to Record Slack Meetings
Method 1: How to Record Slack Meetings and Video Conferences using ZEUS RECORD
Step 1: Download and Install ZEUS RECORD
Download the ZEUS RECORD latest version and install it afterward. You can also refer to the ZEUS manual for detailed information.
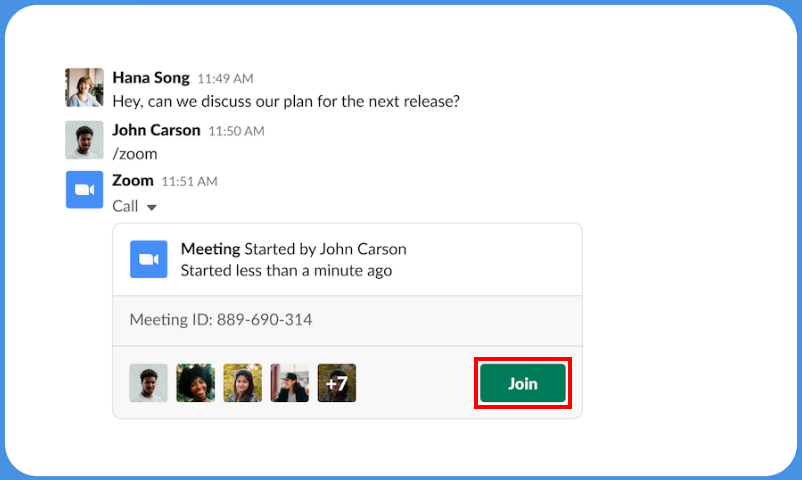
Step 2: Join Slack Meeting
Before you start the recording, go to your Slack Channel and join the meeting.
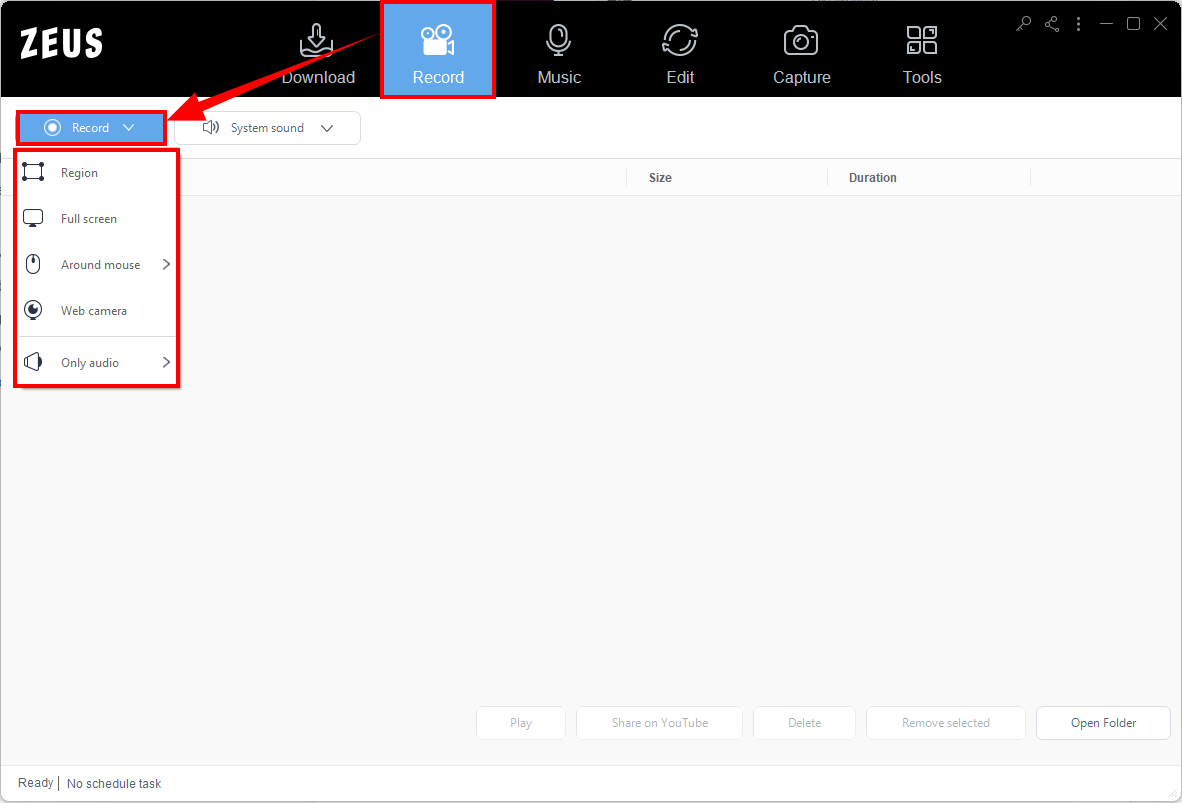
Step 3: Select Record Area
Launch ZEUS RECORD software and open the “Record” function screen. Then click the “Record” button and select your preferred recording mode from the dropdown list such as Region, Fullscreen, Around mouse, etc.
For this example, we will select the recording area using Region recording mode.
After selecting the “Region” as record mode, select the area that you want to include in the recording.

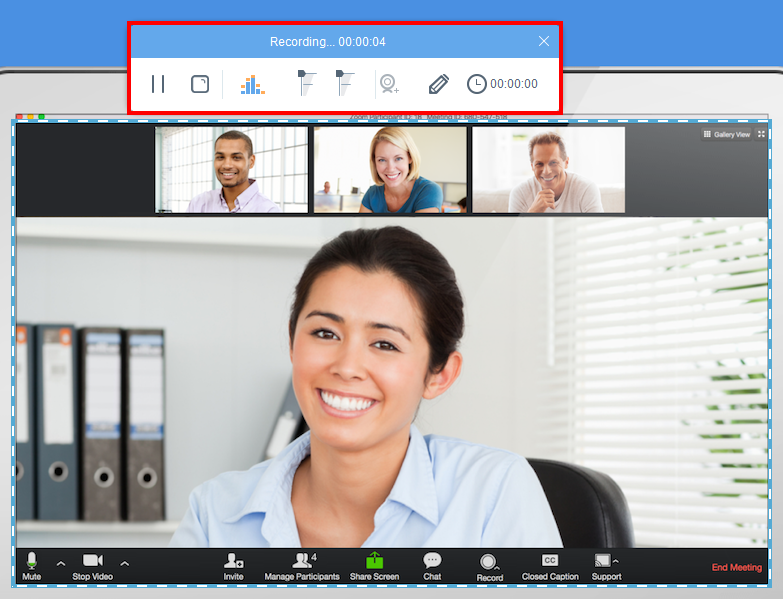
Step 4: Start Recording
After an area is selected, a countdown will automatically pop up indicating that the recording will start when reaches 0. When the recording started, a control toolbar will show where you can Pause or Stop the recording. You can also click the pencil icon to annotate.
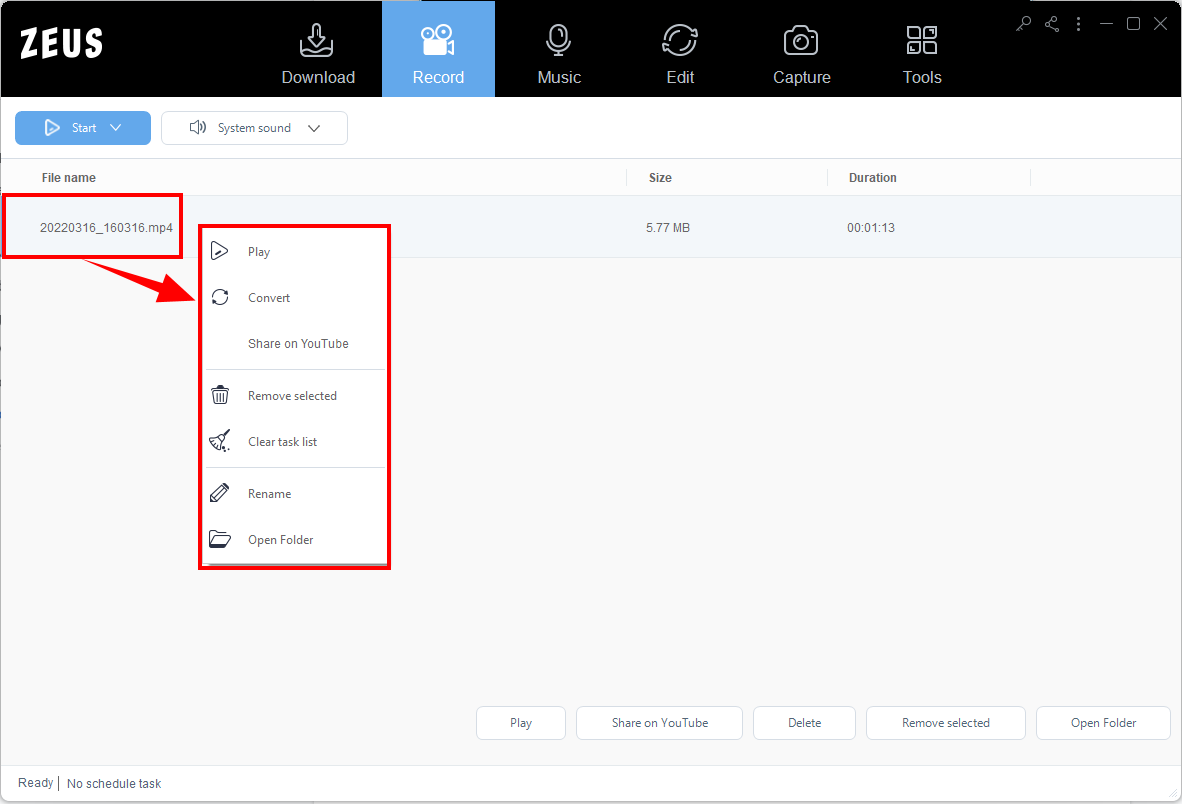
Step 5: Finished Recording
Once you clicked the “Stop” button to end the recording, the recorded file will be automatically added to your recording list. Right-click the recorded file to see more options to manage the file like Play, Convert, Share on YouTube, Rename, etc.
Method 2: How to Record Slack Meetings and Video Conferences using VideoPower GREEN
Step 1: Download and Install VideoPower GREEN
To get started, download the VideoPower GREEN and install it afterward. You may also refer to the VideoPower GREEN manual for detailed guidance.
Step 2: Select Recording Audio Input
After you joined the Slack meeting and conference, launch the VideoPower GREEN and click the “Audio input” menu. You can then choose your preferred source to System Sound, Microphone, both System sound and Microphone, or None.
For Slack meetings, it is recommended to select System sound and Microphone to capture the audio from the computer and your microphone.

Step 3: Select Recording Area
Click the “Record” menu and select your preferred recording modes to select the area. You can choose from Region, Fullscreen, Audio, Web Camera, and Around Mouse.
In this example, we will choose the “Region” recording mode.

Then select the area you want to include in your recording or fill in the customized width and height from the toolbar. Click “OK” once done.

Step 4: Start Recording
After the recording area is selected, a 3-second countdown will pop up indicating that the recording will start. Once started, the recording toolbar will appear where you can Pause or Stop the recording if necessary. You can click the “Pencil” icon to annotate.

Step 5: Finished Recording
Click the “Stop” button from the toolbar to end the recording. All recordings will be automatically added to your record list. Right-click the recorded file to see more options like Play, Edit, Upload, etc.
Conclusion
Having great screen recording software for your business and Slack meetings is very helpful to lessen the workload without sacrificing the quality of work. Stop being hard on yourself for not being able to participate in a meeting because of writing minutes and let the screen recorder software do the work for you.
With the recommended 2 screen recorders above: ZEUS RECORD and VideoPower GREEN, you can now easily record Slack meetings to playback and review the discussions on your Slack meetings any time and any day.