This article will show you how to use ZEUS MUSIC‘s audio editing tools.
You can use this tool to add audio, insert silence, mix audio, cut audio, and more.
You can try ZEUS MUSIC by clicking the button below.
Step 1: Start the audio editing tool
Launch ZEUS, open the Tools tab and click “Edit Music”.

Step 2: Audio editing
Reading audio files. Click “Load an audio file” to load the music file you want to edit.

Cut music (remove unnecessary parts)
There are two ways to cut. There are two methods, one is to cut the area outside the selected area, and the other is to cut the selected area.
Step 3: Cut outside the selected range
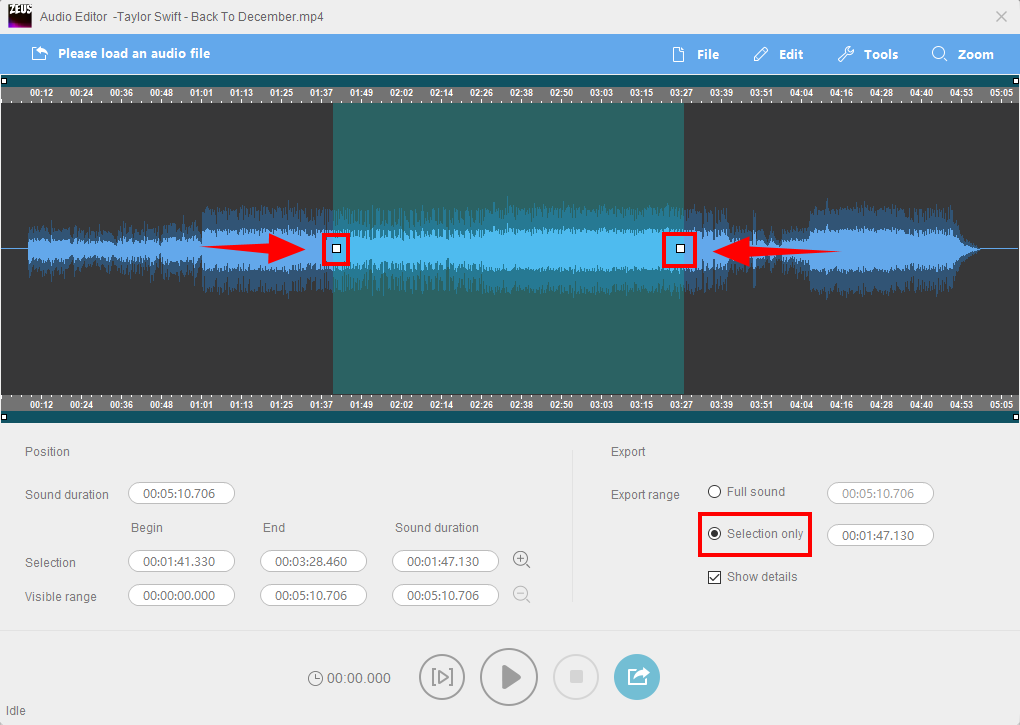
This method saves the selected range. The audio in the unselected range will be cut.
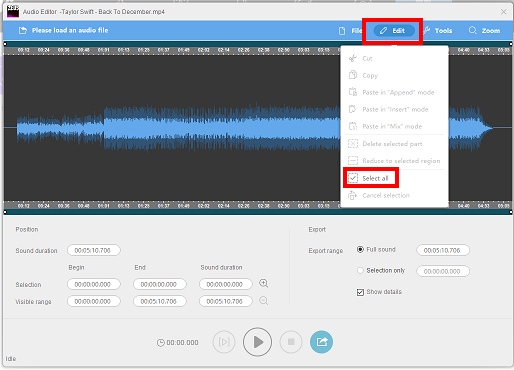
Click “Edit” then, “Select All”.
Cut editing is not possible with music added. Before cutting, click “Edit” ⇒ “Select All”.
Click “Selection Only” and drag the white blocks on both sides of the waveform to select the part you want to save.
When you have finished editing the cut music, save the edited content.
Step 4: Cut the selected range
It is also possible to cut the selected range.
1) Click “Edit” ⇒ “Select All”
2) Range selection
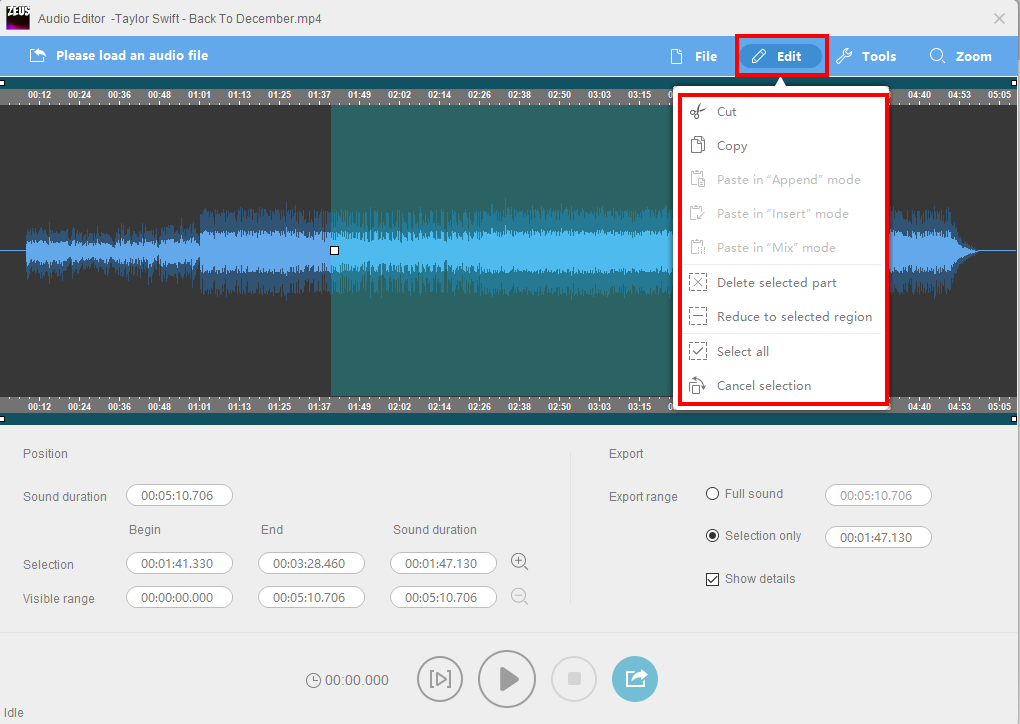
3) Click “Edit” ⇒ “Cut”
The selected range is cut.
When you have finished editing the cut, proceed to “Step 3” and save the edited content. Other audio editing Other music editing can be made using the options under the “Tools” button.

Other Tools:
a. Insert sound file
Insert a blank area in the music file.
Click the part you want to insert using your mouse, and the following yellow line will be displayed. After that, set the number of seconds on the Silence Insertion operation screen by selecting “Tools” ⇒ “Insert Sound File” and click OK.
Silence is inserted after the yellow line.
b. Append audio file
Add a new audio file to the end of the loaded audio file.
c. Append audio file
Insert a new audio file in the middle of the loaded audio file. Click the part that you want to insert using your mouse and a yellow line will be displayed. After that, add a new audio file by selecting “Tools” ⇒ “Insert Audio File”. The newly inserted audio file will be added after the yellow line.
d. Mix audio files
Mix a new audio file in the middle of the loaded audio file. Click the area you want to mix using your mouse and a yellow line will appear. After that, add a new audio file by selecting “Tools” ⇒ “Mix Audio File”. The newly added audio file is added after the yellow line and mixed with the original audio file. “Overwrite with audio file” The original audio file is deleted and the newly added audio file is loaded.
Step 5: Save the edited audio file
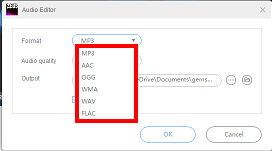
When you have finished editing the audio, click the Save button at the bottom of the screen. The save setting screen is displayed.
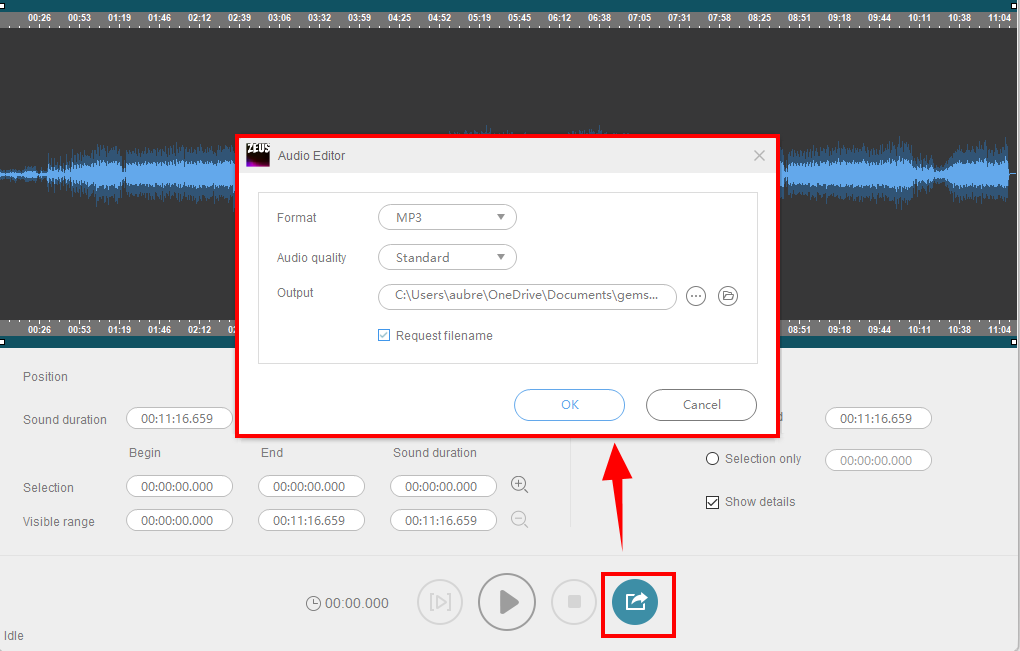
There are other formats available that you can use such as MP3, AAC, OGG, WMA, WAV, FLAC. After setting the format, sound quality, output destination, etc., click “OK” to start saving the audio.
That’s all for the steps on how to use the audio editing tools.
Leave A Comment