This page will show you how to create subtitle file and add it to a video using ZEUS EDIT.
With ZEUS EDIT, you can easily add the created subtitle file to your video. It is also composed of other editing functions such as video enhancements, trimming, cropping, etc.
If you want to convert to another file format after editing, you can also use ZEUS EDIT or ZEUS BUNDLE.
You can try the video & music conversion/editing software – ZEUS EDIT, just click the button below.
Part 1: Create and Edit a Subtitle File
Step 1: Download sample file
This procedure creates an SRT format subtitle file.
First, you can download the sample subtitle file from the following:
Sample subtitle file (SRT format)
If you cannot save it successfully, just copy all content and paste it to notepad. Then save it with .srt file extension. Example: subtitle.srt
Step 2: Open the sample file with Notepad
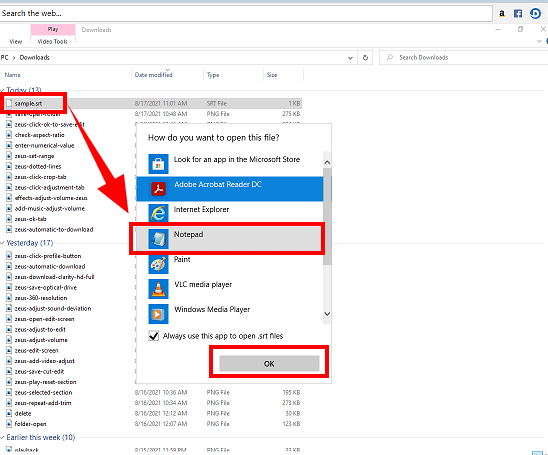
Right-click the downloaded file and select “Open with” from the menu to open, select
“Notepad” on the application selection screen, and click “OK”.
Step 3: Edit file through Notepad
The sample file contains several subtitle samples.
The subtitle file consists of:
-Subtitle number
-Display start time and Display end time
-Subtitle content
Edit only the number, start/end time, and subtitle content without changing the format.

For the above image, an example of editing is shown on the right side.
In this example:
1) 5 seconds to 15 seconds “(August 10, 2018 noon)” is displayed
2) 22.5 seconds to 28 seconds “Meet at Tokyo Station” is displayed
3) 32 seconds to 37 seconds “Some people are late” is displayed
The number can be increased or decreased as desired. If 50 are required, describe from 1 to 50.
When you’re done editing, click File, then select Save or Save as from the Notepad’s top menu.
The saved file is read and used by the subtitle function of each product.
Part 2: Add Subtitle to the Video using ZEUS Edit
Step 1: Add video file
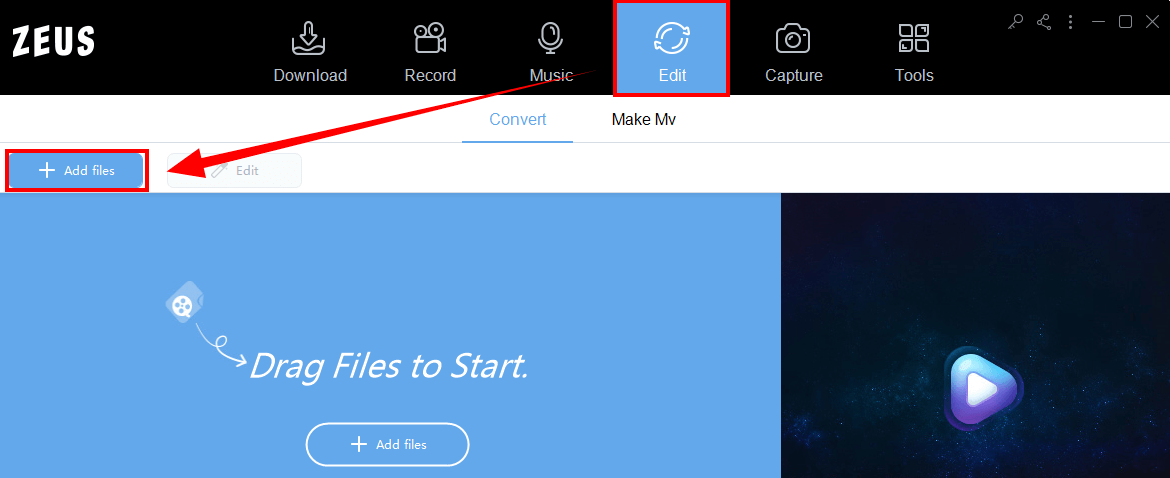
Run ZEUS and click the “Add File” button in the “Edit” tab to add a video file.
Step 2: Add the subtitle file
Click the “Edit” button of the added video file.
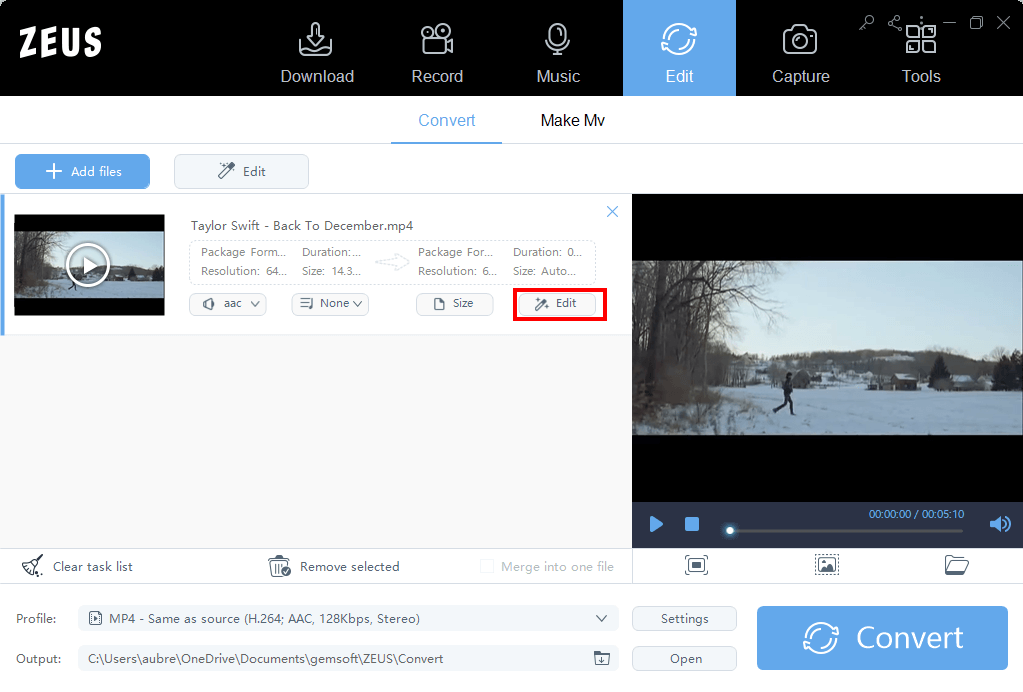
Click the “Subtitle”

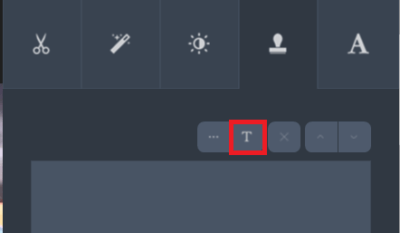
Click the highlighted button below to add the subtitle file created in step 1.
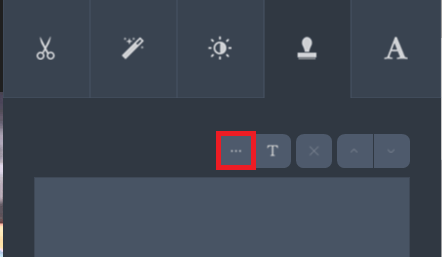
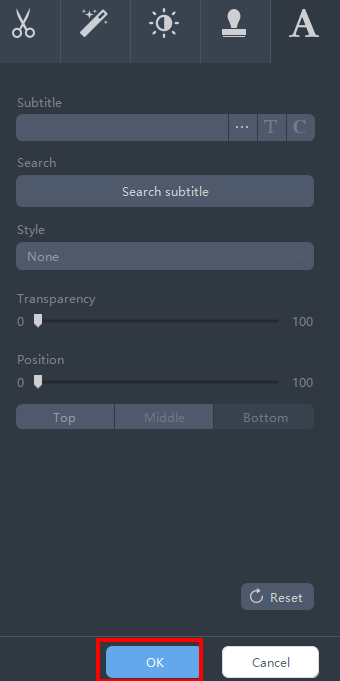
You can change the font, font size, color, etc. by clicking the “T” button.
Click OK after making changes.
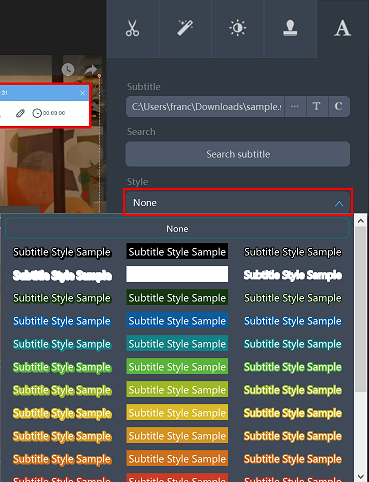
If you click “Style”, you can select a style from the templates provided.
Move the “Transparency” bar to the right to make the subtitles translucent.
If it is 100, it will be completely transparent.

The “Position” bar allows you to adjust the vertical position of the subtitles.

The subtitle position can also be changed using the “Top”, “Middle”, and “Bottom” buttons.

After adding the subtitles, you check it through preview playback.
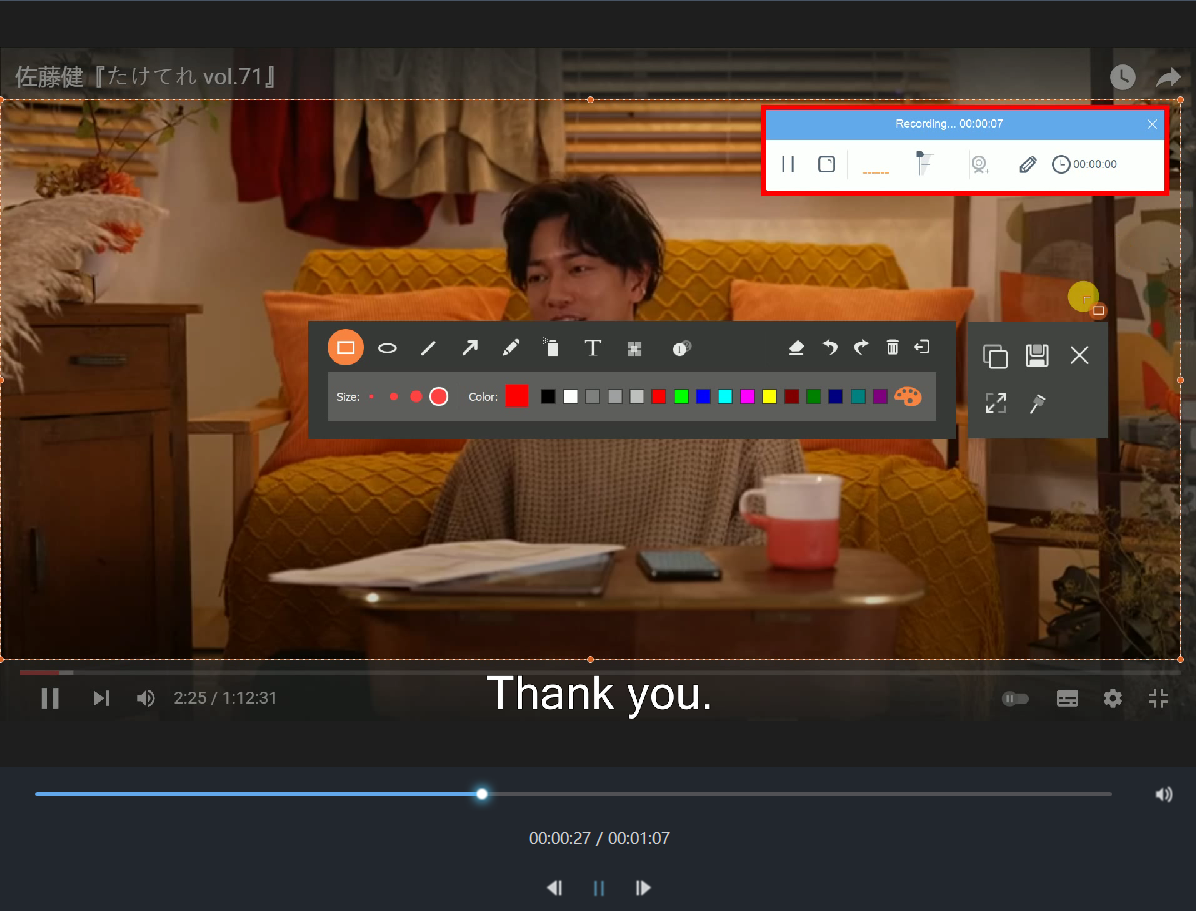
Depending on your settings, it may take some time for the subtitles to be reflected in the preview.
If it is not reflected, please wait for a while. After adding the subtitle file, click “OK”.
Step 3: Save video with subtitles
Check the output folder.
You can check the output folder in the specified folder path under the “Output” field.

If you want to change the output folder, click the highlighted button below.

You can save the created video by clicking the “Convert” button at the bottom right of the screen.

After saving, you can check if the video with subtitles is saved in the output folder.
That’s all on how to create subtitle file and add it to video using ZEUS EDIT.
Leave A Comment